Advertisement
Quick Links
Advertisement

Related Manuals for Arregui AWA


Summary of Contents for Arregui AWA
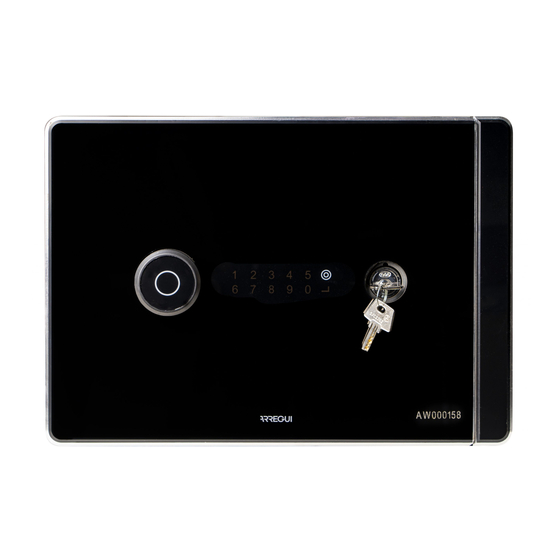
- Page 1 STICK THE SERIAL NO. Smart safe with active security...
-
Page 2: General Instructions
ADMINISTRATOR: Person who owns the administrator code. GENERAL INSTRUCTIONS USER CODE: Code that only allows the opening of the safe. USER: Person who owns the user code. It is important to read these instructions carefully before using the AWA safe for the rst time, and to keep them safe for any future queries. • THE BATTERY: - The AWA safe has a self-sufficient rechargeable battery that will remain charged for approximately 2 months. - The battery should be recharged as soon as it is installed (4 hours for a full charge) and then charged again whenever it runs out, using the USB cable that is provided with the safe. - Page 3 (iOS or Android). ARREGUI b) Activate Bluetooth on your mobile device. f) Key in the new opening code (6 or 7 digits) and confirm it. This code will be the administrator opening code c) Open the mobile app and press the “AWA” button. The first time you download the app you will be shown a quick guide with the necessary steps for setting up your safe (you can access this guide at any point from the login menu by pressing the “?” icon in the upper right corner). NOTE: if there is an unexpected error during the process and the application closes after step e), bear in mind that the administrator code for future use will be the default code (1234567).
- Page 4 If the process has been completed correctly, the knob Administrator will be able to recognise. will light up in green and the settings will be saved in the safe’s memory. They can then be changed as many times as you like once this guided registration process has been completed. h) After configuring the WiFi, you should create and sign in to your ARREGUI AWA account, where you will be notified via PUSH messages about the various alerts that the safe may experience (verified for devices with an Android OS). NOTE: When creating a new ARREGUI AWA account, you will need to accept the data protection policy detailed at the bottom of the registration. The verification code requested for this new registration will be sent to the user by email to the account saved in the previous step, prior to said screen being shown. If the process has been completed correctly, the knob will light up in green and the settings will be saved in the safe’s memory. 1.2. OPENING AND CLOSING THE SAFE Open the mobile app and press the “AWA” button • With the app open and standing close to the safe, press and...
- Page 5 • Enter the user code you’d like to use to operate the safe. 1.3. CONFIGURING THE SYSTEM (ONLY AVAILABLE FOR THE ADMINISTRATOR) The settings described below can only be accessed once the user has entered the Administrator code on the main menu. The Administrator will also be able to find a guide for commonly-used functions in the upper right corner, which they can check whenever they need to: If the code is authorised, the knob will light up in green and the main menu will appear in the mobile app so you can operate the safe. If the user is not authorised, the knob will light up in red and you will see an error message in the app. • Press the central open button on the main menu, then the knob will light up in green and beep for 2 seconds, and during this time you will be able to open the safe by manually turning the knob (90 degrees clockwise).
- Page 6 IMPORTANT: We would recommend installing the safe within c. Creating users a maximum coverage radius of 10 metres from the WiFi router, Press the “Users” button on the main menu to access the user list. with no obstacles in the way. You can create up to a maximum of 10 users (including the Bear in mind that any obstacle between the safe and the router Administrator) by pressing the “New User” icon in the lower (walls, doors, any kind of construction material) could interfere part of the screen. You then set up a username, a password with the WiFi signal, which is why it is a good idea to install and, if you choose, a timetable for when each user can access a WiFi repeater near the safe in order to boost the coverage the safe.
- Page 7 Once you’ve finished configuring the options, press the “SAVE” f. Setting an opening delay button. The knob will light up in green to confirm that the If you choose, you can press the “System options” button to settings have been saved correctly. set a delay time for the safe to open, for both users and the Administrator. To do this, press the digit that appears next to said option and enter the number of minutes that you would like to safe to wait Username for before opening (“0” means that there will be no opening Password delay). Activate access control timetable Daily control Time control NOTE: The password must be 6 or 7 digits long and you may...
- Page 8 • Setting the duress code, (from 0 to 9). This code should be used followed by the user or the Adminis- trator’ s own code only when the safe is being opened under duress, whether it be by keypad or by smartphone. The system will then send a message to the server, which in turn will notify all the users on the email list. If the duress code has been used, the Administrator will receive a PUSH notification on any mobile devices that have an active administrator account (verified on devices with an Android OS) to alert them of the situation, provided that they don’t have the app in the foreground.
-
Page 9: Remote Management
• Delete a previously configured user remotely 1.4. REMOTE MANAGEMENT If the user has an internet connection and after having validated the application with their ARREGUI AWA account, from the start menu they can perform the following actions by clicking on the “REMOTE MANAGEMENT” button.: a. Delete any safe boxes they no longer wish to maintain: to do so, press the icon to the right of the appropriate box on the list. Delete safe b. By selecting the safe box the user wishes to perform an action for, they can: • Send it a command to open so another person can open the... - Page 10 5. USING THE EXTERNAL POWER SUPPLY NOTA: if you enter the wrong code, the knob will light up in red and emit 3 short beeps. If the rechargeable battery has run out of power, which you will know if the knob does not turn on within 20 seconds after being pushed, and you do not have the emergency key, you can power the safe using the USB cable provided by Arregui. 3. CHANGING THE CODES All you need to do is plug in the USB cable to the outlet on the lower part of the knob, and connect the other end of the cable 3.1. CHANGING THE ADMINISTRATOR CODE to a power supply (a laptop or another similar device, a plug connected to the power supply with a USB adaptor, etc.). The default Administrator code for the safe will be 1234567. Change via APP: To change the administrator code, follow the procedure des- cribed in point 1.3.d.
-
Page 11: Warranty Certificate
WARRANTY CERTIFICATE The safe is guaranteed for a period of 24 months from the date of purchase, as established in the Law 23/2003 of 10 July, for Warranties in the Sale of Consumer Goods. In accordance with the law, ABSS covers any non-conformities that occur within a period of two years from delivery, resulting from a manufacturing defect that prevents the safe from working properly. After the first 12 months, the purchaser will need to demonstrate that the non-conformity already existed when they first received the safe. The warranty does not cover any faults caused by misuse or improper installation, excessive moisture or salinity, water or cement leaks, violence, manipulation of mechanisms by unauthorised people, disasters, impacts or falls. If a part is repaired or replaced due to a fault, said part will be covered by an additional 6-month warranty. ABSS will cover the non-conformities that led to said repair, if the same faults that caused the initial repair happen again. IDENTIFICATION DETAILS Name of distributor ..............................Date of sale ................................Name of purchaser ..............................Address of purchaser .............................. - Page 12 Arregui Pol. Industrial Ubegun. 3B. 20809 Aia-Orio. Gipuzkoa (SPAIN) arregui@arregui.es www.arregui.es...
Need help?
Do you have a question about the AWA and is the answer not in the manual?
Questions and answers