Table of Contents
Advertisement
Quick Links
Advertisement
Table of Contents

Summary of Contents for Advance acoustic AXIS AX
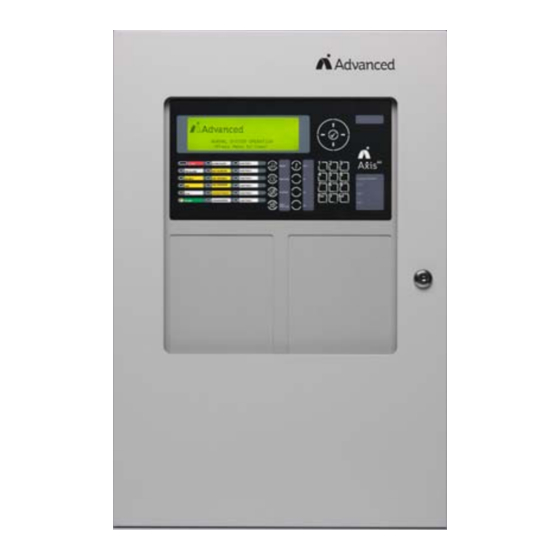
- Page 1 Front Panel Programming Manual www.advancedco.com...
-
Page 2: Table Of Contents
Table of Contents Page INTRODUCTION / OVERVIEW ..........................4 ......................4 IMITATIONS OF LARM YSTEMS ........................4 ENERAL NSTALLATION OTES PROGRAMMING ..............................5 ...............................5 NTRODUCTION 2.1.1 Access Levels ............................5 ...............................6 EMORY ............................7 TARTING OINT 2.3.1 Program Menu Screens ...........................8 2.3.2 Navigating Through Menus ........................9 2.3.3 Changing Text Descriptions ........................9 2.3.4... - Page 3 2.4.12.2 Cause ................................29 2.4.12.3 Style ................................30 2.4.12.3.1 Delay ..............................30 2.4.12.3.2 Mode ..............................30 2.4.12.3.3 Wait ................................ 31 2.4.12.4 Copying Output Settings to Multiple Zones ....................31 2.4.13 Positive Alarm Sequence Delays ...................... 31 APPENDICES ..............................32 1 – F ...................
-
Page 4: Introduction / Overview
1 Introduction / Overview This manual covers the front panel programming of the Axis Intelligent Fire Alarm Control Panels. 1.1 Limitations of Fire Alarm Systems An automatic fire alarm system can provide an Smoke detectors shall be installed in the same early warning and notification of the development room(s) as the FACP, any equipment used for of a fire. -
Page 5: Programming
2 Programming Where you see this symbol, there are Where you see this symbol additional enhanced features that can take note of any special UL only be configured using the PC-NeT, 864 9 Edition precautions. ONLY Field Configuration Program. NOTICE TO USERS, INSTALLERS, AUTHORITIES HAVING JURISDICTION AND OTHER INVOLVED PARTIES: This product incorporates field programmable software. -
Page 6: Memory Lock
2.2 Memory Lock The configuration memory, which contains all programmed entries, may be protected against inadvertent change by means of a memory lock. The memory lock is J1 located to the far left of the main “Base Card” PCB. Before making any programming/configuration data changes, ensure the jumper is in the OPEN (unlocked) position. -
Page 7: Starting Point
2.3 Starting Point Upon power up, the panel display will show: 2:30 PM DEC 22 2010 NORMAL PANEL OPERATION (Press Menu to View) To access programming press the MENU button on the keypad. The following will be displayed: ✔ button or press the number 6 Scroll to the TOOLS heading and press the on the keypad. -
Page 8: Program Menu Screens
There are three programming menu screens to choose from with up to 13 different sub-menus. The 13 sub-menus are as follows: Identify number of SLC/LOOPS installed. Perform AUTO-LEARN, Alter/enter device text, and LOOPS/SLC: more. In addition, opens several sub-menus. Lists all zones in use by the system and allows text alterations. ZONES: Exits program mode and returns to normal display/operation. -
Page 9: Navigating Through Menus
2.3.2 Navigating Through Menus When a Program Menu is displayed, use the buttons to highlight the required menu option and then press the ✔ button to select that option. More Program Menu options are available by selecting the “Next Menu” button. Press the ‘Esc’... - Page 10 The display will then show a list of programming options for the specific loop selected, as follows: Highlight the VIEW/EDIT programming option and then press the ✔ button or press the number 1 on the keypad. The display will be as follows: Press the ...
-
Page 11: Numeric Data Entry
After completing all addressable point device text descriptions, press the ‘Esc’ button to return to the previous display. The following table shows the numbers, characters and symbols assigned to each button on the keypad. Button Press Press Press Press Press Further Characters Ä, Æ, Å, À, Á, Â, Ã, Ç... - Page 12 PROGRAM Menu Functions The following table gives a list of the PROGRAM Menu Functions, the sub-functions available within each main function and a brief description for each function. Step No./Main Sub Menus Comments Menu Option LOOPS/SLC View/Edit View, test and configure the SLC loop devices Auto Learn Learn the devices present on all SLC loops Meter...
-
Page 13: Loops/Slc
2.4.1 Loops/SLC Upon selecting the LOOPS/SLC option, the display will prompt for selection of the loop to be viewed / programmed. Note: The list of loops available will be adjusted automatically to show only those loops that have a loop driver installed. -
Page 14: Value Parameter
2.4.1.1.4 Value Parameter This parameter shows the analog value returned by the device. The number displayed will vary according to the type of device installed. An ‘H’ (High) and ‘L’ (Low) is shown for Switch (logic) inputs. The current sensitivity mode setting for intelligent smoke detectors is shown (a value based on sensitivity programming ranges 1 through 5). -
Page 15: Sensitivity Parameter
Action Description Alarm Signal An alarm condition will be generated whenever the input is active. Supervisory A supervisory condition will be generated whenever the input is active. Trouble Signal A trouble condition will be generated whenever the input is active. Pre-Alarm A pre-alarm condition will be generated whenever the input is active. - Page 16 areas). Response mode 3 (default programmed) would be the mid-sensitivity level used for most normal applications. Response mode setting and hysteresis of the individual detectors are stored within the detector’s memory. The storing of this critical information in the detector rather in the fire alarm control panel software allows the detector to maintain its programmed response settings and compensated values even when power is removed from the detector.
- Page 17 2.4.1.1.8.2 Sampling If an intelligent device is in alarm the Axis Intelligent Fire Alarm Control Panel will perform multiple assessments of the alarming device to ensure that the alarm condition from the device is valid. The value of the assessment time can be programmed by the installer during installation.
-
Page 18: O/P Group
For example: The panel supports two independent times for each day of the week during which the SSM mode will be switched on (i.e. during which the Special Sensitivity Mode settings are active). In the above example the SSM will be active between 7:00 PM on Monday and 6:30 AM on Tuesday (an example of use, would be a detector more sensitive during none occupied time periods). -
Page 19: Detector Testing
Highlight any ✔ marked device: View the devices drift, rapidly compensate it or view the EEPROM. Below is an example of viewing drift. Each intelligent smoke detector connected to the specific SLC loop will indicate its drift as it relates to detector compensation, 0 being the cleanest, 100 being dirty. -
Page 20: Loop - Auto Learn
2.4.1.2 Loop – Auto Learn 2.4.1.2.1 Normal Procedure / Auto Learn The panel can automatically learn the presence or absence of devices at all addresses connected to a specific SLC loop (Auto Learn is done on a per loop basis). When the Auto Learn option is selected, the panel starts searching the selected SLC loop for all associated addressable devices. -
Page 21: Procedure If The Panel Finds Devices Added
Press the buttons to highlight the required menu option and then press the ✔ button to confirm. The pop-up window will disappear and the panel will continue with the Auto Learn process. If a single device is deleted and another missing device is subsequently registered, the display will once again show the pop-up window to keep or delete this device. -
Page 22: Loop - Meter
2.4.1.3 Loop – Meter Displays loop output and input voltages and loop loading. It also shows a diagnostic display with automatic scanning of the loop to find devices with minimum and maximum communication pulse heights. 2.4.1.4 Loop – History Displays loop device history; last activated, last tested, last disabled, last enabled and when created/added to the system. -
Page 23: Exit
2.4.3 Exit To exit the programming mode and return the panel to normal operation (User level 1 or 2), select the “Exit” option by selecting “Exit” then press the ✔ button. The display will prompt for your password to confirm exiting of the PROGRAM area, as indicated below: If the password is incorrect or if the password is not entered within 5-seconds, the display will revert to the PROGRAM Level Menu and User level-2 will not be entered. -
Page 24: Passwords
2.4.7 Passwords The panel provides up to 10 User Level-2 passwords and 2 Level-3 passwords. All of the passwords can be field modified/changed. Upon entry to the function, the display shows a list of the passwords. For example: To change a password, use the buttons to highlight the required password and then enter the new password using the number buttons. -
Page 25: Pc Config
2.4.9 PC Config The PC config enables the connection to the PC-NeT configuration tool for programming configuration data from a file on the PC. For further information, refer to the PC-NeT Field Configuration Programming Manual. 2.4.10 Setup The Setup area enables the configuration of panel generic operating parameters. When the option is selected, the display shows a list of the available parameters. -
Page 26: Trace Logging Mode
2.4.10.6 Trace Logging Mode The Trace Logging Mode determines what type of information and to what level the information is stored in the systems event log. There are three options: STANDARD = Normal operating mode: logging alarm, trouble and warning conditions as they occur. STANDARD + = Extended logging version of the standard operating mode where the removal of trouble and warning conditions are also logged. -
Page 27: Dact
2.4.10.9 DACT The DACT option allows selection of no DACT, external DACT, contact-ID DACT or SIA (300) DACT pressing the ✔ button while x is highlighted will scroll between the various DACT options. 2.4.10.10 DACT AC Trouble Delay This option allows the programming of the system trouble contact to be delayed on AC failure for external DACT usage. -
Page 28: Output-Groups
2.4.12 Output-Groups The Output-Groups area is a schedule of actions that will turn on one or more outputs dependent upon a set of input events. The output-groups provides the means to create simple or complex “cause and effect” programming within the panel. -
Page 29: Cause
2.4.12.2 Cause Each Output Group can be programmed to respond in a unique way to events from each individual zone. An input event may be an alarm condition or it may be a trouble, disablement or other condition. A combination of criteria may also be applied to each zone. -
Page 30: Style
If the cause and effects programming group shows SPECIAL this means the group has been created via the PC- NeT configuration tool and cannot be adjusted/changed via front panel programming. Multiple Detector Operation. The operation of two detectors within the same zone being required for control operation. -
Page 31: Wait
2.4.12.3.3 Wait The Wait field is the time from first activation of the output to the next operational condition (mode) of the output. For example, the output could initially be delayed for 20 seconds and turn on in a pulsing mode. After a wait of a further 30 seconds it can be programmed to turn on differently such as steady ON. -
Page 32: Appendices
Appendices 3.1 Appendix 1 – Forgotten Level 3 Password Should the PROGRAM Level 3 Password be forgotten, contact AFSI to obtain a temporary password number to regain access to the panel programming functions. Technical support will require a decryption key displayed by the panel. To obtain this number, attempt to gain access to the Programming Functions entering “1”... - Page 33 www.advancedco.com www.advancedco.com...
- Page 34 Doc Number: 682-002 AFS Revision: First Issued: 2013-mm-dd 100 South Street, Hopkinton, Massachusetts 01748 Tel: (508) 435-9995 Fax: (508) 435-9990 Email: usa@advancedco.com Web: www.advancedco.com www.advancedco.com...
Need help?
Do you have a question about the AXIS AX and is the answer not in the manual?
Questions and answers