
Summary of Contents for Tajfun RCA 480 JOY
- Page 1 OPERATING INSTRUCTIONS FIREWOOD PROCESSOR RCA 480 JOY RCA 480 JOY PLUS 09/2015-ENG Ver.: 2.2 Please, read these Operating Instructions carefully before installing and using this machine!
- Page 2 MANUFACTURER’S ADDRESS Tajfun Planina d.o.o. Planina pri Sevnici 41a, 3225 Planina pri Sevnici, Slovenia T: +386 (0)3 746 44 00, F: +386 (0)3 579 10 16 E-mail: export@tajfun.com W: www.tajfun.com...
-
Page 3: Table Of Contents
6.3.1. Adjusting the log cutting length 6.3.2. Removing sawdust 6.4. Splitting 6.4.1. Adjusting the height of the splitting wedge and replacing the splitting wedge (RCA 480 JOY) 6.4.2. Proper use of splitting wedge 6.4.3. Machine cover with a safety switch... - Page 4 7. MAINTENANCE AND SERVICE 7.1. Maintenance plan 7.2. Troubleshooting 7.3. Cutting chain replacement 7.4. Tensioning a cutting chain 7.5. Angles used for sharpening the cutting chain 7.6. POWER MATE Sprocket 7.7. Changing the hydraulic system oil 7.8. Replacing the oil filter cartridge 7.9.
-
Page 5: Introduction
1. INTRODUCTION UVOD Dear Customer, By purchasing our firewood processor you obtained a piece of equipment that will provide you with great assistance at your work. To make machine operation as safe and as pleasant as possible, please carefully read these operating instructions and follow the safety and maintenance directives. We would like to thank you for your trust and we wish you to be satisfied with your work. -
Page 6: Safety Instructions
FIREWOOD PROCESSOR • The manufacturer, Tajfun Planina d.o.o., provides the declaration of conformity and risk estimation only for the machines operated by a single person that has sufficient overview over the entire surrounding area, and applies to the machine’s entire operating area. -
Page 7: Safety Instructions For The Conveyor
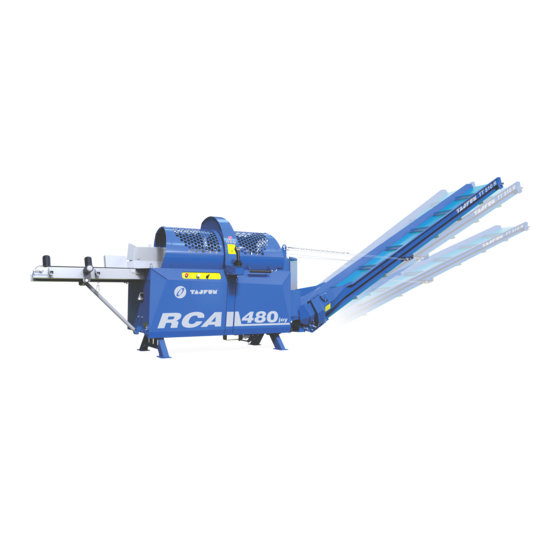
2.7. APPLICATION RCA 480 JOY Firewood Processor is a machine used for processing firewood. The processor is intended for cutting wood logs with a diameter from 5 to 48 cm, which are thereafter split into 4, 6, 8, 12 or 16 firewood logs (with an adjustable length of 25 to 50 cm) using a splitting force of 250 kN. -
Page 8: General
These operating instructions apply to the following models: • RCA 480 JOY RCA 480 JOY PLUS ( See: RCA 480 JOY PLUS attachment to RCA 480 JOY operating instructions ) • 3.2. DESCRIPTION OF THE MACHINE’S FUNCTIONS The (RCA 480 JOY / RCA 480 JOY PLUS) firewood processor is used for processing firewood. -
Page 9: Specifications
3.4. SPECIFICATIONS RCA 480 JOY / RCA 480 JOY PLUS Cutting length 25 - 50 cm (7,9”- 20”) Cutting diameter 5 - 48 cm (2”- 18,9”) Saw bar 24”, b = 0,058” (1,5 mm) Chain 3/8”, 42 cutter teeth, b = 0,058” (1,5 mm) Splitting force 250 kN (≈... -
Page 10: Machine Labels And Their Meaning
3.5. MACHINE LABELS AND THEIR MEANING Control panel (RCA 480 JOY): 1. STOP switch 2. Conveyor belt speed 3. Deck control 4. On / off switch Control handle (joystick) functions. Automatic stopping of the machine after lifting the cover. Machine working area. - Page 11 Wear hearing protectors Wear protection gloves. Wear forestry boots. and safety glasses. Conveyor movement controls scheme. Cutting length setting scheme. Remaining log length on the in-feed conveyor scheme. Hydraulic oil reservoir. Chainsaw lubrication oil reservoir. Direction of the chainsaw drive belt movement.
- Page 12 Proper direction of the PTO shaft rotation. Approved rotational speed range (only for RCA 480 JOY). The valve handle position when operating with or without the deck. For RCA 480 JOY PLUS also see: RCA 480 JOY PLUS attachment to RCA 480 JOY operating instructions.
-
Page 13: Machine Setup
Use a saw to cut both ends of the steel and plastic pipes to the same length. Then file down, clean and grease the edges. Always use a PTO shaft without a clutch. When using our machines, we recommend Tajfun PTO Shafts: Model Dimensions... -
Page 14: Connecting To The Mains Circuit
4.1. CONNECTING TO THE MAINS CIRCUIT Plug the 3 pin plug into the tractor mains or EP unit (optional). Check that the power source provides a constant 12 V voltage and 16 A current; otherwise, this may lead to faulty operation of the electrical system. -
Page 15: Machine Start-Up
• Check the function of the emergency STOP switch (EMERGENCY SHUTDOWN). Follow the RCA 480 operating instructions (See chapter: Operating the RCA 480 JOY). • When the outdoor temperature drops under 0°C leave the machine idling for 5 minutes to allow the hydraulic system to warm-up to reach the operating temperature (the hydraulic pipes feel warm). -
Page 16: Operating The Rca 480 Joy
5.2. OPERATING THE RCA 480 JOY For RCA 480 JOY PLUS see: RCA 480 JOY PLUS attachment to RCA 480 JOY operating instructions. 5.2.1. TURNING ON THE RCA 480 JOY CONTROL On / off Protective cover switch Close the protective cover. Press the On / off switch, located on the control panel, and hold it for approximately 3 seconds. - Page 17 Additional functions: A -> safety STOP switch B -> conveyor belt speed regulator C -> log loader - conveyor chain D -> on / off switch for turning el. system on and off. Additional functions – conveyor: • UP/DOWN -> raising and lowering the conveyor by means of a hydraulic winch;...
-
Page 18: Machine Operation
15° to left or right from the centre position. Before starting the works, place the conveyor into the working position. Placing the conveyor into the working position: The machine must be running (See chapter: Turning on the RCA 480 JOY control); • •... -
Page 19: Log Feeding
Conveyor TT 510 S, TT 404 R, TT 504 R Conveyor TT 404 and TT 504 Valve 6.2. LOG FEEDING Before operation place the in-feed conveyor in a horizontal operating position: • Pull out the safety pin; • Remove the support limiter; Safety pin •... -
Page 20: Sawing
During feeding both trapdoors lift and remain in place until the end of the sawing phase or until the green RESET button is pushed. During the feeding phase the cutting length limiter moves in the correct position. 6.3. SAWING The chainsaw operates only during the sawing cycle, otherwise it is at standstill in the home position. Start the sawing by pulling the main control handle backwards. -
Page 21: Adjusting The Log Cutting Length
For RCA 480 JOY PLUS see also: RCA 480 JOY PLUS attachment to RCA 480 JOY operating instructions. 6.3.2. REMOVING SAWDUST The channel for removing the sawdust is equipped with a hatch, which must be closed if the machine is connected to the suction unit for extracting wood pieces and sawdust (XE 10, XE 10 Hy, XE 11 Hy, etc.). -
Page 22: Splitting
6.4.1. ADJUSTING THE HEIGHT OF THE SPLITTING WEDGE AND REPLACING THE SPLITTING WEDGE (RCA 480 JOY) For RCA 480 JOY PLUS see: RCA 480 JOY PLUS attachment to RCA 480 JOY operating instructions. Lift or lower the splitting wedge by pressing the yellow buttons on the main control handle. -
Page 23: Proper Use Of Splitting Wedge
6.4.2. PROPER USE OF SPLITTING WEDGE To ensure the durability of your splitting wedge, follow these instructions: 1. The splitting wedge is designed exclusively for wood splitting up to the max. diameter specified on your RCA machine. 2. The log in the splitting chute must always be longitudinally directed towards the splitting wedge. This prevents unnecessary overloads and downtime. - Page 24 4. Ensure that the splitting chute and splitting wedge are never obstructed. Always remove any wedged pieces of wood. 5. Adjust the height of the splitting wedge to be slightly less than the mechanism permits. This allows the splitting wedge to still “breathe” during the splitting so as not to burden the mechanism and the lower blades of the wedge.
-
Page 25: Machine Cover With A Safety Switch
6.4.3. MACHINE COVER WITH A SAFETY SWITCH If disturbances occur during splitting, the splitting process must be stopped immediately. The machine cover is connected to the safety switch, which means that all main machine functions are disengaged if the machine cover is lifted: the feeding and the conveyor are stopped, and the splitting cylinder and the saw bar return to the home position. -
Page 26: Cleaning During Operation
6.5. CLEANING DURING OPERATION In certain areas sawdust and wood residues begin to compile during the operation and must regularly be removed: 1 - Wood residues under the machine. If you fail to clean the wood residues, they can clog the area behind the splitting cylinder and prevent the cylinder from returning to the home position. -
Page 27: Maintenance And Service
7. MAINTENANCE AND SERVICE Regular machine maintenance ensures reliable operation and long lifetime of the machine. Any work on the electric circuit can only be performed by a qualified electrician. 7.1. MAINTENANCE PLAN Turn off the machine and disconnect the PTO shaft when performing service or maintenance. WHAT? WHEN? HOW? -
Page 28: Troubleshooting
7.2. TROUBLESHOOTING PROBLEM POSSIBLE CAUSE SOLUTION The power cable is not connected. Connect the cable to the tractor outlet. The power cable is connected; however, Switch on the tractor lights, check the fuses The machine does not react to the main there is no voltage on the socket or the (inside the machine’s and tractor’s distribution control handle or other control handle... - Page 29 PROBLEM POSSIBLE CAUSE SOLUTION Check tractor output voltage. If you power the control mechanism with another power supply by converting 220 V to 12 V, check the power supply output. The current can rise to 16 A. DC The splitting cylinder starts the splitting current from this power supply must be as “linear”...
-
Page 30: Cutting Chain Replacement
7.3. CUTTING CHAIN REPLACEMENT Before replacing the cutting chain disconnect the machine drive! • Disconnect the PTO shaft; • Unscrew the screw and move the saw shield in the forward position; • Loosen the cutting chain tensioning screw; • Unscrew both nuts on the fixing plate until you can move the saw bar away from the tensioner; •... -
Page 31: Tensioning A Cutting Chain
Do not install a new cutting chain on a worn-out sprocket. Replace the sprocket no later than after replacing a worn-out chain for the second time (See chapter: POWER MATE Sprocket). 7.4. TENSIONING A CUTTING CHAIN • Loosen both nuts on the fixing plate; •... -
Page 32: Changing The Hydraulic System Oil
7.7. CHANGING THE HYDRAULIC SYSTEM OIL Important: To prevent pollution dispose of the spent oil in a suitable manner! • Change oil after 5,000 hours of operation or once every two years. • The oil drain plug is located on the bottom side of the reservoir. •... -
Page 33: Lubrication Of The Cutting Chain
7.10. LUBRICATION OF THE CUTTING CHAIN Never operate the machine without lubricating the chain first! Chain lubrication oil reservoir volume: 8 L Approximate oil consumption: 0.6 - 1.0 L/h High-quality chain lubrication oils with viscosity grade of 95 mm²/s at 40 °C are recommended. The flow of the cutting chain lubrication oil can be regulated depending on the oil quality by means of a regulation screw. -
Page 34: Replacing The Cutting Chain Belt
7.11. REPLACING THE CUTTING CHAIN BELT • Disconnect the machine from the drive; • Remove: drive protection, drive cover, hydraulic pipe, 3 spring screws; • Unscrew the lubrication pump; • Loosen the belt tensioner; • Remove the belt from the driven pulley; •... -
Page 35: Belt Tensioning
• Screw the spring screws and apply LOCTITE 222 (or equivalent). Ensure that the distance X is 17 mm. Attention! Do not fully compress the spring, since this prevents the operation of the clutch; • Fasten the hydraulic pipe; • After one hour of test run recheck the belt tension (first disconnect the machine from the drive). -
Page 36: Cleaning And Replacing The Air Filter
7.11.2. CLEANING AND REPLACING THE AIR FILTER FILTER REPLACEMENT • Disconnect the machine from the drive; • Remove the drive protection; • Remove the drive cover, the hydraulic tube, and the spring screws; • Replace the filter with a new one, clean the interior, and reattach the drive cover; •... -
Page 37: Indications Of Improper Use
7.12. INDICATIONS OF IMPROPER USE Some damages that are caused before the end of the service life of machine’s exposed components may indicate overload or improper operation of the machine. Manufacturer’s warranty does not cover these types of damages: • Torn or damaged conveyor or in-feed conveyor belt;... -
Page 38: Loading And Transporting
8. LOADING AND TRANSPORTING 8.1. LOADING WITH A FORKLIFT The loading with a forklift can be carried out from two sides. LONGITUDINALLY:... -
Page 39: Loading With The Help Of Lifting Straps
TRANSVERSELY: 8.2. LOADING WITH THE HELP OF LIFTING STRAPS L = 3 m... -
Page 40: Transporting With A Tractor
F, min [kg] Minimum mass of the front weights F,min [kg] Total mass of the machine attached at the rear (1480 kg - RCA 480 JOY) [kg] Front axle load of an empty tractor [kg] Weight of an empty tractor... - Page 41 EC – DECLARATION OF CONFORMITY Manufacturer: TAJFUN Planina, proizvodnja strojev d.o.o., Planina pri Sevnici 41a, 3225 Planina pri Sevnici declares with full responsibility that the product mentioned hereafter: FIREWOOD PROCESSOR Type: Factory number: RCA 480 JOY 240431 - XXXXX RCA 480 JOY PLUS...
- Page 42 WARRANTY CERTIFICATE THE WARRANTY DOES NOT EXCLUDE THE CUSTOMER’S RIGHTS RESULTING THE MANUFACTURER’S LIABILITY FOR PRODUCT DEFECTS. We hereby warrant as follows: • Faultless operation of the product if used according to the provided operating instructions; • To repair any faults and defects, which arise during the warranty period, within 45 days. If we fail to repair the product within the given period, we will provide a new product upon customer’s request The warranty period is 12 MONTHS from the date of purchase or delivery, which can be observed...
Need help?
Do you have a question about the RCA 480 JOY and is the answer not in the manual?
Questions and answers