Advertisement
Advertisement
Table of Contents

Summary of Contents for Micro VT-04
- Page 1 MICROTESTMACHINES Co. Automated dipper mechanism VT-04 microtm.com...
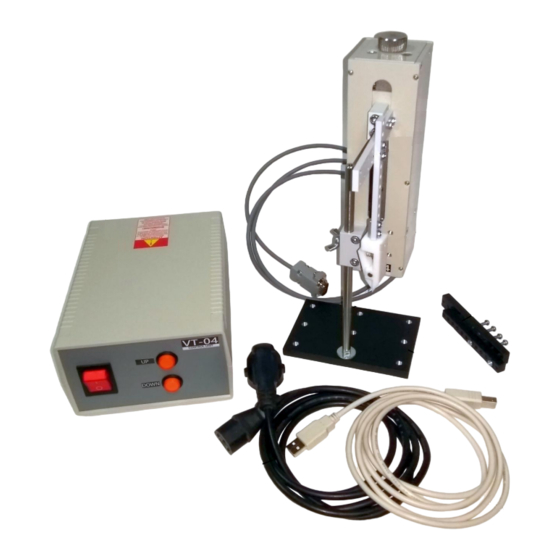
- Page 2 Installation of VT-04 mechanism Complete set of automated dipper mechanism VT-04 includes the dipping unit (with embedded control cable), control electronic unit, set of cables for connecting the electronic unit to electric mains (220-240 V 50 Hz) and to host PC (USB AmBm cable).
- Page 3 Some minor assembling will be necessary after the unpacking the delivery set. 1. Screw vertical rod into a hole on base plate 2. Mount the dipping unit on the vertical rod (stand) and fix its position with a fixing screw in the clamp.
- Page 4 Installation of software to run VT-04 The automated dipper mechanism VT-04 operates under control from host PC. Connection of control electronic unit with host PC is provided via USB-port emulating COM-port. Official site to download latest drivers for USB-to-COM system: https://www.ftdichip.com/FTDrivers.htm.
- Page 5 Control program for VT-04 VT-04 control program panel and its elements are shown in the figure below: COM-port selector Manual control area Programmable motion area Parameters for upward motion Number of remaining cycles Button to connect/ Parameters for disconnect the device...
- Page 6 [Upper point calibration] Upper point calibration should be performed at first run of the device, after positioning of the carriage with knob on the dipper top and after moving the carriage with service buttons on control electronic unit when system does not trace performed steps (distances).
- Page 7 [Programmable operation mode] Automated dipper VT-04 provides possibility for multicycle operation with preset parameters separately for upward and downward movement of the arm (carriage). All necessary parameters should be set in Programmable motion area of the control program panel (see example below).
Need help?
Do you have a question about the VT-04 and is the answer not in the manual?
Questions and answers