Advertisement
Quick Links
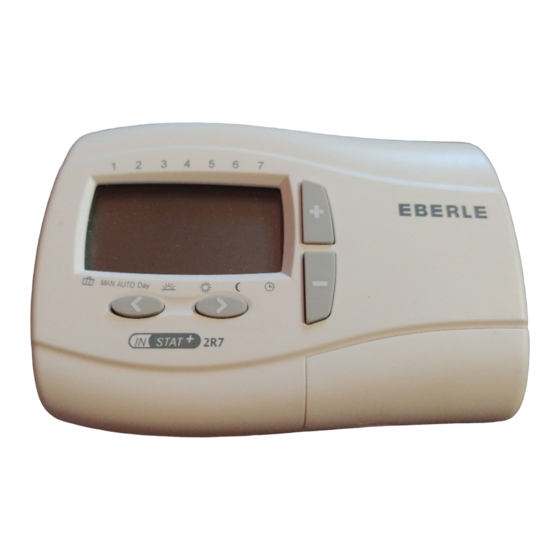
User and installation guide
2R7,
3R7
Room Temperature Controller
I. User Guide
Operation (Overview)
Pointer indicates
Days
the day of the week
Flame icon
3
4
5
(heating on)
1
6
7
2
Battery run low
(see 10.)
Time
Pointer indicates
the current mode
Modes:
automatic, manual,
holiday, day, program
(see 3., 4., 5., 6.)
Moves the pointer
Moves the pointer
Setting the clock
to the left e. g. to
to the right e. g. to
(see 11.)
select the mode
select the mode
Note: Temperature displayed is actual room temperature.
After pressing + or – button the set temperature is displayed. Once adjustment
is complete and after 5 seconds display will show actual room temperature.
Days are shown as 1 to 7 (1= Monday to 7= Sunday)
1. Principle of function
INSTAT + the programmable room thermostat allows you to set time periods (up to 6
per day) and temperatures to suit your own lifestyle. Once fully installed and powered
the device will automatically set the correct time and in auto mode will control your
heating system according to pre-set program 1 (see 7.). The temperature is controlled
by sensing air temperature, switching on the heating when the air temperature falls
below the thermostat setting and switching it off once this set temperature has been
reached.
INSTAT+2R7, -3R7 is a 7 day or 5:2 day Programmable RoomThermostat. Allowing dif-
ferent programs for weekdays and weekends and also every day of the week can be
programmed differently.
NOTE:
The adjusted values (while programming) will be accepted automatically after ~5 sec.
2. How to insert batteries (2 AA 1,5V Alkaline Battery Model only)
4
5
1
2
3
6
7
3. Automatic mode (AUTO)
In this mode, the room temperature is automatically controlled according to the pre-
set program. The pointer indicating the mode is set to AUTO. The number at the bot-
tom right indicates the program event during the day. (Fig. 1)
4. How to change the temperature for a short period of time
(override)
When in AUTO mode, you can override the existing temperature setting for a short
period of time.
Press the + or – buttons to change the temperature setting.
While in temperature override the pointer indicates both AUTO and MAN (Fig. 2).
When the next programmed time/temperature event is reached, the device will revert
to the AUTO mode.
5. How to set a constant room temperature (manual operation)
In this mode, a constant temperature can be set, and the pre-set program is ignored.
The temperature last selected is chosen as the initial temperature.
How to activate this mode
Press the < button until the pointer indicates MAN (Fig. 3).
Set the temperature
by pressing the +- button
Exit the mode
by pressing the > button
6. How to set the room temperature for a set time
(holiday/party mode)
In this mode, the temperature can be set for periods of time ranging from a few hours
up to 199 days, e.g. when you are away from home for longer periods of time (holi-
days).
The remaining hours/days are shown. Time periods between 1 hour and 23 hours and
1 day and 199 days can be set.
How to activate this mode
Press the < button until the pointer indicates the suitcase icon (Fig. 4)
Set the temperature
by pressing the +- button
Select the time
by pressing the < button
Set the time
by pressing the +– button
Once you have set your time period, the time will flash for 10 seconds and then start
the holiday/party period.
To exit this mode, press < or >.
When hours have been set, the controller will return to AUTO mode once the set
hours have passed.
When days have been set, the controller will return to AUTO mode at midnight of the
last day.
Note: the current day (today) must be included in the setting.
e.g. 1 day is set; the controller returns to AUTO today at midnight.
468 931 003 144-2
2
3
4
1
06490092001 ISS B
(Battery and Mains)
Fig. 1
3
4
1
2
Fig. 3
7. Pre-set programs
There are 3 pre-set time/temperature programs which are already available in the con-
troller. Pre-set program 1 (as shown below) is the default. Therefore, if pre-set pro-
gram 1 is the best program to suit your lifestyle, you do not need to change the
time/temperature settings on the device.
To select an other program see 9.3
Temperature
Program 1 (home during the day)
see note below
Events
Time
Temperature °C 21,0
+ or – buttons
for setting
Events
values e. g.
temperature
Time
Temperature °C 21,0
∞C
22
21
20
Time / Temperature
19
Program events 1...6
18
in sequence morning,
midday and night (see 7.)
17
16
15
14
6:00 h
Program 2 (home for lunch and on weekends)
Events
Time
Temperature °C 21,0
Events
Time
Temperature °C 21,0
∞C
22
21
20
19
18
17
16
15
4
5
1
2
3
6
7
14
6:00 h
Program 3 (at work all day)
Events
Time
Temperature °C 21,0
Pay attention to correct
polarity of the batteries!
Events
Fig.1
Time
Temperature °C 21,0
∞C
22
21
20
19
18
17
16
15
14
6:00 h
8. How to adjust the pre-set time/temperature program to suit
personal needs
Select the day function
Select the day
Set the times for this day
Select the event (1...6)
Set the time
Select the temperature
Set the temperature
The > button must be pressed to accept a setting.
If you wish to change other events or days, repeat the actions described above. To
return to the auto mode, press the < button.
Note: The last event of the current day can be extended up to the first event of the
following day.
Table 1 User options
User
options
1
2
3
4
5
6
7
8
5
6
7
3
4
5
6
7
1
2
Fig. 2
5
6
7
3
4
5
6
7
1
2
Fig. 4
Monday to Friday
1
2
3
4
5
6:00
8:30
12:00
14:00
17:00
18,0
21,0
18,0
21,0
Saturday and Sunday
1
2
3
4
5
7:00
10:00
12:00
14:00
17:00
18,0
21,0
21,0
21,0
Mon – Fri
Sat – Sun
8:00 h
10:00 h
12:00 h
14:00 h
16:00 h
18:00 h
Monday to Friday
1
2
3
4
5
6:00
8:30
12:00
14:00
17:00
18,0
21,0
18,0
21,0
Saturday and Sunday
1
2
3
4
5
7:00
10:00
12:00
14:00
17:00
21,0
21,0
21,0
21,0
Mon – Fri
Sat – Sun
8:00 h
10:00 h
12:00 h
14:00 h
16:00 h
18:00 h
Monday to Friday
1
2
3
4
5
6:00
8:30
12:00
14:00
17:00
18,0
18,0
18,0
21,0
Saturday and Sunday
1
2
3
4
5
7:00
10:00
12:00
14:00
17:00
18,0
21,0
21,0
21,0
Mon – Fri
Sat – Sun
8:00 h
10:00 h
12:00 h
14:00 h
16:00 h
18:00 h
by pressing the > button up to position "Day"
by pressing the +- button
by pressing the > button
by pressing the +- button
by pressing the > button
by pressing the +- button
Description
Change 12 h or 24 h clock
Change he manual set point temperature
Change to another pre-set program
Change the number of program events per day
Switch on/off automatic daylight savings time/standard time change
Change temperature display
Restore the built in time temperature programs
Switch off the thermostat
The days can be selected as blocks or individual days (Fig.5 to 7)
Selected by pressing the > button to "Day" then pressing the + or - buttons to select
either blocks Fig 5 to Fig 6 or individual days Fig 7.
Note: To facilitate programming, blocks of days with the same times/temperatures can
be formed before starting.
2
3
4
5
6
7
1
Fig. 5:
Monday to Friday as one block
(working days)
1
2
3
4
5
6
7
Fig. 7:
Each day is individual day
9. How to change user options
The controller offers a number of options that can be changed by the user (see Table 1.).
6
To activate the menu,
22:00
15,0
Select an option
6
Change an option
23:00
Press < or > to accept each change.
15,0
To exit the menu, press the < and > buttons simultaneously for 3 seconds.
If no button is pressed within 2 minutes, the device will return to the auto mode.
9.1 How to change from 24h to 12h clock (option 1, table 1)
Shows the time as 24 hours or 12 hours
9.2 How to change the manual set point temperature (option 2, table 1)
Setting the temperature used when the manual mode is selected for the first time, e.g. 20°C
9.3 How to change to another pre-set program (option 3, table 1)
20:00 h
22:00 h
Selection of a pre-set program to be used for programming events (see 7.).
9.4 How to change the number of events per day (option 4, table 1)
2, 4 or 6 time/temperature events can be selected for all days (not used events will be
6
skipped). If there is no need for e.g. 6 events, choosing 4 makes programming easier.
22:00
15,0
9.5 How to switch on/off the automatic daylight savings time/standard time
change (option 5, table 1)
6
You can select whether or not you want the time change to be carried out automati-
23:00
cally. If it is not carried out automatically, the time has to be adjusted manually (see
15,0
11.).
9.6 How to change the temperature display (option 6, table 1)
The temperature display can be adjusted to individual needs, e.g. 3 = +0,3°; -15 = -1,5°.
9.7 How to restore the built in time temperature programs (option 7, table 1)
Restores the pre-set programs to its original factory settings.
9.8 How to switch off the programmable thermostat (option 8, table 1)
When switched off, the programmable thermostat no longer controls the room tem-
20:00 h
22:00 h
perature and the room is not heated. The display will show OFF, and the buttons will
not function.
In the installer options (refer to Installation Guide) you can select whether or not frost
protection is to active (heating is called for if the temperature falls below 5°C) when
the programmable thermostat is switched off.
6
22:00
10. How to change the batteries
15,0
When the batteries start to run low, the battery icon (refer to Fig. 1) starts to blink.
6
The controller continues to function normally.
23:00
After roughly 6 months, the device will cease to function and will permanently display
15,0
the battery icon (Fig. 8).
Disposal of batteries according to legislation.
20:00 h
22:00 h
11. How to change the time, day, month and year
The controller comes with a pre-set clock, which also automatically switches from day -
light savings time to standard time.
There should be no need to change these settings. However, should the need arise, the
settings can be changed in the following way.
Note: Days are shown as 1 to 7 (1= Monday to 7= Sunday)
Activate the clock mode:
Select DAY with button > and then 7 (Sunday) with button +
With button > move through all 6 time/temperature events (without any modifiaction)
until the pointer indicates the clock icon.
The time will now flash.
Set the time
Press the > button to select the day
Press the > button to select the month
Press the > button to select the year
Press the > button to return to the AUTO mode
Select between
12
24
7
32
1
3
2, 4 or 6
ON
OFF
–5.0
5.0
ON
OFF
ON
OFF
3
4
5
6
1
2
7
Fig. 6:
Saturday and Sunday as one block
(days off)
in AUTO Mode press the < and > buttons simultaneously
for 3 seconds
by pressing the < or > button
by pressing the +- button
(Battery Model only)
2
3
4
5
6
7
1
Fig. 8
by pressing the +- button
Press the +- button to change the setting
Press the +- button to change the setting
Press the +- button to change the setting
Default
24
20
1
6
ON
0.0
OFF
OFF
Advertisement

Summary of Contents for INSTAT+ 2R7
- Page 1 10:00 12:00 14:00 17:00 23:00 INSTAT+2R7, -3R7 is a 7 day or 5:2 day Programmable RoomThermostat. Allowing dif- cally. If it is not carried out automatically, the time has to be adjusted manually (see Temperature °C 21,0 21,0 21,0 21,0...
- Page 2 0 °C bis 40 °C will then control the temperature at 7°C. Storage –20 °C bis 85 °C The electronic thermostat INSTAT+ 2R7 or INSTAT+ 3R7 can be used for temperature Ambient humidity Operating 25 % to 85 % When in Off mode frost protection will still be active.