
Subscribe to Our Youtube Channel
Related Manuals for Avallon AFR241SSODRH


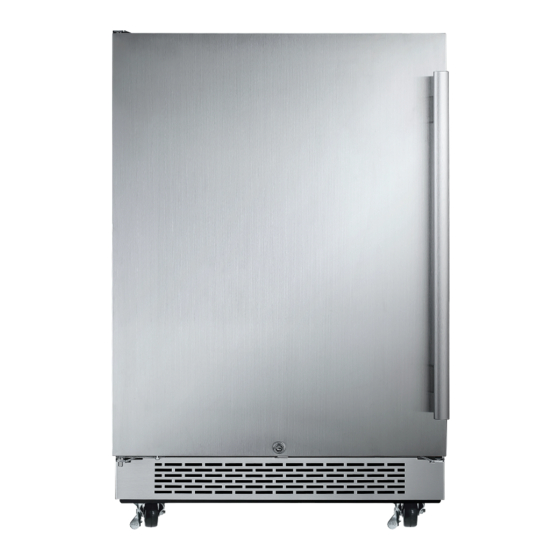
Summary of Contents for Avallon AFR241SSODRH
- Page 1 USER’S GUIDE Installation, Operation, and Maintenance for your product. Outdoor Refrigerator Model – AFR241SSODRH / AFR241SSODLH www.avallon.com 1‐866‐471‐7427 V2.1‐07102018 ...
- Page 2 Important Safety Information Improper handling can cause serious damage to the Avallon outdoor refrigerator and / or injury to the user. This outdoor refrigerator is designed for domestic use only. Do not use the unit for industrial or commercial use. Any other use may invalidate the warranty. Please review the rating label located on the rear panel of the unit for electrical and other technical data related to this unit. The unit must be used in a properly grounded wall outlet. Please read and follow the safety information listed below to reduce the risk of fire, electric shock, or injury. ELECTRICAL SAFETY • Do not exceed the power outlet ratings. • It is recommended the outdoor refrigerator be connected on its own circuit. • The unit must be installed in accordance with state and local electrical codes. • A standard electrical supply (115 V, 60Hz), that is properly grounded in accordance with the National Electrical Code and local codes and ordinances, is required. • Use outlets that cannot be turned off by a switch or pull chain. • Always turn the unit off and unplug it from the outlet when cleaning. • Unplug the unit if it is not going to be used for an extended period of time. • Do not operate the unit with a power plug missing the ground plug, a damaged cord, or a loose socket. • Be sure the refrigerator is properly grounded. ...
- Page 3 GENERAL SAFETY • To prevent back and other types of injuries, use at least two people to move and install the refrigerator. • This appliance is not intended for use by persons, including children, with reduced physical, sensory, or mental capabilities, unless they have been given supervision or instruction concerning the use of the appliance by the person(s) responsible for their safety. • Install the refrigerator in a well ventilated area. • The temperature range for this refrigerator is optimized for perishable food items. • Do not place hot or warm items into the refrigerator before they cool down to room temperature. • This unit is designed to be installed outdoors, and protected from rain, sleet, snow, and / or moisture. • Never allow children to crawl inside the refrigerator. If you are disposing of the unit, remove the door. • Do not use this appliance near flammable gas or combustibles, such as gasoline, benzene, thinner, etc. ...
-
Page 4: Table Of Contents
Table of Contents Important Safety Information……………………………………………………………………………………………………………………………………………….. ii Table of Contents………………………………………………………………………………………………………………………………………………………………….. iv First Time Operating Instructions…………………………………………………………………………………………………………………………………………… v Introduction…………………………………………………………………………………………………………………………………………………………………………… 1 Parts Identification………………………………………………………………………………………………………………………………………………………………… 2 Open Door View…………………………………………………………………………………………………………………………………………………………………….2 90° Door View……………………………………………………………………………………………………………………………………………………………………..…2 Carbon Filter…………………………………………………………………………………………………………………………………………………………………………. 3 Internal Fan…………………………………………………………………………………………………………………………………………………………………………… 3 Installing Your Outdoor Refrigerator……………………………………………………………………………………………………………………………………… 3 TYPES OF INSTALLATION…………………………………………………………………………………………………………………………………………………………4 Free‐standing Installation……………………………………………………………………………………………………………………………………………………… 4 Built‐in Installation………………………………………………………………………………………………………………………………………………………………… 4 Installation Clearance Requirements………………………………………………………………………………………………………………………………………4 LEVELING………….…………………………………………………………………………………………………………………………………………………………………….5 RECOMMENDED GROUNDING METHOD………………………………………………………………………………………………………………………………..5 Installing Your Door Handle and Shelves………………………………………………………………………………………………………………………………… 5 INSTALLING THE DOOR HANDLE…………………………………………………………………………………………………………………………………………….5 INSTALLING THE SHELVES………………………………………………………………………………………………………………………………………………………6 REMOVING THE SHELVES……………………………………………………………………………………………………………………………………………………...6 Operation………………………………………………………………………………………………………………………………………………………………………………. 7 INSTALLATION CHECK‐LIST BEFORE OPERATION…………………………………………………………………………………………………………………….7 USING YOUR CONTROL PANEL……………………………………………………………………………………………………………………………………………….7 Power Button……………………………………………………………………………………………………………………………………………………………………….. 7 Increase Temperature……………………………………………………………………………………………………………………………………………………………7 Decrease Temperature…………………………………………………………………………………………………………………………………………………………. 7 Interior Light………………………………………………………………………………………………………………………………………………………………………….7 ... -
Page 5: First Time Operating Instructions
Specifications………………………………………………………………………………………………………………………………………………………………………… 12 Avallon Product Warranty……………………………………………………………………………………………………………………………………………………… E rror! Bookmark not defined. First Time Operating Instructions: Before use, make sure all packaging labels and materials are removed from the unit. Be sure to keep track of all included parts and pieces before discarding packaging materials. It is advised that you keep the original box and packaging materials in case you need to move or ship the appliance in the future. Allow the unit to stand for at least 24 hours before you use it; this allows the cooling components time to settle from transit. The instruction manual should be read before use. This owner’s manual is provided for reference use only. Specifications may change without prior notice. Refer to the product label on the back of your refrigerator for the latest technical information. v ... -
Page 6: Introduction
Model Number: Serial Number: Date of Purchase: To better serve you, please do the following before contacting customer service: • If you received a damaged product, immediately contact the retailer or dealer that sold you the product. • Read and follow this instruction manual carefully to help you install, use, and maintain your outdoor refrigerator. • Read the troubleshooting section of this manual as it will help you diagnose and solve common issues. • Visit us on the web at http://www.avallon.com to download product guides, additional troubleshooting resources, and up‐to‐date information. • If you need warranty service, our friendly customer service representatives are available via email at service@avallon.com or by telephone at 1 (866) 471‐7427. ... -
Page 7: Parts Identification
Parts Identification Open Door View 90° Door View ... -
Page 8: Carbon Filter
Carbon Filter A built‐in carbon filter protects your products by acting as a natural barrier against harmful odors. Internal Fan This is an air‐cooled unit equipped with an internal fan that maintains a consistent internal temperature. Note: The carbon filter should be replaced every 3‐6 months depending on the unit’s exposure level to odor. If the unit is placed in a kitchen, regular replacement every three (3) months is ideal. Tip: Gather the model and serial number from the product label and write them down before installing the outdoor refrigerator. Installing Your Outdoor Refrigerator The outdoor refrigerator should be installed in accordance with local electrical code requirements. It should ... -
Page 9: Types Of Installation
TYPES OF INSTALLATION: This outdoor refrigerator has been designed for free‐standing or built‐in installation. The refrigerator must be protected from rain, snow, etc. In every case, there must be adequate ventilation and access for service. Free‐standing Installation A free‐standing installation will allow you to install the outdoor refrigerator in almost any place you desire. You must follow the stated instructions for electrical requirements and leveling the refrigerator. Built‐in Installation A recessed installation will allow you to install the outdoor refrigerator under a counter or in a kitchen cabinet provided the clearance space requirements around the refrigerator are followed. It is necessary to allow adequate ventilation space around the unit (make sure there is at least some ventilation room for the back of the unit). The following additional items must be observed: 1. Place the outdoor refrigerator in front of the installation location. 2. Adjust the feet and place the unit flat on the floor or on a platform depending on your installation requirements. 3. If the electrical outlet for the refrigerator is behind the cabinet, plug in the refrigerator. 4. Push the outdoor refrigerator into position. 5. Warning: DO NOT install the outdoor refrigerator behind a closed cabinet door. Installation Clearance Requirements: When installing the outdoor refrigerator under a counter, follow the recommended spacing dimensions shown. • To ensure proper service access and ventilation, allow between 2 ‐ 3 inches of clearance at the back as shown in the diagram. • The installation should allow the unit to be pulled forward for servicing, if necessary. • A standard electrical supply (115 VAC only, 60 Hz), properly grounded in accordance with National Electrical Code and local codes and ordinances, is required. ... -
Page 10: Leveling
LEVELING: The outdoor refrigerator should be installed on a firm and level surface that will be able to support the entire weight of a fully loaded unit. It is important for the refrigerator to be leveled in order to work properly. It can be raised or lowered by rotating the plastic sheaths around each of the feet on the bottom of the machine. If you find that the surface is not level, rotate the feet until the outdoor refrigerator becomes level. You may need to make several adjustments to level it. We recommend using a carpenter’s level to check the machine. Turn the leveling feet to the right to lower that side of the refrigerator. Turn the leveling feet to the left to raise that side of the refrigerator. RECOMMENDED GROUNDING METHOD: For your personal safety, this appliance must be grounded. It is equipped with a power supply cord having a 3‐prong grounding plug. To minimize possible shock hazard, the cord must be plugged into a mating 3‐ pronged wall socket, and grounded in accordance with the National Electrical Code and local codes and ordinances. If a mating wall socket is not available, it is the personal responsibility of the customer to have a properly grounded, 3‐prong wall receptacle installed by a qualified electrician. Electrical Shock Hazard! Plug into a grounded 3‐prong outlet. Never remove the grounding prong from the plug. Never use an adapter to bypass the grounding prong. DO NOT use an extension cord. Failure to follow these instructions can result in fire, electrical shock, or personal injury. Before you move your outdoor refrigerator into its final location, it is important to make sure you have the proper electrical connection. A standard electrical supply (115 V, 60Hz), properly grounded in accordance with the National Electrical Code and local codes and ordinances, is required. It is recommended that a ... -
Page 11: Installing The Shelves
INSTALLING THE SHELVES: 1. Open the door completely. 2. Ensure that the plastic posts are installed on the left and right sides of the shelf track onto which you are attempting to install the shelf. 3. Lifting the rear of the shelf upwards above the shelf track, align the cutouts in the left and right sides of the shelves over the plastic posts mounted to the inner cabinet. 4. Gently set the shelf down on the shelf track. REMOVING THE SHELVES: 1. Open the door completely. 2. Remove all of the contents loaded on the shelf, if applicable. 3. With the shelf pushed all the way to the rear of the unit, position the cutouts in the left & right sides of the shelves under the plastic posts on each side of the shelf track. 4. Push down on the front of the shelf while lifting up on the rear of the shelf (picture a seesawing motion) until the shelf passes over the plastic posts. 5. Pull the shelf forward until it is completely removed from the inner compartment. ... -
Page 12: Operation
Operation INSTALLATION CHECK‐LIST BEFORE OPERATION: 1. Have all packing materials and tape been removed from the interior and exterior of the outdoor refrigerator? 2. Have the installation instructions been followed, including connecting the machine to electricity? 3. Has proper grounding been installed for the outdoor refrigerator? 4. Has the machine been leveled? 5. Is there a clearance of at least 2” to 3” at the rear for proper air circulation? USING YOUR CONTROL PANEL: This outdoor refrigerator has a temperature range from 34° F to 50° F. Power Button Press and hold this button down for three seconds to power your unit on. Once the button is pressed, the “Run” indicator light will illuminate to indicate the unit is on and running. Press and hold this button for three seconds again and the unit will power off and the “Run” Indicator light will turn off. Increase Temperature Press this button to increase the temperature by one (1) degree increments. 50° F is the highest available temperature on this unit. Decrease Temperature Press this button to decrease the temperature by one (1) degree increments. 34° F is the lowest available temperature on this unit. Interior Light Press this button to alternate between the two internal light colors: blue and white. Please refer to the “Internal Light” section on the next page for further details. ... -
Page 13: Internal Light
Warning: Allow at least 24 hours for your outdoor refrigerator to run before use to allow the temperature to acclimate. Whether your outdoor refrigerator can reach the actual set temperature depends on the ambient environmental conditions. Internal Light This outdoor refrigerator is equipped with top and side internal lights that can be set to a blue or white color. The internal lights will illuminate when the door is opened and turn off when the door is closed. Note: Every unit is run tested at the factory. Because of this, your model may default to either a blue or white light setting out of the box. The automatic light feature is triggered by a sensor located on the front vent. This sensor allows the outdoor refrigerator to recognize when the door is open or closed. Defrosting Note that under most refrigerating settings, the unit will automatically defrost under most ambient conditions. However, on colder settings, some frost may build up. Additionally, the more humid the ambient conditions, the more frost may build up. Keep the door closed as much as possible and avoid opening the door unnecessarily to minimize frost build‐up. If frost is preventing the door from closing properly, you may need to power the unit off until the frost melts. Use a soft absorbent towel to dry the unit. ... -
Page 14: Cleaning And Maintenance
Cleaning and Maintenance Periodic cleaning and proper maintenance will ensure efficiency, top performance, and long life. INTERIOR CLEANING: 1. Disconnect power to the unit. 2. Open the door and remove the contents and shelves. 3. Wait until the unit defrosts. 4. With a clean cloth, wipe down the interior of the unit. 5. Reinsert the shelves and contents. 6. Reconnect power to the unit. EXTERIOR CLEANING: The door and cabinet may be cleaned with a mild detergent and lukewarm water solution such as two (2) tablespoons of baking soda to one (1) quart of water. Do not use solvent based or abrasive cleaners. Use a soft sponge and rinse with clean water. Wipe with a soft clean towel to prevent water spotting. If the door panel is stainless steel, it can discolor when exposed to chlorine gas and moisture. Clean stainless steel with a cloth dampened with a mild detergent and warm water solution. Never use an abrasive or caustic cleaning agent. Preparing Your Outdoor Refrigerator for Storage If the outdoor refrigerator will not be used for a long time, or is to be moved to another place, it will be necessary to defrost the unit and dry the interior. 1. Disconnect the outdoor refrigerator from the power supply by removing the power plug from the wall socket. 2. Leave the door open to allow for air circulation and to prevent mold, mildew, and unpleasant smells. 3. - Page 15 Troubleshooting ISSUE POSSIBLE CAUSE SOLUTION The outdoor refrigerator turns on The door is being opened often. Minimize the number of times the and off frequently. door is opened. The door is not completely closed. Make sure the door is completely closed. The door gasket is not sealing Make sure the door gasket is properly. properly sealed. The outdoor refrigerator does not Read and follow the “Installation have the suggested ventilation. Clearance Requirements” section. The outdoor refrigerator does not There is a power failure. Ensure the outdoor refrigerator is turn on. plugged in and the outlet has power. The outdoor refrigerator is not Plug the unit in to a power outlet plugged in. that has sufficient amperage. A fuse has blown or the circuit Replace the broken fuse in your breaker is tripped. fuse box or reset the breaker. The outdoor refrigerator will not ...
- Page 16 ISSUE POSSIBLE CAUSE SOLUTION Frost is forming in the outdoor The environment is humid. Through the unit uses an “auto‐ refrigerator. defrost” system, under certain The door is being opened too frequently. conditions, manual defrosting may be required. If frost builds up, you can try running the outdoor refrigerator on a warmer temperature setting, minimizing the number of times you open the door, or unplugging the unit to allow the frost to melt. The door will not shut properly. The outdoor refrigerator is not Make sure the outdoor level. refrigerator is on a level surface. The door gasket is dirty. Clean the door gasket. The door gasket is not installed Install the door gasket correctly. correctly. The shelves are incorrectly Install the shelves correctly. installed. 11 ...
- Page 17 Specifications DESCRIPTION OF PRODUCT Built‐In Outdoor Refrigerator MODEL AFR241SSODRH / AFR241SSODLH VOLTAGE / FREQUENCY AC 115 / 60 Hz AMPERAGE 1.2 A INPUT POWER 120 W COLOR Stainless Steel Cabinet with Stainless Steel Door STORAGE CAPACITY 5.5 Cu. Ft. REFRIGERANT R134a, 3.53 oz. TEMPERATURE RANGE 34° F to 50° F DIMENSIONS 34 ” X 23 ” X 25 ” ** (HEIGHT X WIDTH X DEPTH) WEIGHT 97 Pounds Note: Technical data and performance information are provided for reference only. Specifications are ...
- Page 18 Once an Avallon authorized representative has con- firmed that your product is defective and eligible for warranty service, the product must be returned to an Avallon authorized repair facility.
Need help?
Do you have a question about the AFR241SSODRH and is the answer not in the manual?
Questions and answers