Table of Contents
Advertisement
Quick Links
Advertisement
Table of Contents

Related Manuals for LG DLE3401 Series


Summary of Contents for LG DLE3401 Series
- Page 1 OWNER'S MANUAL DRYER Read this owner’s manual thoroughly before operating the appliance and keep it handy for reference at all times. ENGLISH DLE3400*, DLG3401* www.lg.com MFL70442642 Rev.01_121819 Copyright © 2019 LG Electronics Inc. All Rights Reserved.
-
Page 2: Table Of Contents
32 Check the Lint Filter Before Every Load 32 Sorting Laundry 32 Loading the Dryer 33 Control Panel 35 Cycle Guide 36 Cycle Modifier Buttons 36 Option Buttons 37 Special Functions 38 SMART FUNCTIONS 38 LG ThinQ Application 38 Smart Diagnosis™ Feature... -
Page 3: Product Features
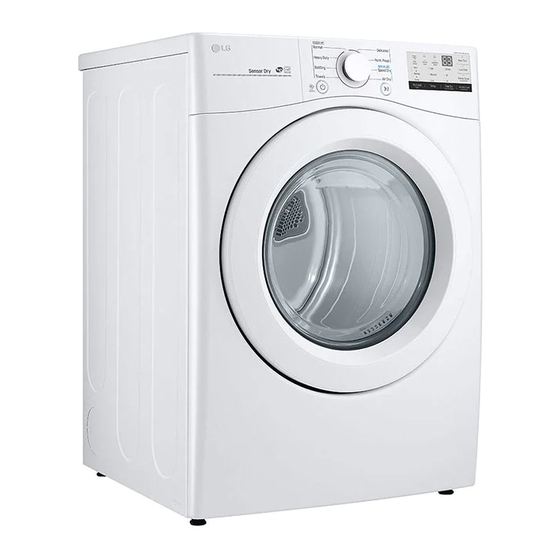
PRODUCT FEATURES PRODUCT FEATURES Easy-to-Use Control Panel Rotate the cycle selector knob to select the desired dry cycle. Add cycle options or adjust settings with the touch of a button. Easy-Access Reversible Door The wide-opening door provides easy access for loading and unloading. The door hinge can be reversed to adjust for installation location. -
Page 4: Safety Instructions
SAFETY INSTRUCTIONS SAFETY INSTRUCTIONS READ ALL INSTRUCTIONS BEFORE USE Your safety and the safety of others are very important. We have provided many important safety messages in this manual and on your appliance. Always read and follow all safety messages. This is the safety alert symbol. - Page 5 SAFETY INSTRUCTIONS INSTALLATION • Before use, the appliance must be properly installed as described in this manual. • Connect to a properly rated, protected, and sized power circuit to avoid electrical overload. • To reduce the risk of severe injury or death, follow all installation instructions. •...
- Page 6 • Do not grasp the power cord or touch the appliance controls with wet hands. • Do not modify or extend the power cord. • If the product has been submerged, contact an LG Electronics customer information center for instructions before resuming use.
- Page 7 SAFETY INSTRUCTIONS • Fix the drain hose securely in place. • Do not put oily or greasy clothing, candles or flammable materials on top of the appliance. • Do not use fabric softeners or products to eliminate static unless recommended by the manufacturer of the fabric softener or product.
- Page 8 SAFETY INSTRUCTIONS GROUNDING INSTRUCTIONS • Improper connection of the equipment-grounding conductor can result in a risk of electric shock. Check with a qualified electrician or service personnel if you are in doubt whether the appliance is properly grounded. Do not modify the plug provided with the appliance; if it will not fit the outlet, have a proper outlet installed by a qualified electrician.
-
Page 9: Product Overview
PRODUCT OVERVIEW PRODUCT OVERVIEW Parts Power Terminal Reversible Cord Block door (gas Access Control panel models) Panel (electric models) Lint filter connection Leveling feet (gas models) Exhaust Duct Outlet Accessories Optional Accessories (Sold Separately) Drying Rack Pedestal Stacking kit Side vent kit Kit No. -
Page 10: Installation
10 INSTALLATION INSTALLATION Installation Overview Please read the following installation instructions first after purchasing this product or transporting it to another location. Check and choose the Level the dryer Vent the dryer proper location Connect the Gas dryer Connect the Electric dryer Gas dryer Electric dryer Installation test... -
Page 11: Installation Location Requirements
INSTALLATION Installation Location Requirements WARNING • Read all installation instructions completely before installing and operating your dryer! It is important that you review this entire manual before installing and using your dryer. Detailed instructions concerning electrical connections, gas connections, and exhaust requirements are provided on the following pages. -
Page 12: Clearances
12 INSTALLATION Clearances 14" max.* 14" max.* (356 mm) (356 mm) 18" min.* (457 mm) 18" min.* (457 mm) 1"* 30.2" 5"** 1"* 30.2" 5"** (25 mm) (765mm) (127 mm) (25 mm) (765mm) (127 mm) 3" * (76 mm) 48 in. (310 cm 0"... - Page 13 INSTALLATION Installation Spacing for Recessed Area or Closet, with Stacked Washer and Dryer 6" 3" (152 mm) (76 mm) 48 in. (310 cm 77 ½" (1968 mm) 24 in. (155 cm 3" (76 mm) 1" 5 ½" 1" 27" 1" (25 mm) (140 mm) (25 mm)
-
Page 14: Leveling The Dryer
14 INSTALLATION Leveling the Dryer Use an adjustable wrench to turn the leveling feet. Unscrew the legs to raise the dryer or screw in the legs to lower it. Raise or lower WARNING with the leveling feet until the dryer is level from side to side and front to back. -
Page 15: Reversing The Door
INSTALLATION Reversing the Door While supporting the door, remove the 2 screws on the door hinge. Remove the door. Tools Required • Phillips screwdriver • Large flat blade screwdriver (recommended for hinge screws if they are tight or your Phillips screwdriver is worn) •... -
Page 16: Installing The Side Vent Kit
It can also vent to the bottom or side (right-side venting is not available on gas models). An adapter kit, part number 383EEL9001B, may Cover be purchased from your LG retailer. This kit Plate contains duct components necessary to change Elbow the dryer vent location. -
Page 17: Stacking The Dryer
INSTALLATION Stacking the Dryer To ensure safe and secure installation, please observe the following instructions. Stacking Kit Installation Make sure the surface of the washer is clean and dry. Remove paper backing from the tape This stacking kit includes: on one of the stacking kit side brackets. •... -
Page 18: Venting The Dryer
18 INSTALLATION Venting the Dryer WARNING • Ductwork is not provided with the dryer. You WARNING should obtain the necessary ductwork locally. The vent hood should have hinged dampers to • Do not crush or collapse ductwork. prevent backdraft when the dryer is not in use. •... - Page 19 INSTALLATION Routing and Connecting Ductwork Correct Venting NOTE Follow the guidelines below to maximize drying performance and reduce lint buildup and condensation in the ductwork. Ductwork and fittings are NOT included and must be purchased separately. • Use 4-inch (10.2 cm) diameter rigid, semi-rigid or flexible metal ductwork.
-
Page 20: Connecting Gas Dryers
20 INSTALLATION Connecting Gas Dryers • Supply line requirements: Your laundry room must have a rigid gas supply line to your dryer. In the United States, an individual manual WARNING shutoff valve MUST be installed within at least 6 ft. (1.8 m) of the dryer, in accordance with To reduce the risk of fire or explosion, the National Fuel Gas Code ANSI Z223.1 or electric shock, property damage, injury to... - Page 21 INSTALLATION • The dryer is configured for natural gas when Check all pipe connections (both internal and shipped from the factory. Make sure that the external) for gas leaks with a noncorrosive dryer is equipped with the correct burner nozzle leak-detection fluid.
-
Page 22: Connecting Electric Dryers
22 INSTALLATION Connecting Electric Dryers • A 4-wire connection is required for all mobile and manufactured home installations, as well as all new construction after January 1, 1996. WARNING A 4-wire connection must be used where local codes do not permit grounding through the To reduce the risk of fire or explosion, neutral wire. - Page 23 INSTALLATION Four-Wire Power Cord Tighten all screws securely. • A 4-wire connection is required Reinstall the terminal block access cover. for all mobile and manufactured Hot (Black) Neutral (White) home installations, as well as all Hot (Red) new construction after January 1, Ground 1996.
- Page 24 24 INSTALLATION Four-Wire Direct Wire Attach the two hot leads of the power cord to the outer terminal block screws. • A 4-wire connection is required for all mobile and manufactured Attach the white neutral wire to the center home installations, as well as all screw of the terminal block.
- Page 25 INSTALLATION Three-Wire Power Cord Reinstall the terminal block access cover. Hot (Black) Neutral (White) • A 3-wire connection is NOT Hot (Red) Ground permitted on new construction Screw after January 1, 1996. • A UL-listed strain relief is required. White Wire •...
- Page 26 26 INSTALLATION Three-Wire Direct Wire Attach the neutral (white) wire to the center terminal block screw. • A 3-wire connection is NOT permitted on new construction Connect the external ground (if required by after January 1, 1996. local codes) to the green ground screw. •...
-
Page 27: Special Electrical Requirements
INSTALLATION Special Electrical • Please be aware that venting materials are not supplied with the dryer. You must obtain Requirements the venting materials necessary for proper installation. (For Mobile or Manufactured Homes) • Any installation in a manufactured or mobile Final Installation Check home must comply with the Manufactured Home Construction and Safety Standards Title 24... -
Page 28: Installation Test (Duct Check)
28 INSTALLATION Checking Levelness Press and hold the Signal and Temp. buttons and then press the Power button. Once the dryer is in its final location, recheck the (On models with a glass touch control panel, dryer to be sure it is level. Make sure it is level press the Power button then IMMEDIATELY front to back and side to side, and that all four press and hold the Temp. - Page 29 INSTALLATION Error Codes Check the Duct Condition If the Flow Sense™ LED is turned on, check Check the error code before you call for service. the exhaust system for restrictions and damage. Repair or replace the exhaust system as needed. Error Possible Solutions...
- Page 30 30 INSTALLATION Restricted or Blocked Airflow Avoid long runs or runs with multiple elbows or bends. Excess or crushed Too many elbows or transition duct exhaust too long Check for blockages and lint buildup. Lint buildup or blockage Make sure the ductwork is not crushed or restricted.
-
Page 31: Operation
OPERATION OPERATION WARNING • To reduce the risk of fire, electric shock, or injury to persons, read the SAFETY INSTRUCTIONS before operating this appliance. Using the Dryer Clean the Lint Filter If the lint filter has not already been cleaned, lift out the filter and remove the lint from the last load. -
Page 32: Check The Lint Filter Before Every Load
32 OPERATION Check the Lint Filter Before Grouping Similar Items Every Load For best results, sort clothes into loads that can be dried with the same drying cycle. Always make sure the lint filter is clean before Different fabrics have different care requirements, starting a new load;... -
Page 33: Control Panel
OPERATION Control Panel Non-Steam Models (DLE3400*, DLG3401*) Power Button Cycle Modifier Buttons Press the button to turn the dryer ON. Press Use these buttons to select the desired cycle again to turn the dryer OFF. settings for the selected cycle. The current settings are shown in the display. - Page 34 34 OPERATION Clean Filter Reminder Damp Dry Signal Indicator The Clean Filter LED is lit when the dryer is The dryer will signal when the load is turned on as a reminder to clean the filter. It approximately 80% dry. This allows you to turns off when the START/PAUSE button is remove faster-drying lightweight items or pressed.
-
Page 35: Cycle Guide
Sensor Dry Cycles of drying time and a drying temperature. When a Manual Dry cycle is selected, the Estimated Sensor Dry cycles utilize LG’s unique dual sensor Time Remaining display shows the actual time system to detect and compare the moisture level remaining in your cycle. -
Page 36: Cycle Modifier Buttons
36 OPERATION Cycle Modifier Buttons Option Buttons Sensor Dry cycles have preset settings that are The dryer features several additional cycle options selected automatically. Manual Dry cycles have to customize cycles to meet individual needs. default settings, but you may also customize the Certain option buttons also feature a special settings using the cycle modifier buttons. -
Page 37: Special Functions
OPERATION Special Functions Default On/Off This option allows the Energy Saver settings to Some cycle option buttons also activate secondary be changed. To run a Normal cycle without the functions. These special functions are marked with Energy Saver option, press and hold the Energy an asterisk (*). -
Page 38: Smart Functions
Using Audible Diagnosis to Diagnose Issues Follow the instructions below to use the audible diagnosis method. • Launch the LG ThinQ application and select the Smart Diagnosis feature in the menu. Follow the instructions for audible diagnosis provided in the LG ThinQ application. -
Page 39: Maintenance
MAINTENANCE MAINTENANCE Cleaning Around and Under the Dryer Vacuum lint and dust from around the dryer and Regular Cleaning underneath it regularly. Vent ductwork should be checked for lint buildup and cleaned at least once per year. If any noticeable reduction in airflow or WARNING drying performance occurs, immediately check ductwork for obstructions and blockages. - Page 40 40 MAINTENANCE If the lint filter has become very dirty or clogged with fabric softener, wash the lint filter in warm, soapy water and allow it to dry thoroughly before reinstalling. NOTE • NEVER operate the dryer without the lint filter in place.
-
Page 41: Troubleshooting
User Support Videos For further assistance, there are videos and tutorials available through the LG.com website. On the lg.com/us home page, click on the Support menu tab to bring up the menu selections. Select Video Tutorials. Type Dryer in the search box on the new page and click Scan this QR code to quickly access the the Search button. -
Page 42: Before Calling For Service
42 TROUBLESHOOTING Before Calling for Service This dryer is equipped with an automatic error-monitoring system to detect and diagnose problems at an early stage. If the dryer does not function properly or does not function at all, check the following before you call for service. - Page 43 TROUBLESHOOTING Problem Possible Causes & Solution Gas supply or service turned off (gas models only). Display show error code gAS • Confirm that house gas shutoff and the dryer gas shutoff are both fully open. Large load of heavy fabrics. •...
- Page 44 44 TROUBLESHOOTING Performance Problem Possible Causes & Solution Fabric softener used incorrectly. • Confirm and follow the instructions provided with your fabric softener. Clean and dirty clothes are being dried together. • Use your dryer to dry only clean items. Soil from dirty clothes can transfer to the clean clothes in the same or later loads.
- Page 45 TROUBLESHOOTING Problem Possible Causes & Solution Fabric softener is not used or used incorrectly. • Use a fabric softener or the REDUCE STATIC option, if equipped, to reduce static electricity. Be sure to follow the manufacturer’s instructions. Clothes dried too long (overdried). Excess static in •...
- Page 46 46 TROUBLESHOOTING Problem Possible Causes & Solution After clearing the restriction, the Flow Sense™ system requires multiple, consecutive cycles to determine that the performance The Flow Sense™ indicator value has improved before the Flow Sense™ indicator is reset. remains active after clearing the restriction in the venting.
-
Page 47: Warranty
Should your LG Dryer (“Product”) fail due to a defect in materials or workmanship under normal home use, during the warranty period set forth below, LG will at its option repair or replace the product. This limited warranty is valid only to the original retail purchaser of the product and applies only when purchased and used within the United States including U.S. - Page 48 TO OBTAIN WARRANTY SERVICE AND ADDITIONAL INFORMATION For additional product information, visit the LG website at http://www.lg.com For assistance using this product or to schedule service, contact LG Electronics at 1-800-243-0000. For further assistance, write: LG Electronics, 201 James Record Road, Huntsville, Alabama 35813...
- Page 49 Notice of Dispute. In the event you intend to commence an arbitration proceeding, you must first notify LG in writing at least 30 days in advance of initiating the arbitration by sending a letter to LG at LG Electronics, USA, Inc. Attn: Legal Department- Arbitration 1000 Sylvan Ave, Englewood Cliffs 07632. You and LG agree to engage in good faith discussions in an attempt to amicably resolve your claim.
- Page 50 Federal Rule of Civil Procedure 11(b)), then the payment of all arbitration fees will be governed by the AAA Rules. In such a situation, you agree to reimburse LG for all monies previously disbursed by it that are otherwise your obligation to pay under the AAA Rules. Except as otherwise provided for, LG waives any rights it may have to seek attorneys’...
Need help?
Do you have a question about the DLE3401 Series and is the answer not in the manual?
Questions and answers