Table of Contents
Advertisement
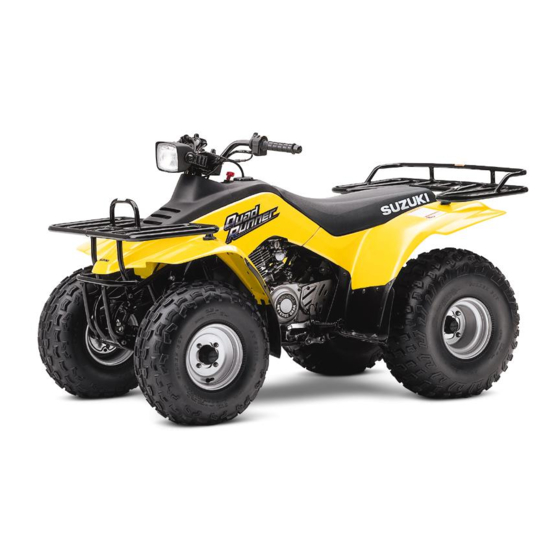
LT-F160
MANUEL DU PROPRIETAIRE
MANUAL DEL PROPIETARIO
This owner's manual contains
important safety information.
Please read it carefully.
Never allow anyone under 16
years old to ride this ATV.
OWNER'S MANUAL
Ce 'Manuel du propriétaire contient
des informations importantes
concernant la sécurité.
Le lire soigneusement.
Ne jamais autoriser les enfants
âgés de moins de 16 ans à
piloter ce V.T.T.
Este manual del usuario contiene
información de seguridad importante.
Léalo detenidamente.
No permita que nadie menor de 16
años de edad conduzca esta ATV.
Part No. 99011-02C77-01D
April, 2006
EN, FR, SP
TK
Advertisement
Chapters
Table of Contents

Related Manuals for Suzuki LT-F160 2006

Summary of Contents for Suzuki LT-F160 2006
- Page 1 LT-F160 OWNER’S MANUAL MANUEL DU PROPRIETAIRE MANUAL DEL PROPIETARIO This owner’s manual contains Ce ’Manuel du propriétaire contient Este manual del usuario contiene important safety information. des informations importantes información de seguridad importante. Please read it carefully. concernant la sécurité. Léalo detenidamente.
- Page 2 ENGLISH LT-F160 OWNER’S MANUAL This manual should be considered a permanent part of the vehi- cle and should remain with the vehicle when resold or otherwise transferred to a new owner or operator. The manual contains important safety information and instructions which should be read carefully before operating the vehicle.
- Page 3 ATV or a $50 check if instructions clearer. they have owned an ATV before. Limit one per ATV purchased. Ask WARNINGs CAUTIONs an authorized Suzuki dealer for arranged like this: the details or call 1-800-887-2887 WARNING-or-CAUTION for training information. •...
- Page 4 A collision or rollover can occur crepancies between information in quickly, even during routine maneu- this manual and your ATV. Suzuki vers such as turning and driving on reserves the right to make produc- hills or over obstacles, if you fail to tion changes at any time, without take proper precautions.
- Page 5 • Never operate an ATV without • Never operate the ATV on hills too wearing an approved motorcycle steep for the ATV or for your abili- helmet that fits properly. You ties. Practice on smaller hills should also wear eye protection before attempting larger hills.
- Page 6 • Always use proper procedures if • Always be sure there are no you stall or roll backwards when obstacles or people behind you climbing a hill. To avoid stalling, when you operate in reverse. use the proper gear and maintain When it is safe to proceed in a steady speed when climbing a reverse, go slowly.
-
Page 8: Table Of Contents
TABLE OF CONTENTS FUEL AND OIL RECOMMENDATIONS CONTROLS, EQUIPMENT AND ADJUSTMENTS RIDING YOUR ATV ACCESSORY USE AND VEHICLE LOADING INSPECTION AND MAINTENANCE TROUBLESHOOTING PREPARATION FOR WINTER RIDING TRANSPORTING CLEANING PROCEDURE AND STORAGE PROCEDURE CONSUMER INFORMATION SPECIFICATIONS INDEX... -
Page 10: Fuel And Oil Recommendations
FUEL AND OIL RECOMMENDATIONS FUEL ......................1-2 ENGINE OIL ....................1-3... - Page 11 In some areas, the only fuels that are available are oxygenated fuels. Oxy- NOTE: genated fuels which meet the mini- • To help clean the air, Suzuki rec- mum octane requirement and the ommends that you use oxygen- requirements described below may ated fuels.
- Page 12 API: American Petroleum Institute tion as follows. JASO: Japanese Automobile Stan- dards Organization SAE Engine Oil Viscosity Suzuki recommends the use of SAE 10W-40 engine oil. If SAE 10W-40 engine oil is not available, select an alternative according to the following chart.
-
Page 14: Controls, Equipment And Adjustments
CONTROLS, EQUIPMENT AND ADJUSTMENTS LOCATION OF PARTS .................2-2 KEY .......................2-5 IGNITION SWITCH ..................2-5 INDICATOR LIGHTS ..................2-6 REVERSE LEVER ..................2-6 GEARSHIFT LEVER ..................2-7 LEFT HANDLEBAR ..................2-7 CHOKE LEVER .....................2-8 RIGHT HANDLEBAR ..................2-9 THROTTLE LIMITER ..................2-9 CHOKE LIMITER KNOB ................2-10 REAR BRAKE PEDAL ................2-10 PARKING BRAKE LOCK LEVER ..............2-10 FUEL VALVE ....................2-11 FUEL TANK CAP ..................2-12... -
Page 15: Location Of Parts
CONTROLS, EQUIPMENT AND ADJUSTMENTS LOCATION OF PARTS 1 Left handlebar switches 2 Choke lever 3 Indicator lights 4 Ignition switch 5 Throttle lever 6 Front brake lever 7 Reverse lever 8 Fuel tank cap... - Page 16 9 Battery 0 Fuse A Fuel valve B Throttle stop screw C Cam chain tensioner D Tools E Seat lock F Gearshift lever G Footrests...
- Page 17 H Air cleaner I Engine oil filler cap J Choke limiter knob K Spark plug L Parking brake lever M Engine oil inspection window N Rear brake pedal O Engine oil drain plug P Engine oil filter...
-
Page 18: Key
IGNITION SWITCH WARNING Indicates a potential hazard that could result in injury or death. The ignition switch has three posi- tions. “OFF” position All electrical circuits are cut off. The engine will not start. The key can be removed. Two keys come with this vehicle. Keep “ON”... -
Page 19: Indicator Lights
INDICATOR LIGHTS REVERSE LEVER Neutral Indicator 1 This vehicle has a reverse gear. To A green light will come on when the shift into reverse gear, completely transmission is in neutral. The light stop the vehicle and shift the trans- will go out when you shift into any mission into neutral. -
Page 20: Gearshift Lever
GEARSHIFT LEVER LEFT HANDLEBAR Dimmer Switch 1 Use the dimmer switch to select the high or low headlight beam when the ignition switch is in the “LIGHTS” position. When you move the dimmer switch to the “HI” position, the high beam will light. -
Page 21: Choke Lever
CHOKE LEVER CAUTION Engaging the starter motor for more than five seconds at a time can damage the ATV. The starter motor and wiring har- ness may overheat. If the engine does not start after several attempts, check the fuel supply and ignition system. -
Page 22: Right Handlebar
RIGHT HANDLEBAR THROTTLE LIMITER Front Brake Lever 1 Use the throttle limiter to restrict max- Apply the front brake by squeezing imum engine power by limiting throttle the front brake lever towards the grip. lever travel. Adjust this limiter accord- ing to the rider’s skill and experience. -
Page 23: Choke Limiter Knob
CHOKE LIMITER KNOB PARKING BRAKE LOCK LEVER The carburetor of this vehicle has a choke limiter knob for two step choke control. Moving the choke lever to the ENGAGE position with the limiter knob pushed in provides a half choke condition. -
Page 24: Fuel Valve
FUEL VALVE “ON” position The normal operating position for the fuel valve is the “ON” position. In this position, fuel will flow to the carbure- tor. “RES” (RESERVE) position If the fuel level in the fuel tank becomes too low for the engine to operate with the fuel valve in the “ON”... -
Page 25: Fuel Tank Cap
FUEL TANK CAP WARNING Overfilling the fuel tank can be hazardous. If you overfill the fuel tank, fuel may overflow when it expands. Fuel expands due to engine heat or heating by the sun. Fuel that overflows can catch fire. Stop adding fuel when the fuel To open the fuel tank cap, remove the level reaches the bottom of the... -
Page 26: Seat Lock
SEAT LOCK COMPARTMENT BOX The compartment box is provided under the seat. To remove the com- partment box cover, unhook the com- partment box cover by pulling it rearward and move it forward. To install the compartment box cover, insert the rear hooks into the retainers and then insert the front hooks into the retainer. -
Page 27: Rear Suspension Adjustment
REAR SUSPENSION ADJUSTMENT The rear suspension spring has five adjustable pre-load positions. change the spring pre-load setting, place the vehicle on level ground and lock the parking brake. Using the spring pre-load adjuster provided in your tool kit, adjust the spring pre- load. -
Page 28: Riding Your Atv
RIDING YOUR ATV WHAT YOU SHOULD KNOW BEFORE RIDING ..........3-2 INSPECTION BEFORE RIDING ................3-3 WHAT TO WEAR ....................3-5 BREAK-IN ......................3-6 STARTING THE ENGINE ..................3-7 STARTING OFF AND SHIFTING ................ 3-8 BRAKING ......................3-13 TURNING ......................3-13 SKIDDING OR SLIDING .................. -
Page 29: What You Should Know Before Riding
Never consume alcohol or drugs by Suzuki. You should regularly before or while riding this ATV. practice the skills learned in the course and the operating tech- niques described in this owner’s... -
Page 30: Inspection Before Riding
Before you begin riding, you should INSPECTION BEFORE RIDING find a good place to practice the skills WARNING you need to ride safely. Find a flat, open area with enough space to prac- tice new skills. Failure to inspect the ATV before operating it can be hazardous. - Page 31 Check the condition of the ATV to WARNING help make sure that you do not have mechanical problems, or you might Operating this ATV with improper get stranded somewhere when you modifications can be hazardous. ride. Before riding the ATV, be sure to check the following items.
-
Page 32: What To Wear
WHAT TO WEAR WHAT TO CHECK FOR CHECK WARNING Steering • Smoothness • No restriction of movement Operating this ATV without wear- • No play or looseness ing an approved motorcycle hel- Brakes • Proper pedal and lever play met, eye protection and protective •... -
Page 33: Break-In
A helmet is the most important piece BREAK-IN of gear you should wear. A helmet The first month is the most important can help prevent a serious head in the life of your vehicle. Proper oper- injury. Choose a helmet that fits ation during this break-in period will snugly. -
Page 34: Starting The Engine
Observe Your Initial and Most STARTING THE ENGINE Critical Service Before attempting to start the engine, The initial service (break-in mainte- make sure to follow these steps. nance) is the most important service 1. Set the parking brake. your vehicle will receive. During 2. -
Page 35: Starting Off And Shifting
When the Engine is Warm: STARTING OFF AND SHIFTING Use of the carburetor choke should WARNING not be necessary. Open the throttle slightly and push the electric starter button. Carrying a passenger on this ATV can be hazardous. CAUTION Carrying a passenger can greatly reduce your ability to balance and Engaging the starter motor for steer this ATV. - Page 36 WARNING WARNING Operating this ATV on paved sur- Operating this ATV on public faces, including sidewalks, paths, streets, roads or highways can be parking lots, driveways, hazardous. streets can be hazardous. You can collide with another vehi- ATV tires are designed for off– cle if you ride on public roads.
- Page 37 WARNING WARNING Operating this ATV at excessive Removing your hands from the speeds can be hazardous. handlebars or feet from the foot- rests during operation can be haz- Riding excessive speeds ardous. increases your chances of losing control of the ATV, which can If you remove even one hand or result in an accident.
- Page 38 WARNING WARNING Failure to use extra care when Failure to use extra care when operating on excessively rough, operating this ATV on unfamiliar slippery, or loose terrain can be terrain can be hazardous. hazardous. You can come upon hidden rocks, Failure to use extra care can bumps, or holes, without enough cause loss of traction or vehicle...
- Page 39 WARNING WARNING The ATV can start moving as soon Opening the throttle suddenly can as you release the parking brake. be hazardous. Unexpected movement can cause The front wheels can lift off the you to lose control of the ATV. ground and cause loss of control of the ATV.
-
Page 40: Braking
BRAKING TURNING To stop the LT-F160, first release the WARNING throttle lever. Next, apply the front and rear brakes evenly and at the same Turning the ATV improperly can time. As vehicle speed decreases, be hazardous. shift down through the gears. If you turn the ATV improperly, it WARNING may cause a collision or overturn. -
Page 41: Skidding Or Sliding
To turn the LT-F160, use the following SKIDDING OR SLIDING technique: WARNING • Move your body weight forward and to the inside of the turn. • Turn the handlebars in the direc- Skidding or sliding improperly can tion of the turn. be hazardous. -
Page 42: Operation On Hills
OPERATION ON HILLS Climbing a Hill WARNING WARNING Climbing hills improperly can be Operating this ATV on excessively hazardous. steep hills can be hazardous. Climbing hills improperly can The ATV can overturn more easily cause loss of control or cause the on extremely steep hills than on ATV to overturn. - Page 43 To climb a hill with the LT-F160, follow WARNING the directions below. 1. Speed up and maintain a steady Stalling, rolling backwards or speed before reaching the bottom improperly dismounting the ATV of the hill. Shift down to increase while climbing a hill can be haz- approach speed, if necessary.
- Page 44 If you lose forward movement, or Descending a Hill begin to roll backwards, follow these WARNING instructions. 1. Lean farther forward, uphill. Going down a hill improperly can 2. Apply the front brake to stop the be hazardous. ATV. Never apply the rear brake if the vehicle has begun to roll back- Going down a hill improperly can wards.
-
Page 45: Riding Over Obstacles
Traversing a Slope RIDING OVER OBSTACLES WARNING WARNING Crossing hills or turning on hills Improperly operating this ATV improperly can be hazardous. over obstacles can be hazardous. Crossing hills or turning on hills Improperly crossing obstacles improperly can cause loss of con- can cause loss of control or a col- trol or cause the ATV to overturn. -
Page 46: Riding Through Water
If you come to an obstacle that you RIDING THROUGH WATER cannot avoid, you may be able to WARNING cross over it using the following pro- cedure. Operating this ATV through deep 1. With the obstacle straight in front or fast flowing water can be haz- of you, approach at walking ardous. -
Page 47: Riding In Cold Weather
After repeated operation of the the ATV to a warmer area to thaw out ATV in these conditions, bring it the brakes. to your Suzuki dealer to have the brakes inspected and cleaned. CAUTION Use of an automotive-size battery RIDING IN COLD WEATHER to jump-start an ATV can damage the ATV. - Page 48 If the where your body’s inner tempera- brakes do not regain full stopping ture drops low enough to cause power, have your local Suzuki dealer injury or death. check them before you continue riding your ATV.
- Page 49 We strongly recommend that if you do Riding Your ATV on Snow and Ice any cold-weather riding, you familiar- WARNING ize yourself with the symptoms, treat- ment, and prevention of hypothermia. Riding on snow-covered terrain Information is available at libraries without care can be hazardous.
-
Page 50: Riding In Reverse
RIDING IN REVERSE WARNING WARNING Failure to use extra care when operating on slippery surfaces Improperly riding this ATV in such as hard-packed snow and ice reverse can be hazardous. can be hazardous. You could hit an obstacle or per- Failure to use extra care can son behind you, resulting in seri- cause loss of traction or loss of... - Page 51 WARNING Sudden application of the throttle or making abrupt turns in reverse gear can be hazardous. Throttle surges or abrupt turns could cause you to lose control of the ATV. When you ride in reverse, go slowly and turn carefully. WARNING Indicates a potential hazard that could result in injury or death.
-
Page 52: Accessory Use And Vehicle Loading
ACCESSORY USE AND VEHICLE LOADING ACCESSORY USE AND VEHICLE LOADING ........... 4-2... - Page 53 Use caution when choosing and designed for use on this ATV. installing accessories for your Suzuki. Install and use them according to Your Suzuki dealer may be able to their instructions. If you have any help you choose accessories and questions, contact your Suzuki install them correctly.
- Page 54 Accessory Use and Vehicle Loading 7. Secure your load well. Shifting Guidelines. weight can affect your ability to 1. The combined weight of the rider, handle the vehicle safely. gear, trailer tongue weight and 8. Ride at slow speeds and avoid any accessories or cargo must hills when carrying cargo.
-
Page 56: Inspection And Maintenance
INSPECTION AND MAINTENANCE MAINTENANCE SCHEDULE ................5-2 TOOLS ......................... 5-4 BATTERY ......................5-4 CAMSHAFT DRIVE CHAIN ................. 5-6 SPARK PLUG ...................... 5-7 IDLE SPEED ADJUSTMENT ................5-8 THROTTLE CABLE ADJUSTMENT ..............5-9 CHOKE CABLE ADJUSTMENT ............... 5-10 FUEL HOSE ....................... 5-10 ENGINE OIL ....................... -
Page 57: Maintenance Schedule
INSPECTION AND MAINTENANCE WARNING Indicates a potential hazard that could result in injury or death. MAINTENANCE SCHEDULE Perform maintenance according to odometer reading or time interval, which- ever comes first. Initial 100 miles Every 600 miles Every 1200 miles Interval (200 km) (1000 km) (2000 km) - Page 58 Perform maintenance more often than shown in the chart. If you Keep your ATV in good condition. have any questions regarding Ask your Suzuki dealer or a quali- maintenance intervals, consult fied mechanic to do the mainte- your Suzuki dealer or a qualified nance items marked with an mechanic.
-
Page 59: Tools
TOOLS BATTERY The battery is located under the cover A tool kit is provided with your ATV. 1. Loosen two screws 2 and remove It is located under the seat. the cover 1. The level of the battery acid must be kept between UPPER... - Page 60 WARNING CAUTION Battery acid is hazardous. Exceeding the standard charging rate for the ATV battery can harm Battery acid will burn if it contacts your ATV. eyes, skin or clothing. If you charge the battery at a rate If battery acid gets in eyes or too high, it will decrease the bat- comes in contact with skin, flush tery life.
-
Page 61: Camshaft Drive Chain
CAMSHAFT DRIVE CHAIN The camshaft drive chain is main- tained at the proper tension by a ten- FRONT sioner. To prevent chain noise and to maintain proper valve timing, the ten- sioner must be adjusted periodically. To adjust the cam chain tensioner: 1. -
Page 62: Spark Plug
Use one of the spark plugs listed Improper installation of the spark below or equivalents. Consult plug can damage your ATV. your Suzuki dealer if you are not sure which spark plug is correct An overly tight or cross threaded for your type of vehicle usage. -
Page 63: Idle Speed Adjustment
To adjust the idle speed properly, you need a tachometer. If you do not have Dirt can damage your ATV if it one, ask your Suzuki dealer or a qual- enters an open spark plug hole. ified mechanic to perform this adjust- ment. -
Page 64: Throttle Cable Adjustment
THROTTLE CABLE ADJUSTMENT WARNING Operating the vehicle with an inadequate throttle cable play can be hazardous. Inadequate throttle cable play can cause engine speed to rise sud- denly when you turn the handle- bars. This can lead to loss of rider control. -
Page 65: Choke Cable Adjustment
CHOKE CABLE ADJUSTMENT FUEL HOSE Replace the fuel hose every 4 years, even if it appears to be in good condi- tion. 1.0 – 5.0 mm 1.0 – 5.0 mm To adjust the choke cable play: 1. Loosen the lock nut 1. 2. -
Page 66: Engine Oil
ENGINE OIL ENGINE OIL AND FILTER CHANGE Change the engine oil and oil filter at the scheduled times. The engine should always be warm when the oil is changed so the oil will drain easily. The procedure is as follows: 1. - Page 67 WARNING New and used oil can be hazard- ous. Children and pets may be harmed by swallowing new or used oil. Repeated, prolonged contact with used engine oil may cause skin cancer. Brief contact with used oil may irritate skin. Keep new and used oil and used oil filters away from children and pets.
- Page 68 No oil flow will result if the ele- use oil that does not meet ment inserted backwards. Suzuki’s specifications. Engine damage will occur from no oil flow. Be sure to use the oil specified in the FUEL AND OIL RECOMMEN- Be sure to insert the open end of DATION section.
-
Page 69: Air Cleaner
AIR CLEANER CAUTION The air cleaner element must be kept clean to provide good engine power Failure to inspect the air cleaner and gas mileage. If you use your vehi- element frequently if the vehicle is cle under normal, low-stress condi- used in dusty, wet, or muddy con- tions, you should service the air ditions can damage your ATV. - Page 70 Removing the Element Washing the Element Wash the element as follows: 1. Fill a wash pan larger than the ele- ment with a non-flammable clean- ing solvent A. Dip the element in the solvent and wash it. 2. Squeeze the element by pressing it between the palms of both hands to remove excess solvent.
-
Page 71: Air Cleaner Drain Tubes
AIR CLEANER DRAIN TUBES CORRECT INCORRECT 7. Reinstall the cleaned element in reverse order of removal. Be sure Periodically check the drain tubes that the element is securely in shown by the arrow to see if any gas- position and is properly sealed. oline or oil has accumulated. -
Page 72: Drive Chain
• Kinked or binding links We recommend that you take your • Excessive wear vehicle to an authorized Suzuki • Improper chain adjustment dealer if the drive chain needs replac- ing. If you find anything wrong with the... -
Page 73: Drive Chain Cleaning And Oiling
Keep cant. children and pets away from kero- sene. Dispose of used kerosene Use Suzuki chain lube or an equiv- properly. alent chain lubricant that is specif- ically intended for use on “O”-ring chains. -
Page 74: Drive Chain Adjustment
DRIVE CHAIN ADJUSTMENT To adjust the drive chain, follow the procedure below. 20 – 30 mm Inspect the drive chain slack before each use of the vehicle. The drive chain should be adjusted for 20 – 30 mm (0.8 – 1.2 in) of slack, as shown. WARNING Failure to inspect the drive chain slack before each use of the vehi-... -
Page 75: Tires
TIRES Tire Tread Condition The LT-F160 is equipped with low pressure tubeless tires of the size and type listed below: 4.0 mm Front Rear Size AT20 × 7-8✩ AT22 × 10-8✩ Type GOLDEN BOY GOLDEN BOY WARNING Operating this ATV with improper tires, or with improper or uneven WARNING tire pressure can be hazardous. - Page 76 Have this work done by cle. Improper air pressure can affect your Suzuki dealer or a qualified tire handling, steering response, traction, repair station. tire life and rider comfort. Be sure that...
-
Page 77: Brakes
Tubeless Tire Repair BRAKES Should a leak or flat tire occur due to The LT-F160 has front and rear drum a puncture, the tire may be repaired brakes. using a plug type patch. If the dam- age is from a cut, or if the puncture WARNING cannot be repaired using a plug, the tire should be replaced. - Page 78 Front Brake Adjustment Check the front brakes for proper operation every time before riding. If necessary, adjust the front brakes as follows: 1. Place the vehicle on a level sur- face.Lift the front end of the vehi- cle and place a solid object, such as a wooden block, securely under the frame.
- Page 79 Rear Brake Pedal/Parking Brake Adjustment 20 – 30 mm 20 – 30 mm WARNING Failure to adjust the front brake lever and rear brake pedal clear- ances properly can lead to an accident or damage your ATV. • If there is too much clearance, the brakes may not stop the ATV when you use them.
- Page 80 2. While fully applying the brake, check to see that the extension line of the index mark is within the range. 3. If the extension line is outside this range, have the brake replaced by your Suzuki dealer or a qualified mechanic. 5-25...
-
Page 81: Front And Rear Wheel Removal
4. Remove the wheel nuts. not know how to use one, ask 5. Remove the wheel. To reinstall the your Suzuki dealer or a qualified wheel, reverse these steps. Use mechanic to check the nuts. the tightening torque chart to determine the tightness of the wheel nuts. -
Page 82: Spark Arrester
SPARK ARRESTER WARNING The muffler has a spark arrester which must be periodically cleaned to Running your ATV indoors where maintain good efficiency. At the inter- there is little or no ventilation can vals shown in the maintenance chart, be hazardous. clean the spark arrester as follows: When breathed in, exhaust gases WARNING... -
Page 83: Light Bulb Replacement
LIGHT BULB REPLACEMENT HEADLIGHT The wattage rating of each bulb is To replace the headlight bulb, use the shown in the following chart. When following procedure: replacing a burned-out bulb, always use the same wattage rating. Headlight 12V 45/45W Brake light/Taillight 12V 21/5W CAUTION Failure to use a light bulb with the... -
Page 84: Headlight Beam Adjustment
HEADLIGHT BEAM ADJUSTMENT The headlight beam can be adjusted vertically, if the beam is too high or too low. 4. Push in on the bulb, twist it to the left, and pull it off. 5. Grasp the replacement bulb with a clean cloth. -
Page 85: Brake Light/Taillight
If the screws are too tight, the lens If the new fuse blows in a short may crack. time, consult your Suzuki dealer or a qualified mechanic immedi- Tighten the lens screws only until ately. -
Page 86: General Lubrication
Be sure that all lubrica- tion is performed during periodic maintenance on the vehicle. Increase intervals when you use your ATV in severe conditions. Your Suzuki dealer or a qualified mechanic should do general lubrication as shown in the MAINTENANCE CHART. -
Page 87: Trailer Towing
Gross Trailer Weight. You can do this rear wheels. We strongly advise you by placing about 60% of the total to use a genuine Suzuki trailer or an cargo weight in the front half of the equivalent ATV trailer. trailer. Make sure the cargo weight is even between the left and right sides of the trailer. - Page 88 WARNING WARNING Overloading your trailer can be Allowing cargo to shift in a trailer hazardous. while moving can be hazardous. An overloaded trailer can affect Cargo weight shifting while mov- the handling of the ATV. ing can affect your ability to han- dle the ATV safely.
-
Page 90: Troubleshooting
TROUBLESHOOTING FUEL SYSTEM CHECK ................6-2 IGNITION SYSTEM CHECK .................6-3... - Page 91 Such damage may not be covered under warranty. If you are not sure about the proper action, consult your Suzuki b. Loosen the drain screw which is dealer about the problem. located under the carburetor.
- Page 92 1600 r/min. push the starter button. If the igni- tion system is operating properly, a blue spark should jump across the spark plug gap. If there is no spark, take your machine to your Suzuki dealer or a qualified mechanic.
-
Page 94: Preparation For Winter Riding
PREPARATION FOR WINTER RIDING ENGINE OIL CHANGE ..................7-2 CHECKING CHOKE LIMITER POSITION ............7-2... - Page 95 PREPARATION FOR WINTER RIDING Use of some engine oils in cold weather may make the engine hard to start. It may also cause clutch drag stiff transmission operation. Select the right oil for cold weather according to the chart in the FUEL AND OIL RECOMMENDATION sec- tion.
-
Page 96: Transporting
TRANSPORTING STARTING THE LT-F160 AFTER TRANSPORT ..........8-3... - Page 97 TRANSPORTING WARNING It is best to transport the LT-F160 in Spilled battery acid can be hazard- the normal position. It may also be ous. transported on its back wheels, but this is not as stable as the normal Battery acid is corrosive and position.
- Page 98 CAUTION Failure to properly secure the ATV when transporting it can be haz- ardous. Failure to properly secure the vehicle may result in an accident or damage to the vehicle. When transporting the LT-F160, lock the parking brake lever and tie down the vehicle securely with straps, rope, or some other suit- able means.
-
Page 100: Cleaning Procedure And Storage Procedure
CLEANING PROCEDURE AND STORAGE PROCEDURE PREPARATION FOR CLEANING ............... 9-2 WASHING YOUR ATV ..................9-3 INSPECTION AFTER CLEANING ............... 9-3 STORAGE PROCEDURE ..................9-4 MAINTENANCE DURING STORAGE ..............9-4 PROCEDURE FOR RETURNING TO SERVICE ..........9-5... -
Page 101: Preparation For Cleaning
PREPARATION FOR CLEANING CLEANING PROCEDURE Wash the ATV before any mud dries AND STORAGE on the ATV. PROCEDURE Block or seal the end or the exhaust A thorough cleaning of your ATV is a pipe (muffler) using a piece of plastic necessary part of maintenance and wrap, cloth rag or another method to will help keep your ATV looking and... -
Page 102: Washing Your Atv
WASHING YOUR ATV INSPECTION AFTER CLEANING With some care, your ATV can be Remove the rags or wrapping from washed in a similar manner to wash- the exhaust pipe. Check the drain ing an automobile. tubes on the bottom of the air filter box and drain any water that has col- NOTE: Avoid spraying or allowing lected in them. -
Page 103: Storage Procedure
For spread the oil in the cylinder. this reason, Suzuki recommends that you trust this maintenance work to your dealer. If you wish to service the BATTERY machine for storage yourself, follow 1. -
Page 104: Procedure For Returning To Service
PROCEDURE FOR RETURNING TO SERVICE 1. Clean the entire vehicle. 2. Drain all the engine oil. Install a new oil filter and fill the engine with fresh oil as outlined in this manual. 3. Reinstall the battery. 4. Remove the spark plug. Turn the engine a few times by pushing the electric starter button. -
Page 106: Consumer Information
CONSUMER INFORMATION SERIAL NUMBER LOCATION ..............10-2 LOCATION OF LABELS ................10-2 10-1... - Page 107 ATV. You also need can get a replacement by contacting these numbers to help your dealer your Suzuki dealer. when you order parts. The frame number 1 is stamped on the left side of the frame as shown in the photograph.
- Page 108 WARNING Improper tire pressure or overloading can cause loss of control. Loss of control can result in severe injury of death. ALWAYS maintain proper tire pressure as shown below. NEVER exceed the Vehicle Load Capacity of 285 lbs (130 kg). LOAD COLD TIRE PRESSURE UP TO 285 lbs...
- Page 109 10-4...
-
Page 111: Specifications
SPECIFICATIONS DIMENSIONS AND DRY MASS Overall length ..........1670 mm (65.7 in) Overall width............ 985 mm (38.8 in) Overall height ..........1000 mm (39.4 in) Wheelbase ............1070 mm (42.1 in) Ground clearance..........135 mm (5.3 in) Front track ............730 mm (28.7 in) Rear track ............ - Page 112 ELECTRICAL Ignition type .............Electronic ignition (CDI) Spark plug ............NGK DPR7EA-9 or DENSO X22EPR-U9 Battery.............12V 32.4 kC(9 Ah)/10HR Generator ............Three-phase A.C. generator Fuse ..............15A Headlight ............12V 45/45W Brake light/Taillight...........12V 21/5W Neutral indicator light........12V 3.4W Reverse indicator light ........12V 3.4W CAPACITIES Fuel tank, including reserve ......8.5 L (2.2/1.9 US/lmp gal) reserve ......1.1 L (0.3/0.2 US/lmp gal) Engine oil, oil change ........1500 ml (1.6/1.3 US/lmp qt) with filter change ......1700 ml (1.8/1.5 US/lmp qt)
- Page 113 INDEX ACCESSORY USE AND VEHICLE FLAG BRACKET ......2-14 LOADING......... 4-2 FRONT AND REAR WHEEL AIR CLEANER....... 5-14 REMOVAL ........5-26 AIR CLEANER DRAIN TUBES..5-16 FUEL..........1-2 FUEL HOSE ........5-10 FUEL SYSTEM CHECK ....6-2 FUEL TANK CAP......2-12 BATTERY ........
- Page 114 LEFT HANDLEBAR ......2-7 SEAT LOCK........2-13 LIGHT BULB REPLACEMENT..5-28 SERIAL NUMBER LOCATION ..10-2 LOCATION OF LABELS....10-2 SKIDDING OR SLIDING....3-14 LOCATION OF PARTS ....2-2 SPARK ARRESTER ...... 5-27 SPARK PLUG........5-7 STARTING OFF AND SHIFTING ..3-8 STARTING THE ENGINE....
Need help?
Do you have a question about the LT-F160 2006 and is the answer not in the manual?
Questions and answers