Advertisement
Quick Links
Assembly Instruction
Item No. : HF170192
SKU No. : 810392478
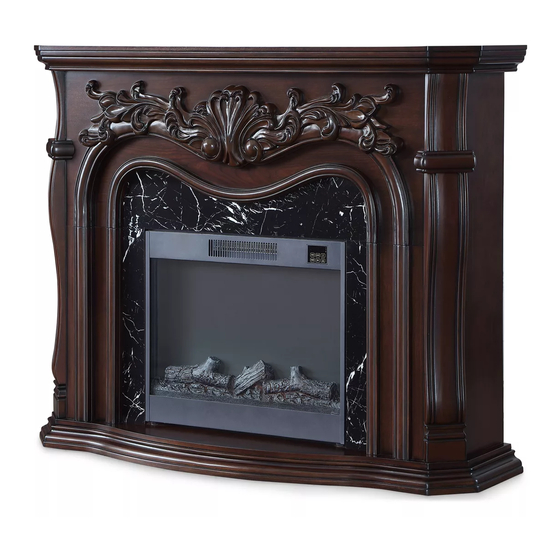
Description: 48IN CHERRY CORNER FIREPLACE
Option A
Option B
To prevent serious injury or death, this product is equipped with a wall anchoring
system. Before this product can be used, the wall anchoring system must be
installed as directed in the assembly instructions.
Clean with a dry soft rag.
For spare parts, please contact Homestar Customer Care
Tel: 1-855-837-2569
E-Mail: Customer@homestarna.com
Page 1 of 10
Advertisement

Related Manuals for Big Lots HF170192


Summary of Contents for Big Lots HF170192
- Page 1 Assembly Instruction Item No. : HF170192 SKU No. : 810392478 Description: 48IN CHERRY CORNER FIREPLACE Option A Option B To prevent serious injury or death, this product is equipped with a wall anchoring system. Before this product can be used, the wall anchoring system must be installed as directed in the assembly instructions.
- Page 2 Tools Required Box (Not included) (Included) Allen Key Screwdriver 16pcs 16pcs 16pcs 9pcs 8pcs 2pcs Page 2 of 10...
- Page 3 STEP1 Insert the wood dowel (part E) to the ouside hole of base panel (part 1) first. Attach side panels (part 2) and (part 3) to base panel (part 1) using bolts (part A), spring washer (part B) and flat washer (part C) by Allen Key as shown in the diagram.
- Page 4 STEP3 Attach front panel (part 4) to side panels (part 2) and (part 3) using bolts (part A), spring washer (part B) and flat washer (part C) by Allen Key as shown in the diagram. Fully tighten all bolts in this step. STEP4 Insert the wood dowel (part E) to the ouside hole of side panel...
- Page 5 STEP5 Please refer to Insert manual to assembly the insert trims first as below on page E-3. STEP6-A Option A: Using on flat wall Attach support foot (part 6) to base panel (part 1) using bolts (part A), spring washer (part B) and flat washer (part C) by Allen Key as shown in the diagram.
- Page 6 STEP7-A Please make sure the insert trims have been assembly first. Then carefully slide the firebox into the completed Mantel and center in the opening. Page 6 of 10...
-
Page 7: Installation Instructions
STEP8-A Securing the firebox to the mantel by using six Screws (Z) as insert manual. INSTALLATION INSTRUCTIONS: This Tip Restraint should be attached to a wall stud where possible. If Placement does not align with a wall stud, the plastic wall anchor must be used. 1. - Page 8 Option B: Using on corner wall STEP6-B Please make sure the insert trims have been assembly first. Then carefully slide the firebox into the completed Mantel and center in the opening. STEP7-B Securing the firebox to the mantel by using six screws (Z) as insert manual. Attach support panel (part 7) to base panel (part 1) using bolts (part A), spring washer (part B) and flat...
- Page 9 STEP8-B Attach support panel (part 7) to top triangle panel (part 8) using bolts (part A), spring washer (part B) and flat washer (part C) by Allen Key as shown in the diagram. Fully tighten all bolts in this step. STEP9-B Attach top panel (part 5) to top triangle panel (part 8)
- Page 10 STEP10-B INSTALLATION INSTRUCTIONS: This Tip Restraint should be attached to a wall stud where possible. If Placement does not align with a wall stud, the plastic wall anchor must be used. 1. Using the 5/8” screw provided, attach the bracket to the top wood panel of the mantel inserting the screw through the smaller hole in the bracket.
Need help?
Do you have a question about the HF170192 and is the answer not in the manual?
Questions and answers