Advertisement
PLEASE FOLLOW THE ASSEMBLY INSTRUCTIONS
CLOSELY. IMPROPER ASSEMBLY OR INSTALLATION
CAN RESULT IN PERSONAL OR PROPERTY DAMAGE.
IF YOU ARE UNSURE ABOUT WHAT MOUNTING
METHOD YOU SHOULD USE, CONSULT A QUALIFIED
PROFESSIONAL OR YOUR LOCAL HARDWARE STORE.
PARTS ENCLOSED:
(A) Head
(B) Rod
(C) Hex nut
(D) Friction lock
(E) Stand
(F) Pin
(G) Wing nut
(H) Wheels
(I) Light bulb
(J) Bulb cover
(K) Knurled screw
(L ) Cone
(M) Electrical cable
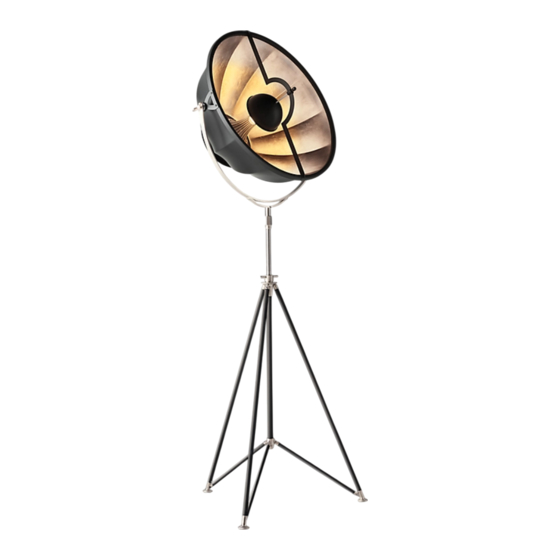
F O R T U N Y ® S T U D I O 7 6 T R I P O D F L O O R L A M P
(I)
(K)
(J)
(C)
(B)
(D)
(E)
(H)
Page 1 of 4
SIDE
(A)
(L)
(G)
(M)
(F)
FRONT
(J)
(K)
(G)
Advertisement
Table of Contents

Subscribe to Our Youtube Channel
Summary of Contents for RH FORTUNY STUDIO 76
- Page 1 F O R T U N Y ® S T U D I O 7 6 T R I P O D F L O O R L A M P PLEASE FOLLOW THE ASSEMBLY INSTRUCTIONS CLOSELY. IMPROPER ASSEMBLY OR INSTALLATION CAN RESULT IN PERSONAL OR PROPERTY DAMAGE.
- Page 2 F O R T U N Y S T U D I O 7 6 ASSEMBLY & INSTALLATION: 1. Unscrew hex nut (C) from head (A). 2. Insert rod (B) into hex nut (C) (as you can see in the figure). Open the tripod stand (E) and unscrew the friction lock (D).
- Page 3 F O R T U N Y S T U D I O 7 6 IMPORTANT PLEASE READ To tilt head, loosen the wing nuts (G), select the prefered position of the head, then tight the wing nuts (G). To extend rod (B) unscrew friction lock (D), lift head to the prefered position, then screw friction lock (D).
- Page 4 F O R T U N Y S T U D I O 7 6 IMPORTANT PLEASE READ To replace the bulb, unscrew (K) by hand and pull gently bulb cover (J). Screw the light bulb (max 15W LED E26 dimmable). STUDIO 76 come with crossbar and black bulb cover as shown in the drawing.
- Page 5 F O R T U N Y S T U D I O 7 6 TECHNICAL PRODUCT SHEET: A. diffuser diameter ......... 29 1/4 in. (cm 75) B. standard height ........... 85 3/4 in. (cm 220) minimum ............82 in. (cm 210) maximum .............


Need help?
Do you have a question about the FORTUNY STUDIO 76 and is the answer not in the manual?
Questions and answers