
Summary of Contents for Severn Trent Capital Controls CI1000B
- Page 1 ® Capital Controls Cl1000B Bufferless Residual Analyser 90-1024 Operation and Maintenance Manual Part no: 04-1008-E Issue: Aug 2004 210.6350.9...
- Page 2 Severn Trent Water Purification, Inc. reserves the rights to make engineering refinements that may not be described herein. It is the responsibility of the installer to contact Severn Trent Water Purification, Inc. for information that cannot be answered specifically by these instructions.
-
Page 3: Table Of Contents
Table of Contents SAFETY ..............................4 1 INTRODUCTION ............................5 1.1 General Description........................5 1.2 Glossary............................5 1.3 Definitions ..........................5 1.4 Specifications ...........................6 1.5 Principle of Operation .......................7 1.6 Chlorine Chemistry .........................10 1.7 Galvanic Cell Theory ......................11 2 INSTALLATION .............................12 2.1 General ...........................12 2.2 Mounting ..........................13 2.3 Hydraulic Connections (Wall Panel Only) ................13 2.4 Electrical ..........................14 3 STARTUP...............................17... -
Page 4: Safety
The power source must have a fuse or circuit breaker, recommended rating: 2 Amp anti surge MCB. Severn Trent Services recommends that qualified personnel install and connect the instrument. Component replacement and internal adjustments must be made by qualified service personnel only. -
Page 5: Introduction
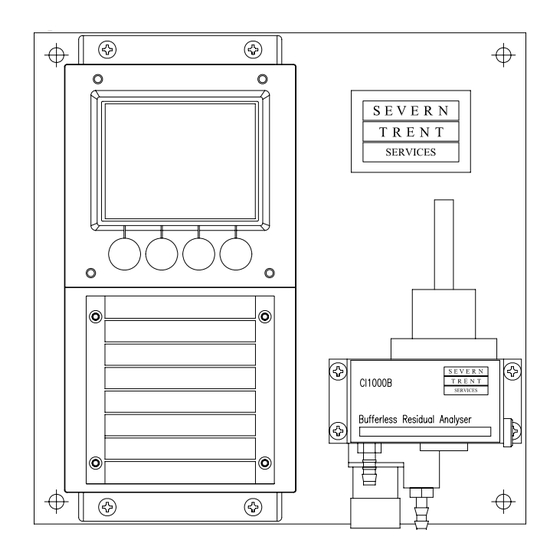
INTRODUCTION General Description ® The Capital Controls Cl1000B Residual Analyser is an amperometric instrument designed to continuously analyse residual levels of free chlorine or other oxidants in water, or aqueous liquids without the use of a buffer reagent. Glossary 1.2.1 Physical mg/l Milligrams per liter... -
Page 6: Specifications
Specifications 1.4.1 General Quality Standards: Severn Trent Water Purification Ltd is ISO 9001:2000 Certified Compliance: CE, UL (optional) Residual Measured: Free Chlorine Bromine Iodine (Consult Factory for other oxidants) Instrument Range: Automatic ranging from 0 - 60 (mg/l) Display: 4" x 3", dot-matrix, graphical display Data Logging: Up to 28 days;... -
Page 7: Principle Of Operation
1.4.4 Instrument Data: Electronics Enclosure: NEMA 4X Electrodes: Cathode (measuring) - Gold Anode (counter) - Copper Reference - Ag/AgCl reference electrode Shipping Weight: 22 lbs (10 kg) Dimensions: 12.9" (w) x 12.9" (h) x 7.7" (d) (330 mm x 330 mm x 195 mm) Principle of Operation A sample of liquid is delivered to the sample inlet chamber at an approximate rate of 150 ml/minute. -
Page 8: Flow Diagram
Figure 2 – Flow Diagram Figure 3 – Analyser Cell Assembly The surfaces of both electrodes in the sensing cell assembly are kept clean by the continuous action of PVC spheres agitated by a motor-driven rotating striker assembly. This constant cleaning minimizes signal drift and recalibration, and provides an accurate residual measurement. -
Page 9: Flow Cell Assembly
Figure 4 – Flow Cell Assembly The sample tap assembly (fig 4, 19) is an optional extra. -
Page 10: Chlorine Chemistry
Chlorine Chemistry As chlorine dissolves in water, hypochlorous acid (HOCl) and hydrochloric acid (HCl) are formed according to the following equation: O → HOCl + HCl Hypochlorous acid may be formed with the addition of hypochlorite [e.g. sodium hypochlorite (NaOCl) or calcium hypochlorite (Ca(OCl) )] to water. -
Page 11: Galvanic Cell Theory
Galvanic Cell Theory Water, in pure form, is relatively nonconductive, but addition of an ionizing species (e.g. salt) allows current to pass. The greater the concentration of ions in solution, the greater the conductance of the solution. If two electrodes are immersed in an ion containing solution, a chemical species capable of being reduced (gaining electrons) can move toward the cathode where electrons are transferred from the cathode to the reducible species, resulting in a cathodic current. -
Page 12: Installation
2 INSTALLATION General ® The Capital Controls Cl1000B Residual Analyser is designed for a multitude of applications. This instrument will provide unparalleled accuracy for drinking water, cooling water, beverage, industrial effluent, RO membrane, and process control applications or any application where highly accurate chlorine detection and control are necessary. -
Page 13: Mounting
Figure 8 – Dimensions Mounting 2.2.1 Wall Panel Dimensional drawings are given to aid installation and to determine the position of mounting holes. See Figure 8. Position the analyser panel on a wall at eye level and as close as possible to the sample source. -
Page 14: Electrical
2.3.2 Sample Line Taps Sample line taps into larger pipes should be installed to minimise the chances of air bubbles or sediment entering the analyser. A tap should project into the centre of the line. Refer to Figure 9. 2.3.3 Sample Flow A typical installation may require a sample pump if the pressure is low and/or a Y-strainer to remove any particulates. -
Page 15: Four Residual Analyser Sample System Examples
Figure 10 – Four (4) Residual Analyser Sample System Examples Connect the power wiring to terminals labeled L1, N and ground. Connect current output and alarm contacts. NOTE: The green relay terminal strips ‘snap’ out to allow more room for cable connection. -
Page 16: Wiring Diagram
Figure 11 – Wiring Diagram... -
Page 17: Startup
STARTUP Conditioning the Analyser WARNING: FAILURE TO DISCONNECT POWER TO THE Cl1000 RESIDUAL ANALYSER PRIOR TO ACCESSING THE INTERIOR OF THE ELECTRONICS ENCLOSURE MAY RESULT IN SERIOUS PERSONAL HAZARD FROM EXPOSURE TO LETHAL VOLTAGES. 3.1.1 Remove the soaker teat from the measuring end of the electrode and place the reference electrode in the reference electrode reservoir (See Figure 2). -
Page 18: 3.3 Set Up
previous screen. At factory default, the software is programmed to automatically return to the main screen after 60 minutes without user interface. 3.2.1 Main Screen The Main Screen is the default screen for viewing the residual value in digital format. The residual value appears on the screen in four (4) x 1-inch high digits and a decimal;... - Page 19 Screen Name Screen Function Notes Screen Timeout The software for the Cl1000 is If amperometric titration is being used to designed to return to the digital display confirm calibration of the instrument, the on the main screen after a period of screen timeout should be set at 60 minutes inactivity when the user is in any of the to allow time for the calibration results.
- Page 20 Screen Name Screen Function Notes mA Output B The value of mA Output Signal B can Function be configured for 4-20 mA, 0-20 mA, or 0-10 mA under this screen mA Output B Low The residual value for the low mA Setting setpoint for Output B is configured from this screen.
- Page 21 Screen Name Screen Function Notes Relay 5 Value If Relay 5 is configured for a ‘high’ or ‘low’ alarm, the residual value to activate the alarm indication is adjusted from this screen Relay 6 Status Relay 6 can be configured for high, low, attention or fail, or can be turned Relay 6 Value If Relay 6 is configured for a ‘high’...
- Page 22 Screen Name Screen Function Notes Communications Under this screen selection, the user configures the serial device, serial settings, and modem settings Device Under this screen selection, the user configures the mode of external communication, the type of communication device, and the frequency that results are printed or communicated to the external device External Mode...
- Page 23 Screen Name Screen Function Notes Protocol From this screen, the user configures the serial communication protocol to be RS232 or RS485 Modem Under this screen selection, the user configures commands for the operation of the Modem and enters the number to dial for modem access Command From this screen, the user...
- Page 24 Contrast adjustment From the Screen menu, use the [↑] and [↓] keys to move through the selection options. Stop when the double outline surrounds the ‘Contrast’ selection. Press the [Select] key. Use the [↑] and [↓] keys to increase or decrease the screen contrast. Press the [ ] key once the contrast is adjusted to save the screen modification and return to the previous screen.
- Page 25 Press the [ ] key once the time is adjusted to save the screen modification and return to the previous screen. Press the [Restore] key to restore the previous time settings. Date adjustment From the Date menu, use the [↑] and [↓] keys to move through the selection options.
- Page 26 Low milliamp setting Use the [→] and [↓] keys to move through the selection options. Stop when the double outline surrounds the low milliamp setting. Press the [Select] key. Use the [→] key to move through the digits and the [↑] key to increase the digit settings.
- Page 27 Press the [Select] key. Use the [→] key to move through the digits and the [↑] key to increase the digit settings. Press the [ ] key to save the screen modifications and return to the previous screen. Press the [Restore] key to restore the previous high milliamp setting.
- Page 28 Use the [→] key to move through the digits and the [↑] key to increase the digit settings. Press the [ ] key to save the screen modifications and return to the previous screen. Press the [Restore] key to restore the previous delay settings.
- Page 29 Press the [ ] key to save the screen modifications and return to the previous screen. Press the [Restore] key to restore the previous set units. Temperature From the Units menu, use the [↑] and [↓] to move through the selection options.
-
Page 30: Calibration
Calibration Two-point manual residual calibration is required for the Cl1000B to achieve the accuracy indicated in the product specification. For the low calibration, a non-chlorinated sample water (taken from the process just upstream of chorine addition) may be used for the low/zero calibration to compensate for the composition of the background water. - Page 31 Screen Name Screen Function Notes Low Calibration This screen provides the current residual value. The low calibration must be Ready When ready to proceed, the user presses the done with non-chlorinated [Ready] key to freeze the residual measurement. sample water or sample water The user then takes a sample from the analyser with a low residual to inlet and performs an independent measurement...
- Page 32 When ready to proceed, press the [Ready] button to freeze the residual measurement and immediately take a grab sample from the inlet of the analyser. Measure the grab sample to confirm the sample residual. Use the [→] key on the analyser to move through the digits and the [↑] key to increase the digit settings to adjust the calibration value.
-
Page 33: Temperature Calibration
4 TEMPERATURE CALIBRATIONS 1. From the main screen select “Calibrate”. 2. Scroll down to “Temp” and select. 3. Place a temperature-measuring device, an electronic RTD or laboratory grade thermometer, in the mixing chamber and allow reading to stabilise. 4. When reading has stabilised, select “Ready”. 5. -
Page 34: Diagnostics
DIAGNOSTICS The diagnostics screens are designed to provide the user with current data on the performance of the instrument and information that is useful during the operation, servicing, and maintenance of the analyser. Under the diagnostic screens, the user is also able to adjust the alarm relay contacts and mA output signals for verification of terminal operation with an external device such as an ammeter. - Page 35 The output signal will return to operational status once this screen is exited Bias This screen is used by Severn Trent Services The bias can be adjusted from Service technicians to check the bias voltage. this screen, but will revert back...
-
Page 36: Graphical Trending Capabilities
GRAPHICAL TRENDING CAPABILITIES The graphical trending screens allow the User to view the residual data in graphical format. Under the graphical trending screens, up to 28 days of data can be viewed in graphical format. Exact data on residual values for a specific time on a specific date can also be viewed under the graphical trending screens. -
Page 37: Analysis Screen
GRAPH: Analysis 10:15 0/00/00 2/21 2/22 2/23 2/24 2/25 2/26 2/27 2/28 11.39 X = 16.00 0/00/00 Y = 11.25 Figure 15 – Analysis The following table summarises the graphical trending options and the location of the screens for these adjustments: Screen Name Screen Function Notes... -
Page 38: Service
Review the sections below for descriptions of the frequency and requirements for these three categories. A service kit is available (Severn Trent Services part number SK105-D or 10-1025). This kit contains the copper electrode and various O rings and PVC spheres (see section 7.2 and 7.3). -
Page 39: Equipment Service
Inspect the gold electrode (Figure 3). Clean and polish with a clean cloth and/or soak in a dilute acid solution (e.g. 10% HCl v/v). If the electrode is damaged, the gold electrode assembly must be replaced (Severn Trent Services part number 14184). - Page 40 If the copper cell is grooved or cannot be cleaned, remove and replace. (Severn Trent Services part number 14182 or 09-1032) (Figure 3). Replace the PVC spheres and reassemble the cell by reversing steps 1a through 1c.
- Page 41 Failure of the 100 Ohm RTD will be indicated with an error message on the analyser screen. If the 100 Ohm RTD has failed, replace the RTD and cable assembly (Severn Trent Services part number 11713 or 51-1008) (Refer to Figure 2 and Figure 4; 18).
- Page 42 112.833 33.002 113.220 34.003 113.607 35.004 113.994 36.005 114.380 37.003 114.767 38.004 115.153 39.002 115.539 40.000 115.925 41.001 116.311 42.002 116.697 43.003 117.083 44.004 117.469 45.005 117.854 46.004 118.239 47.002 118.625 48.003 119.010 49.002 119.395 50.000 7.3.3 Reference Electrode CAUTION: REFERENCE ELECTRODE MUST REMAIN IN REFERENCE ELECTRODE RESERVOIR AT ALL TIMES DURING THE OPERATION OF THE Cl1000.
-
Page 43: Recommended Preventive Maintenance Schedule
If the reading on the analyser does not match the measured sample, re-calibrate the analyser per section 3.4. 7.4.2 Yearly A service kit is available (Severn Trent Services part number SK105-D or 10-1025): Description Part Number Reference Figure Copper Electrode... -
Page 44: Troubleshooting
TROUBLESHOOTING CHART NOTES: Verify that the sample flow to the analyser is a minimum of 150 ml/min at 5 psig minimum (sample water should be at a level just higher than the overflow weir). Verify constant sample flow through the analyser by observing flow through the various reservoirs and in the overflow drain. -
Page 46: Ammendment Record Sheet
AMENDMENT RECORD SHEET Issue Date Amendment Software Approval Version 04-1008-A 11/02 Initial Issue 04-1008-B 03/03 Reduction in required Version 4 maintenance frequency 04-1008-C 15/08/03 Addition of Gel-filled Ref. Version 4 Electrode and Revised layout 04-1008-D March Inclusion of Sample tap, Version 4 hosetail and Name change 04-1008-E... - Page 47 SEVERN TRENT SERVICES LTD ("SEVERN TRENT SERVICES") SEVERN TRENT SERVICES grants to you and you accept a license to use the programs and related materials delivered with this AGREEMENT, ("PRODUCT"). SEVERN TRENT SERVICES retains the copyright protection of PRODUCT. Under copyright laws, you agree not to transfer PRODUCT in any form to any party without prior written consent of SEVERN TRENT SERVICES.
- Page 48 Birch Coppice Business Park Colmar, PA 18915 Dordon, Tamworth B78 1SA Tel +1 215 997 4000 Tel +44 (0) 182 726 6000 Fax +1 215 997 4062 Fax +44 (0) 182 726 6099 www.severntrentservices.com salesenq@severntrentservices.co.uk marketing@severntrentservices.com AUG/09 Copyright 2009 Severn Trent Services 210.6350.8...
Need help?
Do you have a question about the Capital Controls CI1000B and is the answer not in the manual?
Questions and answers