Table of Contents
Advertisement
Quick Links
Advertisement
Table of Contents

Summary of Contents for Harken Tensioner CT0
- Page 1 Rev.0 – 19/03/2021 Tensioner CT0 USER AND MAINTENANCE MANUAL...
-
Page 2: Table Of Contents
INDEX Glossary ............................4 Symbols ............................4 Safety information ........................5 General advice ..........................6 ® Harken limited worldwide warranty ..................6 Product information ........................7 Product identification ........................8 Maximum Loads .......................... 8 Weights ............................9 10. Product composition ........................9 11. - Page 3 Rev.0 – 19/03/2021 10. Installation procedure ....................... 26 10.1 Cleaning and maintenance ......................26 10.2 Internal maintenance procedure ....................27 10.2.1 Maintenance product ......................27 10.2.2 Tools ..........................28 10.2.3 Disassemble procedure ......................29 11. Assembly ........................... 33 11.1 Lipped rings ..........................34 11.2 Torque ............................
-
Page 4: Glossary
Rev.0 – 19/03/2021 Glossary Intended use: specific and proper use of the tensioner for which it is designed Improper use: use of the device in a different way from that indicated in the instructions for use specified in this manual Qualified operator: person who has attended specialisation and training about the use of the tensioner User: person who uses the winch and the tensioner regularly... -
Page 5: Safety Information
Do not operate the hydraulic motor during installation or maintenance • Do not let the oil in the system come into contact with your eyes or skin. Harken cannot be responsible for damage or injury resulting from unsafe product use, lack of maintenance or incorrect product and /or system installation or operation. -
Page 6: General Advice
Improper use - The Harken device must not be used for purposes different from those outlined in ‘Intended use’ chapter, or for purposes not mentioned in this manual or different from those mentioned. - The Harken device must not be used if unauthorized modifications or interventions have been carried out. -
Page 7: Product Information
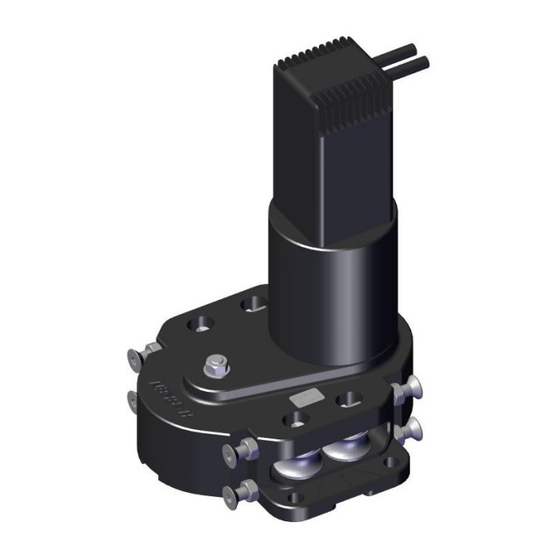
- by an electric motor - by a hydraulic motor Tensioner CT0 is used both for Hydraulic Captive Winch and for Electric Captive Winch. As regards the differences, refer to: - the installation procedures in the ‘Installation’ chapters of the Hydraulic Tensioner CT0 and of the Electric Tensioner CT0 of this manual;... -
Page 8: Product Identification
EL → 24V HY → 50cc Maximum Loads Loads associated to Tensioner CT0 are: - Maximum tensioning load: 12Kg - Maximum working load (MWL) on the rope: 3000 Kg (Maximum dynamic load) - Maximum static load on the rope: 5000Kg... -
Page 9: Weights
Rev.0 – 19/03/2021 Weights Version Weight [Kg] NOTE! Weights refer to the tensioner with the motorization. Product composition Tensioner CT0 is composed by the following groups:... -
Page 10: Rope Diameter
The rope diameter when is not stretched cannot exceed the 5% of the nominal value specified at the Captive order. Two configurations of Tensioner CT0 are available in function of the rope diameter: Ø10-12mm and Ø14-16mm. Every Tensioner is assembled considering the specific rope diameter defined at the order. -
Page 11: Installation Procedure
Electric Tensioner Outline Harken supplies to the customer the outline drawing of the product and the minimum space around necessary for making the inspection and maintenance of the product. -
Page 12: Hydraulic Tensioner Outline
Rev.0 – 19/03/2021 Hydraulic Tensioner Outline... -
Page 13: Installation - Technical Info
It is installer's responsibility to carry out all structural tests needed to ensure that the deck can bear the load. To install the Tensioner CT0 to the deck, use 4xM10bolts, steel class A4 70: NOTE! Harken does not supply the fasteners needed to install the Tensioner since these may vary depending on the deck on which it is to be installed. -
Page 14: Tensioner Mounting Template
To operate the installation, follow the steps below (alphabetic indexes): A. Place the drilling cut-out template over the point chosen for installation. The template in DWG format and 1:1 scaled is available on request from the Harken Italy Tech Service at techservice@harken.it. - Page 15 Rev.0 – 19/03/2021 SEALING TEMPLATE NOTE! Make sure the drainage holes in the base of the tensioner are not obstructed by the sealant. E. Remove excess marine sealant.
-
Page 16: Motorized Use
All work ports are BSPP type (ISO/DIS1179-1). All components and work ports are clearly marked with engraved labels. 9.1.2 Manifold performance data Specifications of the hydraulic motors used to power the hydraulic Tensioner CT0: Max recommended recommended pressure range flow... -
Page 17: Hydraulic Motor Installation Procedure
Rev.0 – 19/03/2021 9.1.3 Hydraulic motor installation procedure The pressure lines must be connected to the motor using the approved size and type hydraulic hose. WARNING! - Do not remove the plugs on the Tensioner motor connections until absolutely necessary to prevent contamination. Each 90°... -
Page 18: Tensioner Manifold Structure
Rev.0 – 19/03/2021 9.1.5 Tensioner Manifold structure... -
Page 19: Hydraulic Motor Connections
Rev.0 – 19/03/2021 9.1.6 Hydraulic Motor connections... - Page 20 Tensioner reducing valve, Pay OUT Check valve, Tensioner load sense NOTE! The maximum flow and pressure must be in accordance to graphic performance. Wrong dimensioning of components can void warranty. For any other information, contact Harken Tech Service at techservice@harken.it...
-
Page 21: Hydraulic Performance Graph
Rev.0 – 19/03/2021 Hydraulic performance graph Tensioner CT0 HY 150 [N] Max pulling load Pulling load [N] 90.4[m/min] Line speed [m/min] Notes: The pressure on the graph is the pressure drop between in and out motor ports. The performance is evaluated measuring the pressure and flow on the motor ports. -
Page 22: Electric Equipment (El)
Rev.0 – 19/03/2021 Electric equipment (EL) The Electric Tensioner CT0 is equipped with an electric unit, composed of electric motor, electric cables and connectors: Harken provides the electric unit assembled with the Tensioner device or as a spare part. Harken also provides the counterparts of the 3-way Fast-on connectors and of the boat-side... -
Page 23: Electric Motor
Rev.0 – 19/03/2021 9.3.1 Electric motor Electric motor data Cables 24V DC Length: 500mm Output power: 133W For wirings and connections, see the following ‘electric unit wirings’ chapter. -
Page 24: Electric Unit Wirings
Rev.0 – 19/03/2021 9.3.2 Electric unit wirings NOTE! Potentiometer range: from 1.5V to 9V; at 1.5V it outputs a 100% power; at 9V it outputs a 0% power. 9.3.3 Electric unit equipment use To have a maximum tensioning load of 12Kg, potentiometer has to be set at 6V. Micro slide switch on line 2 for the reverse direction, to pull the rope out from Captive. -
Page 25: Performance Data
Rev.0 – 19/03/2021 9.3.2 Performance data Specifications of the electric motors used to power the electric Tensioner CT0 are the following: Operating Tension (V) Max current absorption (A) Tensioner CT0 Electrically operated, Tensioners have a load capacity proportional to the line speed. -
Page 26: Installation Procedure
Rev.0 – 19/03/2021 Installation procedure 10.1 Cleaning and maintenance The more the tensioner is used, the more frequent it will be its maintenance and cleaning: environmental conditions and use influence the usury of the components and directly the maintenance and cleaning frequency by the user. Complete maintenance, cleaning and lubrication must be performed every 12 months. -
Page 27: Internal Maintenance Procedure
Generally, for use on all screws, requires no heating before removal. Synthetic GREASE Harken - BK4513 Apply a film of grease with a brush to all the parts indicated, and make sure that the film is visible. Take special care when greasing the teeth of the ring gears, the gears and the roller bearings. -
Page 28: Tools
Rev.0 – 19/03/2021 ® Anti-corrosive lubricants (i.e. TEFGEL or similar) Apply sacrificial anodes or anti corrosive lubricants to prevent electrolytic corrosion between different metals in contact with one another. NOTE! Apply the anti-corrosive lubricant with a brush on clean surfaces. ®... -
Page 29: Disassemble Procedure
Rev.0 – 19/03/2021 10.2.3 Disassemble procedure Step #1 Step #2 Step #3... - Page 30 Rev.0 – 19/03/2021 Step #4 Step #5 Step #6...
- Page 31 Rev.0 – 19/03/2021 Step #7 Step #9 Step #8...
- Page 32 Rev.0 – 19/03/2021 Step #10 Step #11 Step #12...
-
Page 33: Assembly
Rev.0 – 19/03/2021 Step #13 Assembly Once maintenance is finished, reassemble the tensioner in reverse order with respect to the sequence described above and using the maintenance products and taking into account the following aspects: 1. Inserting of the lipped rings into the slots of the pulley 2. -
Page 34: Lipped Rings
Rev.0 – 19/03/2021 11.1 Lipped rings Pay attention to insert the lip of the ring into the slot of the pulley: 11.2 Torque NOTE! Pay special attention to screw bolts with the proper torque, as indicated in the maintenance steps #4, #6 and #12. 11.3 Marking NOTE! For the bolts of maintenance steps #4, #6 and #12 after screwing pay special... -
Page 35: Troubleshooting
Rev.0 – 19/03/2021 Troubleshooting To identify the various components, refer to figures of the disassemble procedure for the tensioner maintenance. PROBLEMS POSSIBLE CAUSES POSSIBLE SOLUTIONS... -
Page 36: Ordering Spare Parts
Rev.0 – 19/03/2021 Ordering spare parts ® ® Spare parts can be requested from Harken as described in the Harken Limited Worldwide Warranty available on the web site http://www.harken.com/ Contact us Manufacturer ® Harken Italy S.p.A. Via Marco Biagi, 14 22070 Limido Comasco (CO) Italy Tel.: (+39) 031.3523511...
Need help?
Do you have a question about the Tensioner CT0 and is the answer not in the manual?
Questions and answers