Table of Contents
Advertisement
Quick Links
OPERATOR MANUAL
Rankin Basics Semi-Automated Microtome
MCT45
Attention: Before using the instrument, please read this Instruction carefully, and keep the Instruction for further reference.
Please refer to the nameplate on the back of the instrument for the serial number and manufacturing date of the instrument.
Advertisement
Table of Contents

Summary of Contents for Rankin Basics MCT45
- Page 1 OPERATOR MANUAL Rankin Basics Semi-Automated Microtome MCT45 Attention: Before using the instrument, please read this Instruction carefully, and keep the Instruction for further reference. Please refer to the nameplate on the back of the instrument for the serial number and manufacturing date of the instrument.
-
Page 2: Table Of Contents
Table of Contents 1. OVERVIEW ··············································································· 3 2. SAFETY ··················································································· 4 3. TECHNICAL SPECIFICATIONS ····················································· 6 4. UNPACKING, TRANSPORTATION, AND STORAGE ························ 8 5. INSTALLATION ·········································································· 9 5.1 Instrument placement/working site requirements ······················ 9 5.2 Instrument components ······················································ 9 5.3 Assembling the specimen clamp ········································· 10 5.4 Assembling the blade holder and base ·································... -
Page 3: Overview
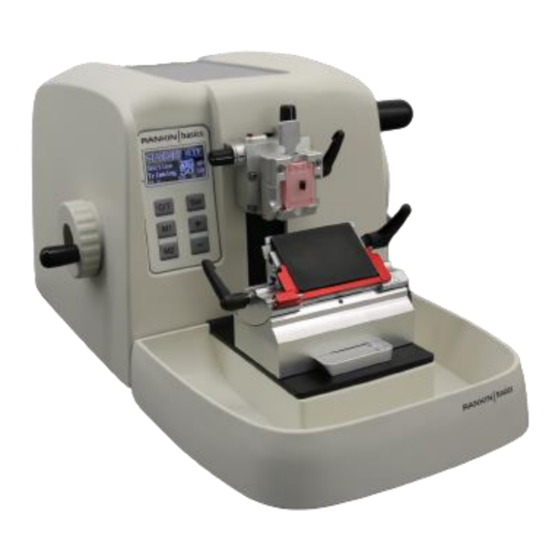
1. OVERVIEW The Rankin Basics Semi-Automated microtome MCT45 is an electronically motorized rotary microtome for use in routine and research laboratories in the fields of biology, medicine, and industry. It is designed for cutting both soft paraffin and harder specimens, as long as they are suitable for being cut manually or automatically. -
Page 4: Safety
Back View Power switch The trough for lifting the instrument 2. SAFETY Be sure to comply with the safety instructions and warnings provided in this section. Be sure to read these instructions, even if you are already familiar with the operation and use of other similar products. - Page 5 Warnings – Personal safety precautions When working with microtomes, personal safety precautions must always be taken. It is mandatory to wear work safety shoes, safety gloves, a mask and safety goggles. Warnings – Operating the instrument • Be very careful when handling microtome knives and disposable blades because their cutting edge is extremely sharp.
-
Page 6: Technical Specifications
3. TECHNICAL SPECIFICATIONS Section thickness range:0.25 to 100 μm 0.25—2.5 μm ; Increments of 0.25 μm 2.5—5 μm ; Increments of 0.5 μm 5.0—10 μm ; Increments of 1 μm 10—30 μm ; Increments of 2 μm 30—60 μm ; Increments of 5 μm 60—100 μm ;... - Page 7 Specimen Clamp Rotation: Left and right/up and down. At any angle within 360 degrees (optional) Movement Range of the Base of Blade Holder Base: 0-60 mm (front to back) Lateral movement Range of the blade clamp: 20 mm Small handwheel control direction: two options Fine (precise) trimming function: On or Off Memory position of the clamp: two position set GENERAL SPECIFICATIONS...
-
Page 8: Unpacking, Transportation, And Storage
4. UNPACKING, TRANSPORTATION, AND STORAGE 4.1 Unpacking • Open the crate, take out all accessories and user manual. Note: The transport crate and included retaining elements should be kept in case a return shipment is necessary later. • Lift the instrument by holding it by the base plate and under the instrument on the back (marked by blue circles in the pictures below) and lift it out of the formed cushion. -
Page 9: Installation
5. INSTALLATION 5.1 Instrument placement/working site requirements • Place the instrument on a stable laboratory table. • Room temperature permanently between + 10 °C and + 35 °C. • Obstruction-free access to the handwheel. Never operate the instrument in rooms with explosion hazard. 5.2 Main instrument components Push button to lock the handwheel at... -
Page 10: Assembling The Specimen Clamp
5.3 Assembling the Specimen Clamp Quick Cassette Clamp Specimen clamp base 1. Two clamp fixation holes 3. Clamp fixation screw holes 2. Quick cassette release lever 4. Clamp lock lever 5. Specimen tilt adjustment indicator 6. Vertical adjustment knob for specimen tilt 7. - Page 11 If the specimen clamp is not installed in the instrument or the user needs to install a new one, please follow the procedures below: • Lock the handwheel. • First lock the clamp lock lever (4), align the two holes (for quick cassette clamp) or four holes (for standard specimen clamp) of the clamp (1) with the screw holes of the base (3), and then tighten the screws.
-
Page 12: Assembling The Blade Holder And Base
5.4 Assembling the blade holder and base Do not insert the disposable blade when the blade holder is not firmly installed! ALWAYS remove the disposable blade before replacing the blade holder. Steps: 1. Turn the lateral movement lever (4) counterclockwise to assemble the blade holder top (6) onto the segment arc (10), which is then locked by turning the lateral movement lever (4) clockwise. -
Page 13: Operation
6. OPERATION 6.1 Function of Small Handwheel on the left side of the instrument The direction can be set according to the user's habit using the SET key (See Page 11) Option 1: rotating forward to fast advance and rotating backward to fast retraction; Option 2: rotating forward to fast backward and rotating backward to fast forward. -
Page 14: Operation Procedures
Brief function descriptions Sectioning/ Trimming Switch (C/T): switch between sectioning and trimming. Memory 1 (M1): Press to return to the saved position. Hold (M1) to set the first position. Memory 2 (M2): Press to return to the saved position. Hold (M1) to set the second position. Decrease key (-): Reduce the sectioning thickness value (hold for rapid decrease) Increase Key (+): Increase the sectioning thickness value (hold for rapid increase) Setup Key (SET): Press to open the option menu for sectioning thickness, trimming thickness,... - Page 15 4. After the setting is completed, press the “C/T” key to exit the setting interface. Rotate the main handwheel for sectioning or trimming as needed. When feeding is exceeding the allowable range, the motor will automatically stop running and give a beeping alarm. Under this situation, please turn the Small Handwheel in the opposite direction to return.
-
Page 16: Three Sectioning Modes
6.4 Three sectioning modes SMART MODE In this mode, sectioning and trimming can automatically switch by rotating the main handwheel either half a circle (i.e., “rock”) for trimming (the screen cursor will stay at the trimming value) or a full circle for sectioning (the cursor will stay at the sectioning value. - Page 17 STANDARD MODE Similar to the operation procedures on a conventional microtome, use the small handwheel for fast advance and retraction, and click the “C/T” key to switch between sectioning and trimming. The sectioning/trimming thickness can be adjusted by using the “+” and “-“ keys. When rotating the main handwheel, the specimen will be sectioned or trimmed as indicated by the cursor on the screen.
-
Page 18: Troubleshooting
7. TROUBLESHOOTING Problem Cause Suggestion Thick/thin sections: 1. Blade, knife holder or 1. Re-clamp the blade, knife holder or orientation. orientation is not clamped The sections alternate between being thick and thin, properly. or there is chattering in the 2. The specimen is not clamped 2. -
Page 19: Cleaning And Maintenence
8. CLEANING AND MAINTENANCE Warnings ▪ Always remove the blade before detaching the blade holder from the instrument. ▪ Always put the knives/blades back into the knife case when not in use. Never place a knife anywhere with the cutting edge facing upwards and NEVER try to catch a falling knife! ▪... -
Page 20: Warranty And Service
9. WARRANTY AND SERVICE The manufactory guarantees that the contractual product delivered has been subjected to a comprehensive quality control procedure based on the in-house testing standards, and that the product is faultless and complies with all technical specifications and/or agreed characteristics warranted. As the product is constantly updated, we reserve the right to update the product without prior notice. -
Page 21: Accesory List
10. ACCESSORY LIST Description Qty. Special Note Base Unit Disposable Blade Holder 2-in-1 low and high profile Power cord Dust Cover Fuse Operator Manual...
Need help?
Do you have a question about the Basics MCT45 and is the answer not in the manual?
Questions and answers