Table of Contents
Advertisement
Quick Links
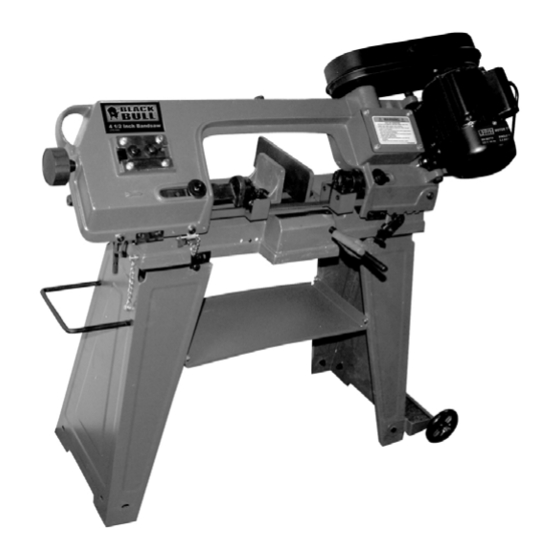
4 ½ Inch Metal Cutting Bandsaw
Assembly & Operating Instructions
READ ALL INSTRUCTIONS AND WARNINGS BEFORE USING THIS PRODUCT.
This manual provides important information on proper operation & maintenance. Every effort has been
made to ensure the accuracy of this manual. These instructions are not meant to cover every possible
condition and situation that may occur. We reserve the right to change this product at any time
without prior notice.
IF THERE IS ANY QUESTION ABOUT A CONDITION BEING SAFE OR UNSAFE, DO
NOT OPERATE THIS PRODUCT!
HAVE QUESTIONS OR PROBLEMS? DO NOT RETURN THIS PRODUCT TO THE
RETAILER - CONTACT CUSTOMER SERVICE.
If you experience a problem or need parts for this product, visit our website http://www.buffalotools.com
or call our customer help line at 1-888-287-6981, Monday-Friday, 8 AM - 4 PM Central Time. A copy of
the sales receipt is required.
FOR CONSUMER USE ONLY – NOT FOR PROFESSIONAL USE.
KEEP THIS MANUAL, SALES RECEIPT & APPLICABLE WARRANTY FOR FUTURE
REFERENCE.
Advertisement
Table of Contents

Related Manuals for Buffalo Tools 800449

Summary of Contents for Buffalo Tools 800449
- Page 1 4 ½ Inch Metal Cutting Bandsaw Assembly & Operating Instructions READ ALL INSTRUCTIONS AND WARNINGS BEFORE USING THIS PRODUCT. This manual provides important information on proper operation & maintenance. Every effort has been made to ensure the accuracy of this manual. These instructions are not meant to cover every possible condition and situation that may occur.
-
Page 2: Table Of Contents
TABLE OF CONTENTS RECOGNIZE SAFETY SYMBOLS, WORDS AND LABELS ..............2 SERVICE .............................. 5 PACKAGE CONTENTS........................6 COMPONENTS ............................ 6 ASSEMBLY ............................6 OPERATION............................8 MAINTENANCE..........................11 PARTS LIST ............................12 PARTS DIAGRAM ..........................11 RECOGNIZE SAFETY SYMBOLS, WORDS AND LABELS What You Need to Know About Safety Instructions Warning and Important Safety Instructions appearing in this manual are not meant to cover all possible conditions and situations that may occur. - Page 3 GENERAL PRODUCT SPECIFICATIONS FEATURES: • 3 Speeds 80 FPM, 120FPM, 200FPM • Miter Gauge for Angle Cutting 90º - 45º • Full Blade Guard for Safety • Horizontal or Vertical operation SPECIFICATIONS • 3/4 HP / 120V / 60 Hz •...
- Page 4 IMPORTANT SAFETY RULES COMMON SENSE AND CAUTION ARE FACTORS WHICH CANNOT BE BUILT INTO ANY PRODUCT. THESE FACTORS MUST BE SUPPLIED BY THE OPERATOR. Keep your work area clean and well lit. Cluttered work benches and dark work areas may cause accidents or injury.
-
Page 5: Service
Do not use the tool if the switch does not turn it on and off. Any tool that cannot be controlled with the switch is dangerous and must be repaired. Check for damage. Check your tool regularly. If part of the tool is damaged it should be carefully inspected to make sure that it can perform its' intended function correctly. -
Page 6: Package Contents
IMPORTANT SAFETY INSTRUCTIONS Before using this tool, you need to become familiar with its operation. If you are unsure about the operation of the tool, or have any questions about its proper use, call the Customer Service Department at 1-888-287-6981. Follow these instructions for safe handling of the tool: •... - Page 7 Ensure all guards, pulley covers etc are securely attached and properly assembled. Legs And Tray Assembly The legs are a three-sided section, one side of which is hinged. Lay the legs on their sides, with the open ends facing each other and approx. 18" apart. Locate the tray and attach between the legs, using the four nuts, bolts and washers supplied.
-
Page 8: Operation
OPERATION BEFORE OPERATING YOUR BANDSAW please read manual carefully BLADE GUIDE BEARING ADJUSTMENT This is the most important adjustment on your saw. It is impossible to get satisfactory work from your saw if the blade guides are not properly adjusted. The blade guide bearings for your Metal Cutting Bandsaw are adjusted and power tested with several test cuts before leaving the factory to ensure proper setting. - Page 9 CHANGING SPEED When using your Band Saw, always change the blade speed to best suit the material being cut. 1. Disconnect power. Open the pulley guard cover. Loosen the lead screw. You can now change the position of the belt to gain the desired speed. Re-set the belt tension to allow 1/2" depression of the belt when pressed in the middle of its longest run.
- Page 10 ADJUSTING THE BLADE TRACKING This adjustment has been completed and power-tested at the factory. The need for adjustment should rarely occur when the saw is used properly. If the tracking goes out of adjustment the blade will leave the wheel and damage will result. Increase blade tension.
-
Page 11: Maintenance
Vertical Cutting Fitting the table: Loosen the A & B Screws from the blade guide. Take away plate D. Locking the saw in vertical position: Rotate the bracket to an upright position, locate in notch on saw arm and tighten. If you have difficulty positioning the bracket in the notch, adjust nearby screw at bottom of saw until bracket is positioned, then tighten bracket. -
Page 12: Parts List
PARTS DIAGRAM 4.5 Inch Metal Cutting Bandsaw Assembly & Operating Instructions... - Page 13 PARTS LIST 0001 Floor stand handle 0068 Screw M6x20 0002 Cotter pin 3x18 0069 Lock chip 0003 Hexagon Head screw M8x20 0071 Bearing 6000 2Z 0004 Washer 8 0072 Guide pivot (left) 0005 Floor stand 0073 Thrust washer 10 0006 Connecting plate 0074 Guide pivot (right)
- Page 14 Troubleshooting...
- Page 15 NOTES...
- Page 16 NOTES (MBS45201002)
Need help?
Do you have a question about the 800449 and is the answer not in the manual?
Questions and answers