
Subscribe to Our Youtube Channel
Related Manuals for Dillenger KD218


Summary of Contents for Dillenger KD218
- Page 1 KD218 Colour LCD Display User Manual English Please read through carefully before using the display...
- Page 2 Details E-bike LCD Display, Model KD218 - 36V/48V Power supply - Rated working current: 10mA - Maximum working current: 30mA - Off leakage current: <1uA - Working temperature: -20°C~ 60°C - Storage temperature: -30°C~ 70°C Dimensions...
-
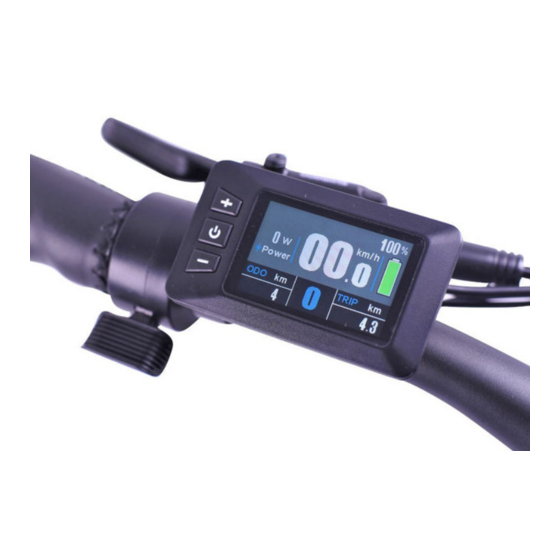
Page 3: Home Screen
Functions - Speed indication, including real-time speed, max speed, and average speed - Metric or imperial readout - Battery level indicator, providing a more stable battery level using an optimisation algorithm - Brightness adjusment, choice of 5 levels - Trip meter and odometer - Walk assist mode - PAS levels, choice of 8 different settings (0-3, 1-3, 0-5, 1-5, 0-7, 1-7, 0-9, 1-9) - Real-time display readout, including motor output, speed, and trip distance... -
Page 4: General Operation
General operation - Switching the display on/off Press and hold down the power button for a few seconds, until the display turns on. To turn the display off, press and hold down that same button for a few seconds. When the e-bike isn’t in use for 10 minutes the display will switch off automatically. - Turning on connected lights If there are compatible lights connected to your controller these can be turned on/off by pressing and holding down the + button for a few seconds. -
Page 5: Display Interface
Display interface When the display is turned on, it shows the current speed, the trip meter, the odometer, power output, and battery level indicator. To change between the different interfaces, press the on/off button shortly to cycle through the interfaces below. The other readouts that will show are: - maximum speed - average speed - trip time... -
Page 6: Battery Level Indicator
Pedal assist levels Use the + and - buttons to adjust the level of the pedal assist (PAS) while you’re riding. There are different PAS level ranges to choose from, and the default PAS level range is 0-9. The higher the PAS level you select on the display, the more power assist you get from the motor while you are pedaling. -
Page 7: Parameter Settings
Parameter settings There are various parameters that can be adjusted to personalise your display, which are divided into Display Settings and Advanced Settings. Examples of these parameters are things like rim size, number of PAS levels, trip meter clearing, etc. More details on each of these settings are explained in this manual. -
Page 8: Advanced Settings
Display settings continued - Wheel You can change the wheel size setting to match the wheel size on your bike, so that you get accurate speed and distance readouts. The default setting is 26”. - Speed Limit The default value of the speed limit setting depends on the kit or bike you have, but you can change the speed limit setting to suit your needs using this parameter setting. - Page 9 Advanced settings continued - Dormancy This setting determines after how much time the display will switch off automatically if it’s not been in use. The default setting is 5 minutes. - SOC View With this setting you can choose the way the battery level indication is represented. The default value is percentage, but you can also change it to a bar representation.
-
Page 10: Wiring Diagram
Wiring diagram Error codes...
Need help?
Do you have a question about the KD218 and is the answer not in the manual?
Questions and answers