
Summary of Contents for GERMANICA GBM6787
- Page 1 BREAD MAKER GBM6787 INSTRUCTION MANUAL Please read this manual carefully before using, and keep it for future reference.
-
Page 2: Table Of Contents
CONTENTS General Safety Product Overview Installation Operation Powering on Start / Stop Pause MENU FUNCTIONS Colour Loaf Size Delay Function Keep Warm Memory Environment Warning Display Auto Add Ingredient First Time Use Using the Bread Maker Special Introduction Introduction of Bread Ingredients Ingredients Measurement... - Page 3 COOK BOOK Cleaning and Maintenance FAQs Specifications Customer Helpline...
-
Page 4: General Safety
GENERAL SAFETY IMPORTANT INFORMATION Read this manual thoroughly before you start using the bread maker. The safety precautions instructions reduces the risk of fire, electric shock and injury when correctly complied to. Please follow all instructions and take notice of all warnings. The lightning flash with symbol within the triangle is intended to warn you of a non-insulated dangerous voltage in the... - Page 5 GENERAL SAFETY (Cont.) WARNING! • Do not allow any object to prevent the door from closing. Also, do not allow cleaner residue or chemicals to accumulate on sealing surfaces. • WARNING: If the door or door seals are damaged, do not operate the bread makeruntil it has been repaired by a authorised service personnel.
- Page 6 GENERAL SAFET (Cont.) ELECTRICAL SAFETY AND POWER CORD HANDLING • Voltage: Make sure that your outlet voltage and circuit frequency correspond to the voltage stated on the appliance rating plate. • Power outlet: Connect the appliance to a properly earthed power outlet, which must be easily accessible so that you can unplug it if necessary.
- Page 7 GENERAL SAFETY (Cont.) • Do not use the appliance for anything other than its intended purpose. Drying of food or clothing and heating of warming padsband similar items may lead to risk of injury, ignition or fire. • The appliance is not intended for use by persons (including children) with reduced physical, sensory or mental capabilities, or lack of experience and knowledge, unless they have been given supervision or instruction on the use of the appliance by a person responsible for their safety.
-
Page 8: Product Overview
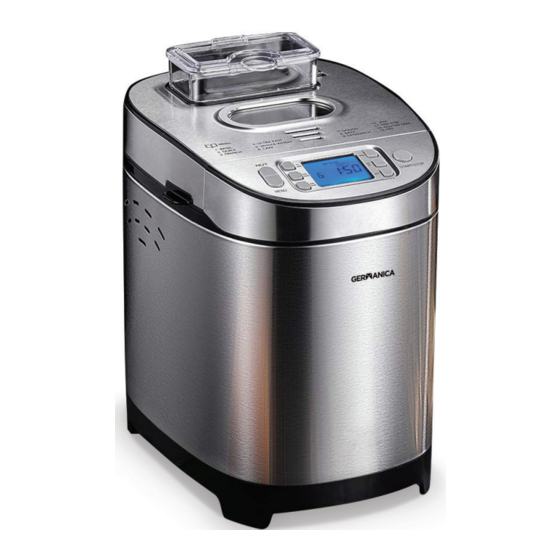
PRODUCT OVERVIEW CONTROL PANEL 1 - Nut 6 - Mix (Mix dough shortcut) 2 - Menu 7 - Bake (Bake shortcut) 3 - Colour (Light, Medium, Dark) 8 - DIY (shortcut) 4 - Time (set time) 9 - START / STOP 5 - Gram... - Page 9 PRODUCT OVERVIEW (Cont.) PRODUCT ACCESSORIES 1 - Fruit Dispenser 4 - Bread Hook 2 - Measuring Cup 5 - Measuring Spoon 3 - Bread Pan 6 - Stirring Rod...
-
Page 10: Installation
INSTALLATION Before installing your appliance, read all safety instructions in this manual, especially the sections on electrical safety and installation. UNPACKING • When unpacking the appliance, be sure to keep all the packaging materials until you have made sure your new appliance is undamaged and in good working order. -
Page 11: Operation
OPERATION POWERING ON As soon as the bread maker is plugged into the power supply, LCD will be illuminated while a beep will be heard. If no operation is actioned, LCD will turn off after 20s; The default setting of 900g and MEDIUM. “BASIC” time “3:00”... -
Page 12: Menu
MENU Use MENU to set different programs. The functions of 13 menus will be explained below. UNPACKING 1. BASIC - kneading, rising and baking normal bread. You may also add ingredients to add flavor. 2. QUICK - kneading, rising and baking loaf with baking soda or baking powder. Bread baked on this setting is usually smaller with a dense texture 3. - Page 13 9. Sandwich - kneading, rise and baking sandwich. For baking light texture bread with a thinner crust. 10.JAM - boiling jams and marmalades, mash up fruit or vegetables before putting them in bread pan 11. MIX STIR - Kneading dough 12.
-
Page 14: Functions
FUNCTIONS COLOUR This is used to set how much you want your bread to be cooked. Light/Medium/Dark There are three colors of LIGHT, MEDIUM or DARK for the crust. - Press “COLOR” button to select your desired color. Exceptionally, it is inactive for the programs of Dough, Bake, Jam and Mix Stir LOAF SIZE There are two loaf sizes of 700g and 900g for selection. -
Page 15: Delay Function
FUNCTIONS (Cont.) DELAY FUNCTION If you want the appliance to start the selected bread maker program at a later time. - You can press “TIME” button to set the delay time. You must decide how long it will be before your bread is ready by pressing “TIME”... -
Page 16: Keep Warm
FUNCTIONS (Cont.) KEEP WARM Bread can be automatically kept warm for 60 minutes after baking. If you would like to take the bread out, switch the program off with the START/STOP button. MEMORY (10 minutes of no power) If the power supply has been broken off in the course of bread making, the process will be continued automatically within 10 minutes, even without touching “START/STOP”... -
Page 17: Warning Display
FUNCTIONS (Cont.) WARNING DISPLAY If the display shows “HHH” after the program has been started, the temperature inside is still too high (accompanied by 5 beep sounds). Then the program has to be stopped. Open the lid and let the machine cool down for 10 to 20 minutes. -
Page 18: First Time Use
OPERATIONS FOR THE FIRST USE The appliance may emit a little smoke and a characteristic smell when turning it on for the first time. This is normal and will soon stop. Make sure the appliance has sufficient ventilation. Please check if all parts and accessories are “complete and free of damage”. -
Page 19: Using The Bread Maker
OPERATIONS USING YOUR BREAD MAKER Place the appliance on the firm and even surface. Before making bread, weigh the ingredients you need respectively. Place the BREAD PAN in position, turn it clockwise until it clicks in correct position. Fix the kneading blade onto the drive shafts. It is recommended to fill holes with heat-resisting margarine prior to placing the kneaders, this avoids the dough to stick below the kneaders and the kneaders could be removed from bread easily. - Page 20 OPERATIONS (Cont.) For the programs of BASIC, QUICK, FRENCH, ULTRA FAST, WHOLE WHEAT, CAKE, SANDWICH, GLUTEN FREE and DIY, put the fruit ingredients into the ingredient box and then close the pan drawer. NOTE: During operation, the ingredients in the ingredient box will be automatically poured into the bread pan.
-
Page 21: Special Introduction
OPERATIONS (Cont.) If leaving the room or not to touch START/STOP button at the end of operation, the bread will be kept warm automatically for one hour. When in not use or after complete operation, unplug the power cord. CAUTION: Before slicing the loaf, use the hook to remove out the kneading blade hidden on the bottom of loaf. -
Page 22: Introduction Of Bread Ingredients
OPERATIONS (Cont.) INTRODUCTION OF BREAD INGREDIENTS Bread flour - Bread flour has high content of high gluten (so it can be also called high-gluten flour which contains high protein), it has good elastic and can keep the size of the bread from collapsing after rise. - Page 23 OPERATIONS (Cont.) Yeast - After yeasting process, the yeast will produce carbon dioxide. The carbon dioxide will expand bread and make the inner fiber soften. However, yeast fast breeding needs carbohydrate in sugar and flour as nourishment. 1 tsp. active dry yeast =3/4 tsp. instant yeast 1.5 tsp.
- Page 24 OPERATIONS (Cont.) Baking powder - Baking powder is used for rising the Ultra Fast bread and cake. As it does not need rise time, and it can produce the air, the air will form bubble to soften the texture of bread utilizing chemical principle.
-
Page 25: Ingredients Measurement
OPERATIONS (Cont.) INGREDIENTS MEASUREMENT One of important step for making good bread is proper amount of ingredients. It is strongly suggested that use measuring cup or measuring spoon to obtain accurate amount, otherwise the bread will be largely influenced. Weighing liquid ingredients - Water, fresh milk or milk powder solution should be measured with measuring cups. -
Page 26: Cookbook
COOKBOOK BASIC BREAD QUICK BREAD... - Page 27 COOKBOOK (Cont.) FRENCH BREAD ULTRA FAST BREAD...
- Page 28 COOKBOOK (Cont.) WHOLE WHEAT BREAD CAKE...
- Page 29 COOKBOOK (Cont.) DOUGH BAKE Bake the dough SANDWICH BREAD...
- Page 30 COOKBOOK (Cont.) DOUGH MIX STIR Kneading the flour GLUTEN FREE Self-program and re-set every steo time with this menu.
-
Page 31: Cleaning And Maintenance
Cleaning and Maintenance Disconnect the machine from the power and let it cool down prior to cleaning. Bread pan - Rub inside and outside with a damp cloth. Do not use any sharp or abrasive agents for the consideration of protecting the non-stick coating. -
Page 32: Faqs
FAQS If experiencing issues with your product and isn’t operating correctly please check the following pages for solutions to the problems. If none of the solutions offered help solve the problem with your appliance then please contact our call centre on info@ayonz.com. DO NOT ATTEMPT TO REPAIR THE APPLIANCE YOURSELF. - Page 33 FAQS (Cont.) Problem Cause Solution Unplug the bread maker and The temperature in clean the heat element, but be Display “HHH” after pressing bread maker is too high to careful not to burn you, during start button make bread. the first use, dry operating and open the lid.
- Page 34 FAQS (Cont.) Problem Cause Solution 1. Too much flour or short of Reduce flour or increase water water Bread weight is very large and organization construct is too dense 2. Too many fruit Reduce the amount of ingredients or too much corresponding ingredients and whole wheat flour increase yeast...
-
Page 35: Specifications
SPECIFICATIONS POWER SUPPLY 220-240V ~ RATED FREQUENCY 50Hz RATING POWER 500W 237 (w) x 295 (d) x 335 (h) mm Dimensions Without nut dispense: 302 (h) mm Weight Net: 4.08 kg / Gross: 4.85 kg... -
Page 36: Customer Helpline
CUSTOMER HELPLINE: info@ayonz.com DISTRIBUTED BY: Ayonz Pty Ltd...
Need help?
Do you have a question about the GBM6787 and is the answer not in the manual?
Questions and answers