
Related Manuals for LeapFrog Magic Adventures Microscope


Summary of Contents for LeapFrog Magic Adventures Microscope
- Page 1 Instruction Manual This manual contains important information. Please keep it for future reference.
- Page 2 INTRODUCTION Thank you for purchasing Magic Adventures Microscope™! Explore microworlds across various topics including flowers, insects, the human body and more with videos, images, games and learning challenges. Create your own slides or place larger samples on the tray to discover even more on this real...
-
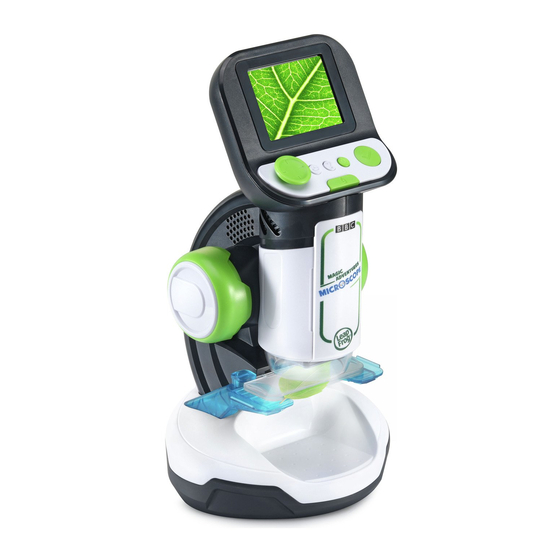
Page 3: Included In The Package
Up to 60x Sample Walnut Shell, Sea (with digital zoom) Needed Tray Shell, Coin, Rock, etc. INCLUDED IN THE PACKAGE Magic Adventures Microscope™ • • 9 double-sided smart slides • 2 reusable slides • 1 Quick Start Guide WARNING All packing materials such as tape, plastic sheets, packaging locks, removable tags, cable ties, cords and packaging screws are not part of this toy, and should be discarded for your child’s... -
Page 4: Getting Started
GETTING STARTED Please cut and discard the cords before playing with the unit. The cords are not part of the product and should be discarded for your child’s safety. Attention: The unit is in Try-Me mode. To exit this mode, follow the steps below: 1. - Page 5 WARNING: Adult assembly required for battery installation. Keep batteries out of reach of children. IMPORTANT: BATTERY INFORMATION • Insert batteries with the correct polarity (+ and -). • Do not mix old and new batteries. • Do not mix alkaline, standard (carbon-zinc) or rechargeable batteries.
-
Page 6: Product Features
LeapFrog cares for the planet. ® Care for the environment and give your toy a second life by disposing of it at a small electricals collection point so all its materials can be recycled. In the UK: Visit www.recyclenow.com to see a list of collection points near you. -
Page 7: Magnification Button
6. Microscope Mode Button Press the Microscope Mode Button to enter the Microscope Mode and explore your own samples using the Reusable Slides or the Large Sample Tray. When a Smart Slide is inserted into the device, press the Microscope Mode Button to toggle back and forth between the Smart Slide Menu and the Main Menu. - Page 8 14. Reusable Slides Place your own samples into the Reusable Slides, then place the Reusable Slides into the Slides Tray. Press the Microscope Mode Button to view your sample with the microscope. 15. Take Photos Capture about 100 photos of your samples in Microscope Mode by pressing the Tick Button.
- Page 9 If a microSD card (not included) is inserted into the microSD • Card Slot, all photos taken will be saved to the microSD card. The Magic Adventures Microscope supports microSD cards up to 32GB. • The maximum number of photos that can be taken is 30,096.
- Page 10 Micro Adventure Game Beat the clock in this exciting microworld adventure game. Feed, protect, heal microorganisms and remove micro-invaders in 24 exciting levels. What’s This? Quiz See if you can figure out what each image is in this fun quiz. Listen to the question and then select the picture that provides the answer.
- Page 11 How to Copy Saved Photos from the Microscope to a Computer 1. Insert a microSD card** into the microSD Card Slot of the unit. 2. In the Gallery, select the Photo Transfer icon to transfer all of your saved photos from the unit’s internal memory to the inserted microSD card.
-
Page 12: Automatic Shut-Off
Automatic Shut-Off To preserve battery life, the Magic Adventures Microscope™ will automatically dim the LCD Screen after approximately three minutes without input, then power down after approximately six minutes without input. Press any button before the device shuts off to return the LCD Screen to its normal brightness level. -
Page 13: Troubleshooting
TROUBLESHOOTING Problem Possible Solution(s) (1) Press and hold the Power Button for more than 10 seconds. (2) Release the Power Button and the unit The unit stopped working. will power back on again. It should now work properly. (3) If the unit does not work, change the batteries and press the Power Button to turn on the unit. - Page 14 Restart the unit by pressing the Power Button and try again. (1) Enter the Parent Menu (see the Parent Menu section for how to access this screen). (2) Select Option 2 and confirm. Once the Microscope Mode process is finished, it should be okay to (without microSD take photos while in Microscope Mode.
- Page 15 (1) Enter the Parent Menu (see the Parent Menu section for how to access this screen). Microscope Mode (2) Select Option 2 and confirm. Once (without microSD the process is finished, the overwrite card inserted) prompt should no longer appear every - An overwrite time a photo is taken.
- Page 16 Make sure the microSD card is not larger than 32GB. Format the microSD card in your computer Gallery - Photo and try again. Transfer Failed NOTE: All the files from the microSD card will be removed. Please backup any wanted photos by transferring them to a computer first.
- Page 17 Use a different microSD card that does not contain any previously saved photos from the microscope. (1) Enter the Parent Menu (see the Parent Menu section for how to access this Gallery (with screen). microSD card (2) Select Option 2 and confirm. Once the inserted) - New process is finished, new photos taken in photos taken in...
-
Page 18: Care And Maintenance
CONSUMER SERVICES Creating and developing LeapFrog products is accompanied ® by a responsibility that we at LeapFrog take very seriously. We ® make every effort to ensure the accuracy of the information, which forms the value of our products. However, errors some- times can occur. - Page 19 PRODUCT WARRANTY/ CONSUMER GUARANTEES UK Customers: Read our complete warranty policy online at leapfrog.com/ warranty. Australian Customers: VTECH ELECTRONICS (AUSTRALIA) PTY LIMITED – CONSUMER GUARANTEES Under the Australian Consumer Law, a number of consumer guaran- tees apply to goods and services supplied by VTech Electronics (Australia) Pty Limited.
- Page 20 Visit our website for more information about our products, downloads, resources and more. leapfrog.com LeapFrog Enterprises, Inc. A subsidiary of VTech Holdings Limited. TM & © 2022 LeapFrog Enterprises, Inc. All rights reserved. IM-616100-002 Version:0...
Need help?
Do you have a question about the Magic Adventures Microscope and is the answer not in the manual?
Questions and answers