Table of Contents
Advertisement
Quick Links
Advertisement
Table of Contents

Subscribe to Our Youtube Channel
Related Manuals for Unihertz Titan Pocket


Summary of Contents for Unihertz Titan Pocket
- Page 1 User Manual V1.0...
-
Page 2: Table Of Contents
Contents Unboxing your Phone Contents Unboxing your Phone ................... i Getting to know your phone ......................5 Keys Description ......................... 6 Inserting a SIM card / Micro SD card .................... 6 Turning your phone on and off ..................... 7 Charging your phone ........................8 Transferring Data to the new phone ............ - Page 3 Quickly enter an application ....................... 29 Taking photos while recording video ................... 29 Adjusting the system volume rapidly ................... 29 Turn on the Student mode ......................30 Swap Alt/Shift key ........................31 Home button false touch rejection settings .................. 32 Turn on the Mini mode ......................
- Page 4 Shooting modes ........................55 Burst shooting .......................... 57 Shooting a video ........................57 Camera and video settings ......................58 Photos and Videos ..................59 Viewing photos and videos ......................59 Playing a video ......................... 60 Deleting images or videos......................60 Sharing images or videos ......................
- Page 5 Student mode ........................... 82 Remote ............................ 83 Settings ....................... 85 Configuring the Access Point Names ..................85 Enabling location access ......................85 Enabling Bluetooth & NFC ......................86 Configuring the display settings ....................87 Sound settings .......................... 88 Changing the screen unlock method ................... 89 Airplane mode ..........................
-
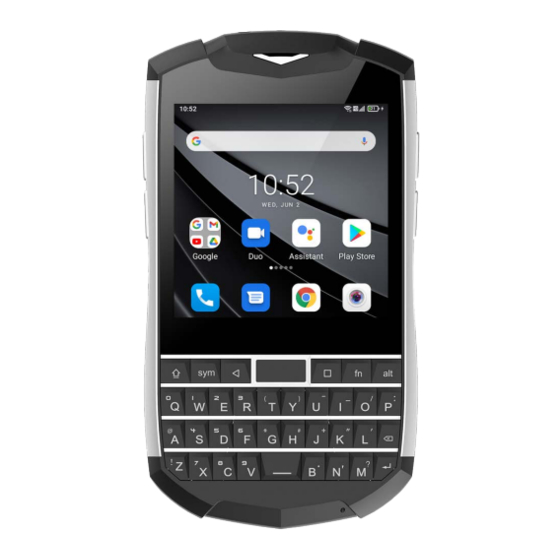
Page 6: Getting To Know Your Phone
Transferring Data to the new phone Getting to know your phone... -
Page 7: Keys Description
Transferring Data to the new phone Keys Description ● Hold down this key to turn your phone on and off. Power Key ● Press this key to lock the mobile phone. ● During the conversation, press the keys to adjust the volume. ●... -
Page 8: Turning Your Phone On And Off
Transferring Data to the new phone Place the metal side of the Nano card or the Micro SD card face down, at an oblique angle to the bevel of the card, and place it in the card slot as indicated by the arrow in the illustration. -
Page 9: Charging Your Phone
Avoid prolonged contact with the surface of your phone if it becomes hot. ● When charging your phone, only use genuine UniHertz batteries, chargers, and USB cables. Third-party accessories are a potential safety hazard and may impair your phone's performance. -
Page 10: Transferring Data Between Your Phone And A Computer
Transferring Data to the new phone Transferring data between your phone and a computer Transfer the data on your old phone to your computer, and then transfer it to your new phone. Connect your phone to a computer using a USB cable. Select Photos or Files. Your computer will automatically install any necessary drivers. -
Page 11: First Use And Initial Setup
First Use and Initial Setup First Use and Initial Setup Initial setup Ensure that the SIM card is inserted correctly before using your phone for the first time. Read the Quick Start Guide for more information on how to set up your phone. Press and hold the power button to turn on your phone, and then follow the onscreen instructions to complete the initial setup. -
Page 12: Connecting To The Internet
First Use and Initial Setup ●Enable or disable a SIM card. You can enable two SIM CARDS at the same time, or disable either card. Touch the switch behind the SIM card to enable or disable the SIM card. If you disable a SIM card, you will not be able to use it to make calls, send messages, or access the Internet. - Page 13 First Use and Initial Setup Using mobile data Before using mobile data, ensure that you have a data plan with your carrier. Swipe down from the status bar to open the notification panel. In the Shortcuts tab, touch to enable mobile data Disable mobile data when it’s not in use to save battery power and reduce data usage.
-
Page 14: Installing Applications
Installing Applications Installing Applications Sharing applications using storage Save installation packages to phone storage to share them with other phones. Only install applications from trusted sources. Copy the installation package into your phone. Open Files, locate the installation package, and then touch to install. A warning message may be displayed during the installation process. -
Page 15: Uninstalling An Application
Installing Applications Uninstalling an application Free up space on your phone and boost performance by removing unused applications. Some pre-installed system applications cannot be removed. ● On the home screen, touch and hold the application you want to uninstall, and then touch App info, touch Uninstall. -
Page 16: Getting Started
Getting Started Getting Started Locking and unlocking the screen Locking the screen ● Press the power button to manually lock the screen. ● The screen will lock automatically and enter sleep mode after it has been idle for a certain period to reduce power consumption and prevent unintended operations. To change the screen sleep time, open Settings, touch Display >... - Page 17 Getting Started Touch: Touch an item once. For example, touch to select an option or open an application. Double touch: Touch the target area of the screen twice in quick succession. For example, double touch an image in full screen mode to zoom in or out.
-
Page 18: Status And Notification Icons
Getting Started Status and notification icons Status icons Status icons are displayed on the right-hand side of the status bar. Status icons display information about your phone's status, such as network connection information, signal strength, battery level, and time. Status icons may vary according to your region or carrier. Signal strength No signal Connected over GPRS... - Page 19 Getting Started Key Description: ● Back: Press to return to the previous screen or close an application. When entering text, press to close the onscreen keyboard. ●Home: Touch to return to the home screen. ● Recent: Press to access the list of recently used applications. ●Sym: Symble key, which also can be set as multi-function button.
- Page 20 Getting Started Adding a widget to the home screen Add frequently used widgets to the home screen for quick access. On the home screen, touch and hold a blank area on the screen to access the home screen editor. Touch Widgets and select a widget.
-
Page 21: Taking A Screenshot
Getting Started For the third-party application installed by users, use the above steps to quickly uninstall it. Creating a folder Create home screen folders to organize your applications by type. For example, you can create a Games folder that contains all of your game applications. On the home screen, drag an icon on top of another icon to create a folder containing both applications. - Page 22 Getting Started screenshot. Select S-capture from drop-down menu Select S-capture from the drop-down shortcut menu of the screen, and select an appropriate way to capture the current screen content you want. Setting Shortcut Open Settings > Intelligent > Shortcut settings, select a keystroke to start Screenshot and take a screenshot of the interface you want by pressing the programmable key.
-
Page 23: Notifications
Getting Started Notifications Status indicator The status indicator changes color and flashes to indicate the following: ● Steady red (not charging): The battery level is critically low and the phone will turn off automatically. ● Steady red (when charging): The battery level is critically low. ●... - Page 24 Getting Started Viewing notifications on the lock screen New notifications (such as missed calls and messages) are displayed on the lock screen. Swipe right on the lock screen notification to view its details. By default, your phone will only display lock screen notifications for certain applications.
-
Page 25: Accessing Applications
Getting Started Accessing applications Opening and switching between applications Opening an application from the home screen On the home screen, touch an icon to open the corresponding application. Switching between applications To switch to another application, touch Home key to return to the home screen, and then touch the icon of the application you want to open. -
Page 26: Entering Text
Getting Started Assign a unique ringtone to each contact so that you can easily tell who is contacting you. Open Contacts. Select the existing contacts, and then touch Select Set ringtone and then choose the desired ringtone or music file. For more information on how to configure call and message ringtones and vibration settings, see Sound... - Page 27 Getting Started Input method instructions ● Switch input language: Touch to switch to the next input method language. ● Add an input language: Long press to open the input language menu, Touch in the upper right corner to add more language input methods to the list, select the default input method language.
- Page 28 Getting Started ● sym key: Clicking the Sym Key may quickly activate the symbol virtual keyboard. Then click the Sym Key again, the symbol keyboard will switch to the next page. Click Sym Key on the last page, the symbol keyboard will be turned off. Long pressing the Sym Key will activate the Voice function.
-
Page 29: Tips And Tricks
Getting Started Tips and Tricks Quick access to a Settings menu Swipe down from the status bar to open the notification panel. In the Shortcuts tab, touch an icon to turn on/off the switch. Long press the icon, it will automatically jump to the corresponding setting interface where you can make more detailed settings quickly High volume mode... -
Page 30: Quickly Returning A Call
Tips and Tricks Quickly returning a call On the lock screen, double touch on a missed call notification and unlock the screen. The dialer screen will be displayed; touch the corresponding number to return the call. Quickly enter an application You can customize the shortcut button function on the right side of the phone, turn on the switch, select an app in the list, press this button in any interface to quickly enter the selected app. -
Page 31: Turn On The Student Mode
Tips and Tricks Turn on the Student mode Titan pocket's "Student mode" is a mobile application that can quickly switch the mobile phone to the scene exclusive to students. By customizing passwords, setting time-range, network, application limits and so on, it provides a plan to use mobile phone reasonably and creates a healthy and controllable learning and entertainment environment for students. -
Page 32: Swap Alt/Shift Key
Tips and Tricks Swipe on the keyboard to scroll the screen The physical keyboard is also touch sensitive. In some interfaces that require sliding up, down, left and right (such as viewing photos, browsing web pages, etc.), the swipes of your fingers on the physical keyboard will act on your screen, which means you will see page scrolling on the screen. -
Page 33: Home Button False Touch Rejection Settings
Tips and Tricks screen rotation for some specific App, which will make the experience more perfect. Settings > Intelligent assistance > Scroll assistant. Home button false touch rejection settings The function of swiping on keyboard to scroll screen will sometimes cause false touch on the Home button. -
Page 34: Calls And Contacts
Call and Contacts Calls and Contacts Making calls Smart dialing Enter the name, initials, or number of a contact in the dialer. Your phone will display matching contacts. Open Phone. Enter the name or initials of a contact in the dialer (for example, Howard Smith or HS). -
Page 35: Answering Or Rejecting A Call
Call and Contacts Open Phone > touch Slide the list up and down to view all calls. Touch the name or number of the person that you want to call. If your phone has dual SIM support, select a SIM or use the default SIM to make a call. -
Page 36: Functions Available During A Call
Call and Contacts ● Swipe right to answer the call. ● Swipe left to reject the call. ● Swipe to reject the call and send an SMS. While the screen is in the application interface: ● Touch ANSWER to answer the call. ●... -
Page 37: Answering A Third-Party Call
Call and Contacts ● Hide the in-call menu: Touch Home key or press the Back key to return to the in-call menu, swipe down from the status bar to open the notification panel, touch the notification of call. ● Start a three-way call: Please contact your carrier to find out how to use this feature. -
Page 38: Making A Conference Call
Call and Contacts Making a conference call You can set up a conference call using the multi-party call feature on your phone. Call one number (or receive a call), and then call another number to add it to the conference call. Conference calling requires network support. -
Page 39: Viewing The Call Log
Call and Contacts Make or answer calls as normal. When the call is put through, use the TTY device to send or receive the letters. Press the to end the call. Setting the TTY Mode Open Phone and touch > Settings >... -
Page 40: Call Settings
Call and Contacts Clearing the call log Open Phone > touch > touch > select Call History. You can: ● Delete one entry: Long press one call log select Delete. ● Delete multiple entries: Touch > Clear call history. Call settings Enabling call recording When automatic recording is on, it will start recording and the recordings will be saved in Internal Storage >... - Page 41 Call and Contacts to answer the new call, and touch to switch between the two calls. Enable Call blocking You can block a number which you do not want to answer. Open Phone. Touch > Settings > Blocked numbers. Touch Add a number > Input the phone number you want to block. When a marked number calls, you will not receive the call notification.
-
Page 42: Adding A Contact To Your Favorites
Call and Contacts Touch > Settings > Voicemail. Touch the desired SIM, then touch Advanced Settings > Setup > Voicemail number, and then enter your voicemail number. When you receive a voicemail message, the icon is displayed in the status bar. Dial the voicemail number to retrieve the message. -
Page 43: Set Photo For Phone Contact
Call and Contacts Set photo for phone contact You can set the photo for the contact saved locally on the phone. After the setting is successful, the photo will be displayed in the contact list, the outgoing interface. Add photo for new contact Open Contacts. -
Page 44: Importing Or Exporting Contacts
Call and Contacts Set the ringtone to be a non-system preset personalized ringtone, such as mp3, recording etc. Open Contacts. Select a Phone contact. Touch > Set ringtone. Ringtones list then slide to the bottom > Add ringtone. Touch , select a personalized ringtone. Touch OK >... - Page 45 Call and Contacts Exporting contacts to a storage device Open Contacts. Touch > Settings >Export > copy contacts from Phone contact > copy contacts to Internal shared storage. Touch Next. Select the contacts you want to export, and then touch OK. The exported .vcf file is saved to the root directory of your phone's internal storage by default.
-
Page 46: Managing Contacts
Call and Contacts Managing contacts Editing a contact After creating a contact, you can edit their contact information at any time. This includes adding or deleting default information such as phone numbers or email addresses. You can also choose a custom ringtone and add a birthday, nickname, or photo. -
Page 47: Finding A Contact
Call and Contacts Deleting contacts Open Contacts. Touch the contact you want to delete. Touch > Delete. Touch Delete. You can also touch and hold a contact you want to delete. Then you can select more contacts. Touch to delete all the selected contacts. Finding a contact Search contacts stored on the phone, SIM card, or linked to an online account. -
Page 48: Viewing Contacts From Different Accounts
Call and Contacts address, or other contact information in the search bar at the top of the contact list. Search results will be displayed underneath. Select a contact. You can then choose to call them, send them a text message, or edit their contact information. - Page 49 Call and Contacts Remove contacts in a label Open Contacts. Touch > Settings and select the label you want to edit. Touch > Remove contacts, select the contact you want to delete and then touch to remove contact from the label. Rename a label Open Contacts.
-
Page 50: Messages And Email
Messages and Email Messages and Email Sending a message Spice up your messages by adding emoticons, images, videos, music, recordings, and more. Open Messages. In the list of message threads, touch Select the recipient box and enter the contact name or phone number. Select the text field and enter your message, and then touch Touch to add an attachment to your message. -
Page 51: Searching For Messages
Messages and Email Searching for messages Use the message search feature to find messages quickly. Open Messages. Touch Enter one or more keywords. The search results will be displayed underneath the search bar. Deleting threads Delete unwanted or old threads to tidy up your message list. Deleted threads cannot be retrieved, so please proceed with caution. -
Page 52: Managing Messages
Messages and Email ● Add to Contacts: Touch to add the number to the Contacts. ● Do Not Disturb:Touch , then you won’t receive calls or texts from this number. This conversation will be archived. ● Exit: Touch to exit. Managing messages Delete unwanted messages, forward messages to other contacts, copy message content, share message, and to view the details of the message. -
Page 53: Adding An Email Account
Messages and Email Adding an email account Adding a personal email account When adding an account, consult your email service provider if you are unsure about the account settings. Open Gmail. Enter your email address and password, and then touch Next to configure an email. -
Page 54: Sending An Email
Messages and Email Sending an email Open Email. Touch From: select the email account you want to use. Enter one or more recipients. To Cc or Bcc the email to multiple recipients, touch Cc/Bcc. Enter your email subject and main body. Touch >... - Page 55 Messages and Email Select the account you want to remove. Touch Remove account > OK. After you remove an email account, you will no longer be able to send or receive emails using that account. Personalizing your email account Display contact pictures, choose what to display after deleting an email, change your signature, set inbox update frequency, and change email notification tones.
-
Page 56: Camera
Camera and Video Camera Accessing the viewfinder Open Camera to access the viewfinder. For more information on the camera settings, see Camera settings. Taking a photo Your phone comes with a feature-packed camera that you can use to capture life's unforgettable moments. - Page 57 Camera and Video Availability of different shooting modes varies by model. Touch the icon on the bottom of viewfinder to change the capture mode. ● Time-lapse mode Time-lapse mode allows you to capture and speed up subtle changes in the natural world.
-
Page 58: Burst Shooting
Camera and Video Burst shooting Use burst shooting when you want to take a photo of a moving subject, such as during a football match. The camera will capture several images in quick succession so that you don't miss out on the action. Not all camera modes support this feature. -
Page 59: Camera And Video Settings
Camera and Video Touch icon to end the recording. Camera and video settings Some shooting modes may not support all settings. Setting the photo and video resolutions Increase the resolution for higher quality images and videos. However, larger resolution images take up more space on your phone. Changing the resolution will also change the image dimensions. -
Page 60: Photos And Videos
Camera and Video Camera settings In the Picture mode, Touch to configure the following settings: ● Self timer: Enable this feature to set a self-timer. ● Picture size: Changing the resolution to change the image dimensions. ● Capture Sound: Turn off the switch, turn off the sound during capture. ●... -
Page 61: Playing A Video
Camera and Video Open Photos and then touch an image to view it in full-screen mode. Touch the screen to display or hide the screen menu. ● Zoom or in out: Spread two fingers apart to zoom in or pinch two fingers together to zoom out. -
Page 62: Sharing Images Or Videos
Camera and Video Open Photos. Touch and hold an image or video to select the files that you want to delete. Touch > Delete to delete the selected files. Sharing images or videos Open Photos. Touch and hold an image or video thumbnail, and then select the files that you want to share. - Page 63 Camera and Video ● Photos: Go to the Photos to view photos or videos ● Trash: Deleted photos or videos will be saved here, Touch RESTORE, the file can be restored to the original folder, otherwise it will be permanently deleted after 60 days. Touch >Empty trash, can manually delete all files in Trash.
-
Page 64: Accessing The Internet
Accessing the Internet Accessing the Internet Connecting to the Internet using mobile data Data charges may apply when using mobile data to access the Internet. Before using mobile data, ensure that you have a data plan with your carrier. Open Settings. -
Page 65: Sharing Your Mobile Internet With Other Devices
Accessing the Internet Open Settings. Touch Network & Internet >Wi-Fi and then turn on the Wi-Fi switch. Touch Add network > , and then scan the QR code. You can get the QR code from other device which has connect to this Wi-Fi network Sharing your mobile Internet with other devices You can share your phone's mobile Internet with other devices (such as phones,... - Page 66 Accessing the Internet Touch Network &Internet > Hotspot & Tethering Touch Wi-Fi hotspot and then turn on the Wi-Fi hotspot switch. After enabling your personal Wi-Fi hotspot, your phone will display the icon in the status bar. Touch Set up Wi-Fi hotspot to view or modify the hotspot name, security settings, and password, and then touch Save.
- Page 67 Accessing the Internet mode. Using Bluetooth tethering to share your mobile Internet Use Bluetooth tethering to turn your phone into a wireless router and share your mobile Internet with other devices. Compared with a Wi-Fi hotspot, Bluetooth tethering offers a slower Internet connection, but consumes less power. Bluetooth tethering can be used to share your Wi-Fi and mobile Internet connection.
-
Page 68: Data Sharing And Transmission
In the boot state, connect the mobile phone to the computer through the USB data cable, click Android System in the mobile phone notification bar, select “Transfer files”, double-click the newly appeared “Titan pocket” drive in the computer to copy, delete and other related operations. -
Page 69: Transferring Data Using Bluetooth
Files Transferring data using Bluetooth Enabling Bluetooth and pairing your phone with another device Open Settings. Touch Connected devices > Connection preferences > Bluetooth Turn on the Bluetooth switch. Touch Pair new device and then select the device you want to pair with and follow the onscreen instructions. -
Page 70: Files
Files By default, your phone's model number is used as the device name when you enable Bluetooth. You can change the name to something more recognizable. Open Settings. Touch Connected devices > Connection preferences > Bluetooth Turn on the Bluetooth switch. Touch Device name to Rename the phone. -
Page 71: Creating Folders
Files Creating folders Create folders and place files inside them to keep your phone organized. Open Files. Touch ,and then open Internal Storage. Touch > Add new folder , enter the name of the new folder, and then touch Create Folder. Renaming files Give your files distinctive names so that you can find them more quickly. -
Page 72: Power Management
Power Management Power Management Viewing battery usage statistics Open Settings and then touch Battery. You can: ● Turn on the Battery save. To help improve battery life, battery saver reduces your device’s performance and limits vibration, location services and most background data. - Page 73 Power Management phone. Configuring the display settings to learn how to save power by disabling Screen saver, turning off the indicator light, and reducing the screen brightness and screen-off time. Intelligent assistance > LED Notification to learn how to turning off the indicator light.
-
Page 74: Tools
Tools Tools Calendar Calendar helps you to plan your daily schedule. For example, it helps you to plan ahead. If you have saved your contacts' birthdays, Calendar will automatically create birthday reminders. Adding and deleting events Add events and set reminders to help you plan ahead. ●... -
Page 75: Clock
Tools Touch the event to see more detail, you can also edit, duplicate or delete it. ● View week number: Touch > Settings > General , and then turn on the Show week number switch to display the week number on the left of the calendar. ●... - Page 76 Tools ● Add a city: Touch Enter a city name or select a city from the list. ● Set the home time zone: Touch > Settings, turn on the Automatic home clock switch, and then touch Home time zone. ● Set the system date and time: Touch >...
-
Page 77: Sound Recorder
Tools Sound Recorder Record Sound Turn on Sound Recorder App. Touch to start recording. Touch to stop recording. Touch to end the recording. You can save or delete it. In order not to affect your recording effect, please do not cover the phone microphone with your hands or other objects. - Page 78 Tools surrounding environment. ● Compass : View the latitude and longitude of the direction and environment. Please touch to calibrate the compass as prompted of the screen before making the measurement accurate! ● Flashlight : Turn the flashlight on or off. ●...
- Page 79 Tools you need more steps for the day. Using a pedometer can help you set goals to take more steps in a day. You may need to find creative ways to add more steps, but walking more will help you get more exercise, feel better, and stay healthy.
-
Page 80: Nfc Card Emulation
Tools You can view your Total distance. Touch : It counts the duration taken by you, the distance traveled and the track that is followed. It is linked with GPS and Internet that help you plan out your running routine in a better and more efficient way. In case of indoors and absence of network, please pay attention to close the track function, so as not to affect your battery life. -
Page 81: Sos
Tools Simulate NFC card Click on a card you want to use in the NFC card list, tap your phone at an NFC enabled terminal. SOS is a software application that can notify emergency contacts in a dangerous situation, reduce the power consumption of mobile phones, and extend standby time in order to wait for effective rescue. -
Page 82: Game Mode
Tools 。 ● First aid CALL: Swipe the icon to the right in an emergency to call all your emergency contacts for help. Shake your phone and hang up to cancel dialing. SMS: Swipe the icon to the right in an emergency, you can send a distress message to all emergency contacts, and your location information will be included in the distress message. -
Page 83: Student Mode
Tools ● Display mode: Tap button in the upper left corner, you can switch between T9 Keyboard and QWERTY keyboard according to your preference. ● Function settings: Tap button to enter the game settings, you can choose whether to turn on the call rejection and notifications according to your own habits. ●... -
Page 84: Remote
Tools ● Change password: Enter the current password once to reset password, then enter new password twice, the password will be changed. Application whitelist: Only checked whitelist apps are allowed. Unchecked ● apps will be disabled. ● Available time period for restricted application: All periods are restricted if there is no settings for restricted time period. - Page 85 Tools corner, and then tap to add other electrical appliance types and models. Switch control If you have added multiple appliances on your phone, you need to select the corresponding model first to control the corresponding appliances. on the upper left corner to select the type of electrical appliance you want to control.
-
Page 86: Settings
Settings Settings Configuring the Access Point Names Configure the Access Point Names when you cannot use mobile date to connect to the internet. Open Settings. Touch Network &Internet >Mobile network. Select the SIM card you use to connect to the internet. Touch Access Point Names . -
Page 87: Enabling Bluetooth & Nfc
Settings App-level permissions Many applications require access to the location of the mobile phone, not only you can set the location permissions when using it for the very first time, but also change it later under the Settings. For not commonly used applications or commonly used applications but don't need to get the location, you can turn off the location permissions. -
Page 88: Configuring The Display Settings
Settings Enabling Bluetooth Open Settings. Touch Connected devices > Connection preferences Turn on the Bluetooth switch to enable Bluetooth. Configuring the display settings Configure the display settings to personalize your phone. For example, you can change the wallpaper, font size, and screen-off time. Go to Settings and then touch Display. -
Page 89: Sound Settings
Settings ● Lift to wake: If this option is enabled, the screen will turn on automatically when the phone is picked up from a flat surface. Keyboard backlight: You can adjust the keyboard backlight duration according to ● actual needs, and you can also set the keyboard backlight to adapt to the ambient brightness. -
Page 90: Changing The Screen Unlock Method
Settings simultaneously pressing the power and volume up buttons. ● Select a ringtone under Phone ringtone to change the ringtone. You can choose from preset ringtones or a local music file. Turn on Also vibrate for calls switch to enable vibrations when your phone rings. ●... -
Page 91: Airplane Mode
Settings Open Settings. Touch Security > Fingerprint Follow the prompt to select an alternate screen lock, touch the fingerprint sensor according to the prompt to start registering the fingerprint, the local fingerprint sensor is located on the front of the phone. This machine can register a total of 5 fingerprints . -
Page 92: Setting Your Sim Card Pin
Settings disabled. You will not be able to make or receive calls, or use mobile data, Bluetooth or Wi-Fi. However, you will still be able to play music, watch videos, and use applications that do not require an Internet connection. Use one of the following methods to enable or disable airplane mode: ●... -
Page 93: Setting Up An Account
Settings Setting up an account Adding an account Many applications and online services require you to create an account in order to access the full range of features. Open Settings. Touch Accounts > Add account. Select an account type, and then follow the onscreen instructions to enter your account information. -
Page 94: Intelligent Assistance
Settings Intelligent Assistance Network Manager Your phone can control the cellular data or WLAN of a single application respectively. By setting, you can control the frequency of the push notifications of certain applications after networking and it can also save mobile data traffic. Settings >... - Page 95 Settings Keyboard shortcuts ou can configure the unique shortcut function of each key, short or long press th e set key while in the main interface to quick start the corresponding function. Open Settings >Intelligent assistance > Keyboard shortcuts, turn on the switch, tap icon behind each 26 English letters to quickly set the shortcut on the keyboard.
- Page 96 Settings Scroll assistant Open Settings >Intelligent assistance >Scroll assistant, In some interfaces that allow to slide up and down or left and right, scroll on the keyboard with your finger can slide the content on screen. This function also has a shortcut switch in the drop-down menu. In any interface, you can slide down from the top to get the drop-down menu, and then quickly turn on/off the Scroll Assistant function.
- Page 97 Settings Mini mode and regular display by scrolling down from top. This action can be set up as a shortcut. Note: For a better browsing experience, it is not recommended to turn on the Mini mode when the app is well displayed. Rotation Control When the third-party apps installed can only be operated under portrait display, you can turn on the rotation control for a better browsing experience.
- Page 98 Settings Programmable Key There are three programmable keys that can be set up as Ctrl/ Symbol/ Media key/ Tab/ Magic key. A third-party app, such as blackberry input, should be added to make Ctrl, Symbol and Tab functional. The default Kika-Keyboard can also work with these programmable keys.
- Page 99 Settings There are three programmable keys: Sym key, Fn key, and PTT key. They can all be set as customized shortcut keys. In camera preview interface, press this button will default to photo-taking or video-recording regardless of system settings. 1 Open Settings.
-
Page 100: Digital Wellbeing & Parental Controls
Settings Scan Open Settings > Intelligent assistance > Scan, locate the QR code or barcode in the virtual box, after successfully recognized, you are able to perform operations such as copy, share or open links and so on. More settings Open Settings >... -
Page 101: Setting The Date And Time
Settings some content or other restrictions to limit the content and time on the device. Open Settings. Touch Digital Wellbeing & parental controls. You can chose to show this app in the app list so as to display the icon on home page and quickly enter the app. -
Page 102: Viewing The Available Storage Space
Settings information about the processor, RAM, internal storage, SIM status , IMEI, and more. Viewing the available storage space Check that there is enough space on your phone's internal storage before downloading update packages or large files. Open Settings and touch Storage to view storage information. Portable storage device If a MicroSD card or OTG USB flash drive is connected to your phone, you can format the MicroSD card or OTG USB flash drive on the phone. -
Page 103: Gestures
Settings Please note when your phone is powered off automatically, you may miss important calls or notifications. Gestures ● Jump to camera: You can press the power button twice to quickly open camera from any screen. ● System navigation: use system navigation to change the current screen. ... - Page 104 Settings your phone's online update feature. ● Your personal data may be erased during a system update. Ensure that you back up important data before updating your phone. ● When updating, ensure that your phone has at least 50% battery power remaining.
-
Page 105: Accessibility Features
Accessibility Features Accessibility Features Accessibility features make it easier for users with impaired vision or hearing to use their phone. TalkBack Enabling or disabling TalkBack TalkBack is an accessibility feature designed for visually impaired users. It provides audible prompts to help you operate your phone. Once it is enabled, your phone will issue audible prompts for all content that you touch, select, or enable. -
Page 106: Captions
Accessibility Features Open an item: Double touch any part of the screen using one finger to confirm your selection from the previous step. For example, if you want to open Settings, two steps are required: Touch the Settings icon once using one finger, and then touch twice on any part of the screen. Configuring the TalkBack settings TalkBack settings can be customized to suit your individual needs. -
Page 107: Volume Key Shortcut
Accessibility Features hearing-impaired users. This feature requires TalkBack to be enabled. Open Settings. Touch Accessibility > Captions preferences Turn on the Captions preferences switch, and then configure the language, font size, and caption style. Volume key shortcut When the shortcut is on, you can press both volume keys for a few seconds to start an accessibility feature. -
Page 108: Using The Power Button To End A Call
Accessibility Features ● Zoom in temporarily: Swipe up from the bottom of the screen with two fingers to activate the magnification function. Tap the screen to zoom in, touch and hold anywhere on the screen, and drag with one finger to scroll. Using the power button to end a call Open Settings. -
Page 109: Appendix
Appendix Appendix About Network Bands supported by Titan pocket: GSM: Band 2/3/5/8 WCDMA: Band 1/2/4/5/6/8/19 TDSCDMA: Band 34/39 TDD/FDD-LTE: Band 1/2/3/4/5/7/8/12/13/17/18/19/20/25/26/28A/28B/34/38/39/40/41/66 CDMA2000: BC0/BC1 Due to different carrier's policy regarding to unlocked phones, LTE wireless service may not be certainly available, even if the listed bands are supported by your carrier. -
Page 110: Legal Notice
Unihertz E-Commerce Co., Ltd. Android™ is a trademark of Google LLC. LTE is a trademark of ETSI. The Bluetooth® word mark and logos are registered trademarks owned by Bluetooth SIG, Inc. and any use of such marks by Unihertz E-Commerce Co., Ltd. - Page 111 Unihertz shall not be responsible for the legality, quality, or any other aspects of any software installed on this product, or for any uploaded or downloaded third- party works in any form, including but not limited to texts, images, videos, or software etc.
- Page 112 THE MAXIMUM LIABILITY (THIS LIMITATION SHALL NOT APPLY TO LIABILITY FOR PERSONAL INJURY TO THE EXTENT APPLICABLE LAW PROHIBITS SUCH A LIMITATION) OF UNIHERTZ ARISING FROM THE USE OF THE PRODUCT DESCRIBED IN THIS MANUAL SHALL BE LIMITED TO THE AMOUNT PAID BY CUSTOMERS FOR THE PURCHASE OF THIS PRODUCT.
- Page 113 This guide is for reference only. The actual product, including but not limited to the color, size, and screen layout, may vary. All statements, information, and recommendations in this guide do not constitute a warranty of any kind, express or implied. Please visit http://www.unihertz.com/about.html to contact us.
Need help?
Do you have a question about the Titan Pocket and is the answer not in the manual?
Questions and answers
How do I mute a message conversation from my unihertz titan phone