Table of Contents
Advertisement
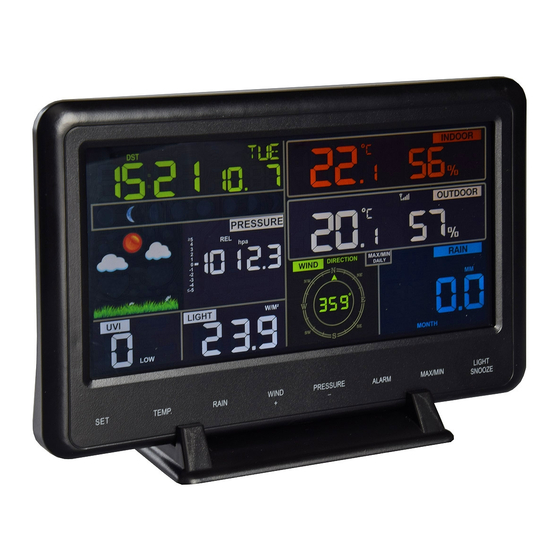
PROFESSIONAL WEATHER STATION
Table of Contents
1. Introduction .......................................................................................... 3
2. Warnings and Cautions ....................................................................... 3
3. Quick Start Guide ................................................................................ 3
4. Pre-Installation Checkout and Site Survey .......................................... 4
4.1 Pre Installation Checkout ................................................................. 4
4.2 Site Survey ....................................................................................... 4
5. Setting Started ..................................................................................... 5
5.1 Contents ........................................................................................... 5
5.2 Sensor Set Up .................................................................................. 5
5.2.1 Install U-bolts and mounting pole .............................................. 6
5.2.2 Install wind vane ........................................................................ 7
5.2.3 Install wind speed ...................................................................... 7
5.2.4 Install Rain Gauge ..................................................................... 8
5.2.5 Install Batteries .......................................................................... 8
5.2.6 Mount assembled outdoor sensor package .............................. 9
5.2.6.1 Before you mount ......................................................... 9
5.2.6.2 Mounting ....................................................................... 9
5.2.7 Reset Button and Transmitter LED ......................................... 10
5.3 Best Practices for Wireless Communication .................................. 10
5.4 Display console .............................................................................. 11
5.4.1 Vertical Desk Stand ................................................................. 13
6. Display Console Operation ................................................................ 14
6.1 Screen Display ............................................................................... 14
6.2 Initial Display Console Set Up........................................................ 15
6.3 Key function ................................................................................... 16
6.4 Setting mode .................................................................................. 17
6.4.1 BEEP: ...................................................................................... 17
6.4.2 MAX/MIN Daily: ....................................................................... 17
6.4.3 Time / Date .............................................................................. 17
6.4.4 Pressure .................................................................................. 18
6.4.5 Light ......................................................................................... 19
6.4.6 Temperature ............................................................................ 20
6.4.7 Wind speed ............................................................................. 20
6.4.8 Rain ......................................................................................... 20
6.4.9 Moon phase............................................................................. 21
6.5 Alarm mode .................................................................................... 21
22515 ChiliTec GmbH
Operation Manual
1
Advertisement
Table of Contents

Summary of Contents for ChiliTec 22515
-
Page 1: Table Of Contents
22515 ChiliTec GmbH PROFESSIONAL WEATHER STATION Operation Manual Table of Contents 1. Introduction ..................3 2. Warnings and Cautions ............... 3 3. Quick Start Guide ................3 4. Pre-Installation Checkout and Site Survey .......... 4 4.1 Pre Installation Checkout ..............4 4.2 Site Survey .................. - Page 2 6.5.1 Display of Alarm value ............. 21 6.5.2 Alarm mode setting: ..............22 6.5.3 Alarm Setting Order: ..............22 6.6 Max/min mode ................22 6.6.1 Press and release MAX/MIN key to display MAX data ... 22 6.7 Calibration mode ................23 6.8 Other Features ................
-
Page 3: Introduction
1. Introduction Thank you for your purchase of the Solar Powered Wireless WiFi Weather Station. The following user guide provides step by step instructions for installation, operation and troubleshooting. 2. Warnings and Cautions Warning: Any metal object may attract a lightning strike,including your weather station mounting pole. -
Page 4: Pre-Installation Checkout And Site Survey
4. Pre-Installation Checkout and Site Survey 4.1 Pre Installation Checkout Before installing your weather station in the permanent location, we recommend operating the weather station for one week in a temporary location with easy access. This will allow you to check out all of the functions, insure proper operation, and familiarize you with the weather station and calibration procedures. -
Page 5: Setting Started
5. Setting Started 5.1 Contents Item Display Console Y shape outdoor sensor(Thermo-hygrometer / Rain Gauge / Wind Speed Sensor /Transmitter) Wind Vane 5V DC Adapter U-bolt with mounting clamps User manual Zip bag for 1pc 10mm single-head wrench 5.2 Sensor Set Up 1. -
Page 6: Install U-Bolts And Mounting Pole
5.2.1 Install U-bolts and mounting pole Installation of the U-bolts, which are in turn used to mount the sensor package on a pole, requires installation of an included metal plate to Fehler! receive the U-bolt ends. The metal plate, visible in Verweisquelle konnte nicht gefunden werden. -
Page 7: Install Wind Vane
5.2.2 Install wind vane Push the wind vane onto the shaft on the top of the sensor, until it stop moving further, as shown in figure 3. Tighten the set screw, with a Philips screw driver(size PH0), until the wind van cannot be removed from the axle, as shown in figure 4. Make sure the wind vane spin freely. -
Page 8: Install Rain Gauge
5.2.4 Install Rain Gauge Keep the Indication mark in straight line. As show below photo. 5.2.5 Install Batteries Insert 2XAA batteries in the battery compartment. The LED indicator on the back of the transmitter will turn on for four seconds and normally flash once every 16 seconds (the sensor transmission update period). -
Page 9: Mount Assembled Outdoor Sensor Package
5.2.6 Mount assembled outdoor sensor package 5.2.6.1 Before you mount Before proceeding with the outdoor mounting detailed in this section, Before proceeding with the outdoor mounting detailed in this section, Fehler! Fehler! you may want to skip to setup instructions in section Verweisquelle konnte nicht gefunden werden. -
Page 10: Reset Button And Transmitter Led
more (use a wrench) to prevent further rotation. Note: Use the bubble level next to the rain sensor to make sure sensor array is completely level. If the sensor is not level, the rain gauge, UV and solar radiation sensors will not measure properly. 5.2.7 Reset Button and Transmitter LED In the event that the sensor array is not transmitting, reset the sensor array. -
Page 11: Display Console
away from computer monitors and TVs. Radio Frequency Interference (RFI). If you have other 433 MHz devices and communication is intermittent, try turning off these other devices for troubleshooting purposes. You may need to relocate the transmitters or receivers to avoid intermittent communication. 1. - Page 12 Figure 12 Note: The batteries are intended for back-up power only. The backlight will remain on for 5 seconds when on back up battery power only. Only when you use power adapter it will the back-light be continuously on. 3. Keep both sensor and the display console together for 15 minutes to lock in the sensor signals.
-
Page 13: Vertical Desk Stand
Note: Your display console should have readings in all sections. Wind Your display console should have readings in all sections. Wind and Rain will show 0’s (connected) until wind or rain occur or are and Rain will show 0’s (connected) until wind or rain occur or are simulated. -
Page 14: Display Console Operation
6. Display Console Operation 6.1 Screen Display 1.Time 10. Rain fall 2. Moon phase 11. Outdoor temperature 3. Barometric Pressure 12. Outdoor humidity 4. Weather forecast 13. RF icon 5. UV index 14. Indoor humidity 6. Light 15. Indoor temperature 7. -
Page 15: Initial Display Console Set Up
6.2 Initial Display Console Set Up Connect the power adapter to power up the display console. Connect the power adapter to power up the display console. The unit will show software version number 2 seconds after power 2 seconds after power reset. -
Page 16: Key Function
6.3 Key function The console has eight keys for easy operation Description Press this key to view MAC address. Hold this key to enter setting mode Press this key to view wind Chill, Heat Index, Dew Point TEMP. Temperature RAIN Press this key to view Rain Rate, event, Rain Day, Rain Week, Rain Month, and Rain total Press the RAIN key 2s to reset current display rain... -
Page 17: Setting Mode
6.4 Setting mode Pressing the SET key for 2 seconds to enter setting model,the basic key for 2 seconds to enter setting model,the basic settings can now be performed in the following order: 6.4.1 BEEP: - Press the SET key for 2 seconds to select the beep section, ON/OFF key for 2 seconds to select the beep section, ON/OFF section digits will start flashing, press the WIND/+ or PRESSURE/ PRESSURE/-... -
Page 18: Pressure
Note: Press the WIND/+ or PRESSURE/-key to set the value. Note: If user to change minute value, second will auto clear to 0. Note: WIFI firmware version 1.4.4 and above support Global Time synchronization. Time zone, DST and date will automatic updated from internet when base station is connected to WIFI internet. -
Page 19: Light
3) Viewing Pressure History Press the [PRESSURE -] button to view the 12 hour, 24 hour, 48 hour ] button to view the 12 hour, 24 hour, 48 hour and 72 hour pressure average. 4) Relative Pressure Calibration Discussion To compare pressure conditions from one location to another, another, meteorologists correct pressure to sea-level conditions. -
Page 20: Temperature
6.4.6 Temperature - Press the SET key 13 time to select in/outdoor temperature unit to select in/outdoor temperature unit, degree C digits will start flashing, press the WIND/+ or PRESSURE/ PRESSURE/- key to select unit (C or F; default: C). - In normal mode, press the TEMP. -
Page 21: Moon Phase
Note: Rain rate: the last 10 minutes rainfall multiplication 6. Rain event: It start to record the rain event value form th the rain falls, the rain event is over and value reset to 0 if last 24 hour rainfall less our rainfall less 1mm and the last 1 hour no rainfall.. -
Page 22: Alarm Mode Setting
6.5.2 Alarm mode setting: Press and hold for 2 seconds ALARM key enter alarm setting key enter alarm setting mode: Press the WIND/+ or PRESSURE/- to arm/disarm alerts and to arm/disarm alerts and adjust alert values. Press the SET key to confirm & move to the next item. irm &... -
Page 23: Calibration Mode
- Press TEMP. key to view wind chill, heat index and dew point max. key to view wind chill, heat index and dew point max. - Press RAIN key to view rain rate, rain day, rain week and rain month key to view rain rate, rain day, rain week and rain month max. -
Page 24: Other Features
Calibration Order: Indoor temperature offset calibrated (range +/-5˚C, default: 0 degrees) Indoor humidity offset calibrated (range +/-10%) Outdoor temperature offset calibrated (range +/-5˚C, default: 0 degrees) Outdoor humidity offset calibrated (range +/-10%) Absolute pressure offset calibrated (range +/-50hpa) Wind direction offset calibrated (adjust by degree) Wind speed factor adjust, default 100% (range 50% to 150%) Rain factor adjust, default 100% (range 50% to 150%) 6.8 Other Features... -
Page 25: Tendency Indicators
6.8.4 Tendency indicators Tendency arrows allow you to quickly determine of temperature or Tendency arrows allow you to quickly determine of temperature or pressure are rising and falling in a three hour update period, updated pressure are rising and falling in a three hour update period, updated every 30 minutes. - Page 26 Sunny Sunny Partly sunny Partly sunny Cloudy Cloudy Rainy Snowy Storm rainy(Blink for 30 minutes at most) (Blink for 30 minutes at most) Storm Snowy(Blink for 30 minutes at most) (Blink for 30 minutes at most) Note: Snowy icon will appear in place of rainy icon when the outdoor Snowy icon will appear in place of rainy icon when the outdoor temperature is below 0˚C (32 F).
-
Page 27: Snooze
The reason the current conditions do not match the forecast icon is son the current conditions do not match the forecast icon is because the forecast is a prediction 24-48 hours in advance. In most 48 hours in advance. In most locations, this prediction is only 70% accurate and it is a good idea to locations, this prediction is only 70% accurate and it is a good idea to consult the National Weather Service for more accurate weather... -
Page 28: Specification
7. Specification: Outdoor data Transmission distance in open field : 100m (300 feet) Frequency : 433MHz/868MHz (option) Temperature range : -40˚C--60˚C (-40˚F to +140˚F) Accuracy : + / - 1 ° C Resolution : 0.1˚C Measuring range rel. humidity : 10%~99% Accuracy : +/- 5% Rain volume display... -
Page 29: Live Internet Publishing
Power consumption • Base station : 5V DC adaptor (included), Power Consumption : 0.5 Watts (1.25 Watts during WiFi configuration mode) • Base station : 3 x AAA batteries (not included) • Remote sensor : 2x AA batteries (not included) The primary power source is the solar panel. -
Page 30: Connecting The Weather Station Console To Wifi
and gauges, import text data for more detailed analysis and use iPhone, iPad and Android applications available at Wunderground.com. Weather Underground is a subsidiary of The Weather Channel and IBM. Weather https://weathercloud.net Weathercloud is a real-time Cloud weather social network formed by observers from around the world. -
Page 31: Download Mobile Application
console history. That will start uploading to the services with a clean slate. 8.1.1 Download mobile application Wi-Fi configuration is done using your mobile device, either iOS or Android. Start by downloading the “ WS View Plus ” application from the Apple App Store or Google Play store, as appropriate for your device. - Page 32 4) Press Scan and select 5) Start to connect your you SSID from the list, then phone to the weather enter your WiFi password station and press Next. “EasyWeather-WIFI” to If you own a dual band your router. Configure router (2.4 GHz and 5.0 successfully 100%, Press GHz),make sure you connect to the 2.4 GHz...
-
Page 33: Adding Weather Services
Upload Setting Your console is capable of sending your sensor data to select Your console is capable of sending your sensor data to select internet-based weather services: ecowitt.net, Wunderground.com, Wunderground.com, weathercloud.net, wow.metoffice.gov.uk and Customized Website Customized Website. User need to register at the select website to get the station ID User need to register at the select website to get the station ID(or MAC address) and password 8.2 Adding weather services... -
Page 34: Ecowitt Weather
8.2.1 Ecowitt Weather It’s recommended to use the Ecowitt Weather server to monitor and It’s recommended to use the Ecowitt Weather server to monitor and record your sensors’ data. Configure as follows: On the ecowitt.net uploading page, enable the ON button On the ecowitt.net uploading page, enable the ON button •... - Page 35 Enter the captcha you received from your email box and press you received from your email box and press • submit. It will jump to the ecowitt.net dashboard and display the sensor It will jump to the ecowitt.net dashboard and display the sensor •...
-
Page 36: Viewing Data On Ecowitt.net
full settings, please visit the ecowitt website on your browser or on a full settings, please visit the ecowitt website on your browser or on a computer. If you could not register on the WS View Plus app, please go to the t register on the WS View Plus app, please go to the website to register and add the device. - Page 37 List display Weather Map...
-
Page 38: Weather Underground
Email Alerts 8.3 Weather Underground If you are planning to use wunderground.com you must have an If you are planning to use wunderground.com you must have an account and register a (new) personal weather station. You may do so account and register a (new) personal weather station. You may do so... - Page 39 on the Wunderground uploading page in the WS View Plus application: Press Register at Wunderground.com and finish the registration on • the page: 1. Visit Wunderground.com and click Join as the right top arrow indicates and select the Sign up for free option. 2.
- Page 40 4. Find Personal Weather Station. Select ‘other’ and click ‘Next’. 5. Select ‘Address’ or ‘Manual’ option, and find your local position. Press ‘Next’.
- Page 41 6. This time you will be asked details about your weather station. Go ahead and fill out the form. 7. After completing the weather station, you will see station ID and key/password.
- Page 42 Take note of the PWS identifier (ID) and the password that will be Take note of the PWS identifier (ID) and the password that will be • generated for you. Back to the app and input the Station ID and Key. •...
-
Page 43: Viewing Data On Wunderground.com
This requires that your mobile device can reach the Internet and therefore this is possible even when you are not on your home Wi-Fi network, such as when using cellular data. 8.4 Viewing data on wunderground.com You can also observe your weather station’s data by using the wunderground.com web site. - Page 44 Weather Underground: Forecast: iOS and Android application for forecasts https://itunes.apple.com/us/app/weather-underground-forecast/id48 6154808 https://play.google.com/store/apps/details?id=com.wunderground.a ndroid.weather&hl=en PWS Weather Station Monitor: View weather conditions in your neighborhood, or even right in your own backyard. Connects to wunderground.com: https://itunes.apple.com/us/app/pws-weather-station-monitor/id713 705929...
-
Page 45: Device List
8.5 My Device Press the “My Device” (bottom left) on the home screen (bottom left) on the home screen and select Device list to view all of your device. You can move the device to You can move the device to Favorites column by press the star button on the back of the device button on the back of the device Note: This function requires that your phone and the console is using... -
Page 46: Settings
8.6 Settings You can set your desired display units or default home page for the app You can set your desired display units or default home page for the app by selecting “Settings” on the home screen: 9. Maintenance 1. Clean the rain gauge once every 3 months. Rotate the funnel Clean the rain gauge once every 3 months. - Page 47 When replacing the batteries, apply a corrosion preventive compound on the battery terminals, available at Amazon and most hardware stores. In snowy environments, spray the top of the weather station with anti-icing silicon spray to prevent snow build up.
-
Page 48: Troubleshooting Guide
10. Troubleshooting Guide Problem Solution Outdoor sensor The sensor array may have initiated properly and the array does not data is registered by the console as invalid, and the communicate to console must be reset. Press the reset button as the display described in Section 5.2. - Page 49 Problem Solution time. Use the calibration feature to offset installation issues related to radiant heat sources. Reference Section 6.7. Relative pressure You may be viewing the absolute pressure, not the does not agree relative pressure. with official reporting station Select the relative pressure. Make sure you properly calibrate the sensor to an official local weather station.
- Page 50 Problem Solution No WiFi 1. Check for WiFi symbol on the display. If connection wireless connectivity is successful the WiFi icon will be displayed in the time field. 2. Make sure your modem WiFi settings are correct (network name, and password). 3.
Need help?
Do you have a question about the 22515 and is the answer not in the manual?
Questions and answers