
Summary of Contents for SJS Cycle2Charge V3 Plus
- Page 1 Cycle2Charge Deutsch Seite 3 English Page 15 Bedienungsanleitung / User Manual Cycle2Charge Rev08 1/28...
- Page 2 Bedienungsanleitung / User Manual Cycle2Charge Rev08 2/28...
- Page 3 Bedienungs- und Montageanleitung Achtung: Lesen Sie die Montageanweisung vor Beginn der Installation sorgfältig durch Sollten Sie nicht die notwendigen Erfahrungen haben, die beschriebenen Tätigkeiten sicher auszuführen, lassen Sie die Montage von einem Fachhändler durchführen Montage auf Ahead Steuersatz Für Montage mittels Adapter → siehe Seite 10 1.1 Bestehende Ahead Top-Cap entfernen ...
- Page 4 1.2 Kabel verlegen Das beigelegte Versorgungskabel wird von oben durch die Aussparungen der Kralle im Steuerrohr gefädelt. Bei manchen Krallen sind die Aussparungen der oberen und unteren Reihe der Kralle gegeneinander verdreht. In diesem Falle muss das Kabel schräg eingeführt werden.
- Page 5 Fädeln Sie das Kabel soweit ein, dass der weiße Stecker noch gut 3cm aus dem Lenkrohr herausschaut Verlegen Sie nun das durchgeführte Kabel parallel zu dem Kabel für die Beleuchtung bis zum Nabendynamo. Die entgültige Fixierung mit den beigelegten Kabelbindern sollten Sie ganz zum Schluss durchführen.
- Page 6 Ziehen Sie den Stecker vom Dynamo ab Drücken Sie mit einem kleinen Schraubenzieher die Rastnase zurück (Pfeil) und ziehen die schwarze Kappe ab. Ziehen Sie die Litzen der Beleuchtung aus dem Stecker und verdrillen diese mit dem durchgefädelten Versorgungskabel.
- Page 7 Fädeln Sie die beiden verdrillten Litzen wieder in den grauen Stecker ein und biegen die Kupferdrähte gemäß der nachfolgenden Abbildung um. Achten Sie darauf, dass sich die umgebogenen Litzenenden nicht berühren. Bedienungsanleitung / User Manual Cycle2Charge Rev08 7/28...
- Page 8 Schieben Sie die schwarze Kappe wieder auf und stecken den Stecker wieder auf den Dynamo 1.3 Montage Cycle2Charge Stecken Sie den weißen Stecker in die passende Buchse. Achten Sie darauf, dass der Stecker vollständig einrastet, um ein Losrütteln im Betrieb zu vermeiden.
- Page 9 Befestigen Sie den neuen Ladekopf mit der mitgelieferten Inbusschraube. Achten Sie darauf, dass Sie das Kabel nirgends eingequetscht wird. Bevor Sie die Inbusschraube festziehen, drehen Sie den Kopf so, dass die USB-Buche gut zugänglich ist. Achtung: Drehen Sie den Ladekopf bei der Ausrichtung nicht mehrfach um die eigene Achse, da dies das Kabel beschädigen könnte.
- Page 10 Montage mittels Adapter Klappen Sie den Aluminiumadapter über den Lenker. Hierbei sollte der offene Teil des „C“-förmigen Adapters nach Vorne zeigen. Die breitere Fläche mit den 3 Öffnungen zeigt nach oben. Fädeln Sie nun das Anschlusskabel wie auf dem Foto zu sehen durch eines der rechteckigen Öffnungen.
- Page 11 Stecken Sie den weißen Stecker in die passende Buchse. Achten Sie darauf, dass der Stecker vollständig einrastet, um ein Losrütteln im Betrieb zu vermeiden. Befestigen Sie den neuen Ladekopf mit der mitgelieferten Inbusschraube. Die Schraube muss so fest angezogen werden, dass sich der Lader nicht mehr auf dem Adapter drehen kann, da sonst der Stecker beschädigt wird.
- Page 12 Schlingen Sie das Kabelende noch einmal um die Befestigungsschraube, um den Stecker vor Zugbelastungen vom Kabel zu schützen. Achten Sie bei der Umschlingung auch darauf, dass das Kabelende zum Stecker nicht unter Zug steht. Verlegen Sie nun das weitere Kabel entlang des Lenkers und der Gabel bis zum Dynamo.
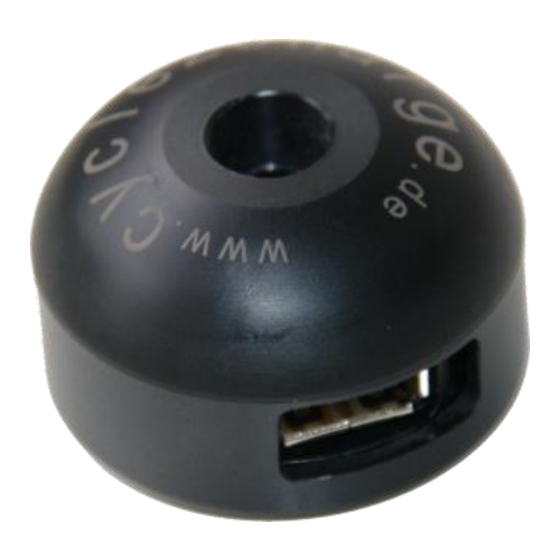
- Page 13 Bedienungsanleitung Der USB-Lader Cycle2Charge wandelt die Energie des Dynamos in eine 5 V Gleichspannung um, die für den Betrieb von USB-Geräten benötigt wird. Der maximale Ladestrom darf 1A nicht überschreiten. Zur Verwendung muss die schwarze Abdeckkappe so weit gedreht werden, dass die rechteckige Aussparung die USB-Buchse freigibt.
- Page 14 gleichzeitige Laden eines Verbrauchers wird nicht empfohlen, da zum einen die Lichtleistung stark abfällt und auch nur eine geringe Ladeleistung erreicht wird. Wenn die Ladefunktion genutzt werden soll, sollte daher das Licht vollständig ausgeschaltet werden. Wenn im Dunkeln Licht benötigt wird, sollte der Ladevorgang unterbrochen werden.
-
Page 15: Mounting Instructions
User manual & mounting instructions Prior to installation, please read the complete mounting instructions carefully! If you do not have the necessary skills or experience for the described assembly, please ask a specialist for assistance. Assembly on Ahead head set Adapter assembly for handlebar →... - Page 16 5.2 Cable routing The feed wire is threaded from the top through the openings of the star fangled nut. At some star fangled nuts the upper and lower openings are rotated against each other. In these cases the cable must be inserted skewed. A flashlight that lights from below in the head tube can facilitate this job.
- Page 17 Thread the cable so far through the head tube that the white plug is approx. 3 cm outside the head tube. Run the cable coming out of the head tube parallel to the existing cable of the front light down to the hub dynamo.
- Page 18 Pull the plug off the dynamo Press with a small screwdriver on the locking pin (arrow) and remove the black cap of the plug. Pull the cables of the front light out off the plug and twist the stranded wires with the feed wire of the charger.
- Page 19 Thread the two twisted wires back into the gray plug and bend the copper wires according to the following picture. Take care that the ends of the wires don't touch each other. Bedienungsanleitung / User Manual Cycle2Charge Rev08 19/28...
- Page 20 Reassemble the black cap and put the plug back on the dynamo. 5.3 Assemble Cycle2Charge Push the white plug into the socket. Take care that the plug is securely locked Fasten the Cycle2Charge with the delivered screw. Bedienungsanleitung / User Manual Cycle2Charge Rev08 20/28...
- Page 21 Take care that the cable does not get caught. Prior to the final tightening of the screw, rotate the Cycle2Charge to have the USB outlet in the preferred direction. Attention: Don't rotate the Cycle2Charge several times around itself as this would damage the feed cable ...
- Page 22 Assembly of the adapter Position the black aluminum adapter around the handlebar. The open part of the “C”-shaped adapter should be facing the front of the bicycle. The wider base with the 3 openings should be facing upwards. Thread the feed wire through one of the rectangular openings (see picture below).
- Page 23 Push the white plug into the socket. Ensure that the plug is securely locked Fasten the Cycle2Charge with the delivered allen screw. Take special care to tighten the screw only so much that the charger can't rotate on the adapter any more.
- Page 24 Wind the feed cable once around the mounting screw to keep tensile forces away from the plug. Double check after the cable routing that the white plug is not under tension. Run the cable along the handlebar and the fork down to the dynamo. Chapter 5.2 describes the connection to the dynamo.
- Page 25 User manual The USB-charger Cycle2Charge converts the energy of the dynamo in 5V DC voltage to power USB-devices. The maximum charge current must stay below 1A. To use the Cycle2Charge, the black top cap must be turned until the USB-outlet is accessible. If no cable is connected to the USB outlet, the top cap has to be turned by 180°...
- Page 26 switch front and rear light completely off. If you need light in the dark please stop the charging. The charge current depends on the cycling speed and is adjusted automatically for the connected smartphone / GPS / battery. For some devices it is necessary to stop the charging for a very short time and restart the charge process.
- Page 27 Bedienungsanleitung / User Manual Cycle2Charge Rev08 27/28...
- Page 28 Bedienungsanleitung / User Manual Cycle2Charge Rev08 28/28...
Need help?
Do you have a question about the Cycle2Charge V3 Plus and is the answer not in the manual?
Questions and answers