
Related Manuals for Vertilux VTi


Summary of Contents for Vertilux VTi
- Page 1 PROGRAMMING INSTRUCTIONS MANUAL DE PROGRAMACIÓN CELTIC MOTOR FOR ® SLIDING PANELS MOTOR VTi CELTIC PARA ® PANELES DESLIZANTES vertilux.com...
- Page 2 Maximum rail length: 7 m I 23 ft • DC motor with RF communication through the Celtic Radio Receiver & Transformer ® Wall Switch (6-700-AT-AC227) • Smart control with VTi Smart Hub ® • Compatible with leading brands of Home Automation Systems vertilux.com...
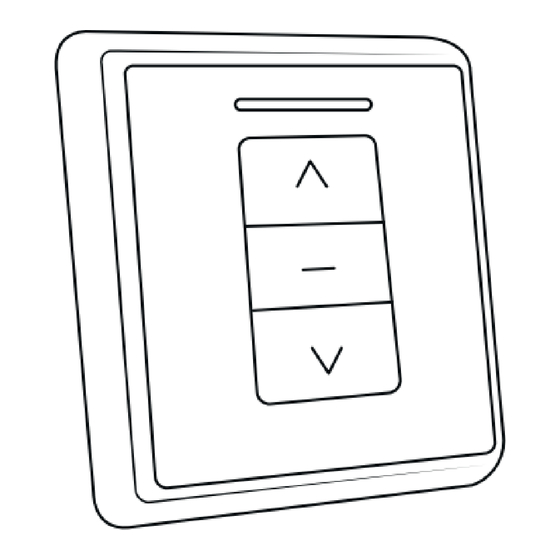
- Page 3 Then place the GEAR back (fig. GEAR To adjust the limits it is necessary to use the VTi Celtic Radio ® Receiver & Transformer Wall Switch (6-700-AT-AC227). Make sure it is properly wired and installed (fig.
-
Page 4: Adjusting The Motor Limits
2. Both motor DIRECTION limits have been adjusted. BUTTON IMPORTANT: Secure the motor settings by covering the limit setting buttons with their cover. vertilux.com © 2018. Vertilux, Ltd. All Rights Reserved. Last revised: October 2018. -
Page 5: Optional Functions
Then, using the new remote control, select the desired channel using the channel selector NEW REMOTE button, and press the button. The Vertilux BUTTON CONTROL Shade is now set on the new remote control. vertilux.com © 2018. Vertilux, Ltd. All Rights Reserved. Last revised: October 2018. - Page 6 UNLOCKED The motor is now set to its factory default settings. Place the GEAR back. You can now follow the procedure to adjust the limits vertilux.com © 2018. Vertilux, Ltd. All Rights Reserved. Last revised: October 2018.
- Page 7 This does not affect its operation. Clean the lubricant residues with a dry cloth to avoid stains on the slats or panels during the shade fabrication process. For additional information contact your Vertilux representative or Vertilux Authorized Dealer.
- Page 8 • Longitud máxima del riel: 7 m I 23 ft • Motor DC (corriente directa) con comunicación Celtic RF a través del control de pared VTi ® Radio Receiver & Transformer Wall Switch (6-700-AT-AC227) • Control inteligente desde teléfonos y tabletas a través del VTi...
- Page 9 VISTA POSTERIOR BOTÓN DE PARADA MOTOR VTi CELTIC ® 6-710-SP-00XXX SN: 324385 U = 24V DC n= 59 U/mim 0,009 kW Fig. 3. Diagrama de conexión eléctrica vertilux.com © 2018. Vertilux, Ltd. Todos los derechos reservados. Última revisión: Octubre 2018.
- Page 10 2. DIRECCIÓN Ambos límites del motor han quedado configurados. botones de ajuste de límites IMPORTANTE: Asegúrese de cubrir con su tapa los del motor. vertilux.com © 2018. Vertilux, Ltd. Todos los derechos reservados. Última revisión: Octubre 2018.
-
Page 11: Funciones Opcionales
NUEVO CONTROL BOTÓN DE botón de selección de canales, y presione el REMOTO SUBIDA subida. El motor ahora se encuentra configurado en el nuevo control remoto. vertilux.com © 2018. Vertilux, Ltd. Todos los derechos reservados. Última revisión: Octubre 2018. - Page 12 El motor ha sido configurado a sus valores de fábrica. Coloque nuevamente el ENGRANAJE y siga el procedimiento para ajustar los límites (pág. vertilux.com © 2018. Vertilux, Ltd. Todos los derechos reservados. Última revisión: Octubre 2018.
- Page 13 Esto no afecta el funcionamiento del motor. Limpie los residuos de lubricante con un paño seco para evitar manchas en los slats o paneles durante la fabricación de la cortina. Para información adicional contacte a un representante de Vertilux o un distribuidor autorizado.
Need help?
Do you have a question about the VTi and is the answer not in the manual?
Questions and answers