Table of Contents
Advertisement
Quick Links
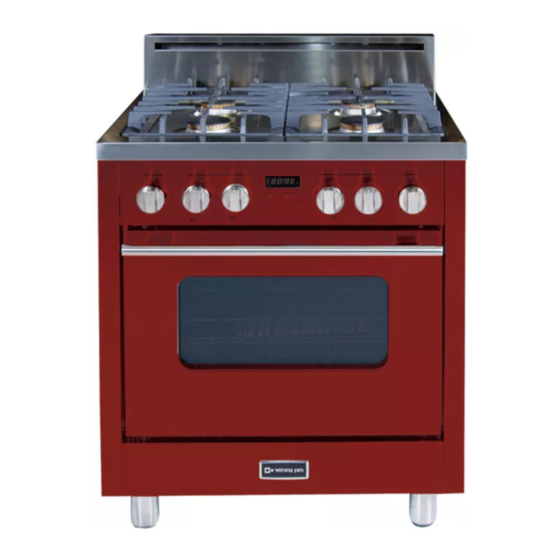
FREE STANDING RANGE
GAS AND ELECTRIC
APPLIANCES
EUROCHEF USA inc.
MOD.: VEFSGG30
MOD.: VEFSGG31
INSTRUCTION GUIDE
INSTALLATION
AND MAINTENANCE
IMPORTANT: SAVE THESE INSTRUCTIONS.
■ IMPORTANT SAFETY INSTRUCTIONS ■
Read and follow all instructions before using this appliance to prevent
the potential risk of fire, electrical shock, personal injury or damage to the
appliance as a result of improper usage of the appliance.
WARNING: If the information in this manual is not followed exactly, a
fire or explosion may result causing property damage, personal injury
or death.
Do not store or use gasoline or other flammable vapours and liquids in
the vicinity of this appliance.
WHAT TO DO IF YOU SMELL GAS:
- Do not to light any appliance.
- Do not touch any electrical switch.
- Do not use any phone in your building.
- Immediately call your gas supplier from a neighbour's phone. Follow
the gas supplier's instructions.
- If you cannot reach your gas supplier, call the fire department.
Installation and service must be performed by a qualified installer,
service agency or the gas supplier.
1
9880021100-CU 30P VERONA PRO 040413040413
Advertisement
Table of Contents

Related Manuals for Eurochef USA verona pro VEFSGG30

Summary of Contents for Eurochef USA verona pro VEFSGG30
- Page 1 FREE STANDING RANGE GAS AND ELECTRIC APPLIANCES EUROCHEF USA inc. MOD.: VEFSGG30 MOD.: VEFSGG31 INSTRUCTION GUIDE INSTALLATION AND MAINTENANCE IMPORTANT: SAVE THESE INSTRUCTIONS. ■ IMPORTANT SAFETY INSTRUCTIONS ■ Read and follow all instructions before using this appliance to prevent the potential risk of fire, electrical shock, personal injury or damage to the appliance as a result of improper usage of the appliance.
-
Page 2: Important Safeguards
To ensure proper and safe operation: Appliance must be properly installed and grounded by a qualified installer. Have the installer show you the location of the gas shut off valve and how to shut it off in an emergency. Always disconnect power to appliance before servicing. IMPORTANT SAFEGUARDS. - Page 3 Storage in or on appliance. Flammable materials should not be stored in an oven or near surface units. Do Not use water on grease fires. Smother fire or flame by using dry chemical or foam-type extinguisher. Use only dry potholders. Moist or damp potholders on hot surfaces may result in burns from steam.
- Page 4 Placement of oven racks. Always place oven racks in desired location while oven is cool. If rack must be moved while oven is hot, do not let potholder contact hot heating element in oven. Clean ventilating hoods frequently. Grease should not be allowed to accumulate on hood and hood filter.
- Page 5 ■ INSTRUCTION GUIDE FOR GAS GAS OVEN ■ ■ INSTRUCTION GUIDE FOR GAS OVEN, CONTROL FEATURES OVEN GAS BURNER IGNITION, REGULATION AND THERMOSTAT Open the oven door completely, and them push in and turn the thermostat knob counterclockwise to 500 ° F setting. See fig. 03 and 04. A clicking sound will be heard and the burner will light.
- Page 6 ON AND OFF PILOT LIGHT Whenever one of the above functions is selected, the red light goes on. CAUTION: 1) Do not store or use gasoline or other flammable vapours, liquids or items in the vicinity of this or any other appliance. 2) Never use appliance as a space heater to heat or warm a room.
- Page 7 Burner operational Notes, fig. 08A: - A properly adjusted burner with clean ports will light within a few seconds. If using natural gas the flame will be blue with a deeper blue inner cone. - If the burner flame is yellow or is noisy the air/gas mixture maybe incorrect. Contact a service technician to adjust.
-
Page 8: Abnormal Operation
This is easily done using a damp cloth and a non-abrasive detergent, wipe using a soft dry cloth. For stainless steel parts with stubborn soils. Use only plastic scrubbing pad or a sponge with vinegar and warm water. Because of many new cleaning products introduced in the marketplace each year, it is not possible to list all products that can be safely be used to clean this appliance. -
Page 9: Replacing The Oven Light
being locked). When the front of the door is high enough and hinges are locked, you will be able to lift the hinges to clear the slots 4) Pull the hinges out of the slots in the oven front frame. TO REPLACE THE OVEN DOOR 1) Grasp the sides of the door at the centre and insert the ends of the hinges (A) and fix the slots in the oven front frame. -
Page 10: Installation Instructions
INSTALLATION INSTRUCTIONS SPECIAL WARNING: ONLY QUALIFIED AND AUTHORIZED PERSONNEL SHALL INSTALL OR SERVICE THIS RANGE. READ “SAFETY INSTRUCTIONS” IN THIS BOOK BEFORE USING RANGE. IMPROPER INSTALLATION, ADJUSTMENT, ALTERATION, SERVICE, MAINTENANCE OR USE OF RANGE CAN RESULT IN SERIOUS INJURY OR PROPERTY DAMAGE, AND SO THE MANUFACTURE WILL NOT BE RESPONSIBLE. - Page 11 If cabinet storage is to be provided, the risk can be reduced by installing a range hood that projects horizontally a minimum of 5 inches beyond the bottom of the cabinets. CAUTION: SOME CABINETS AND BUILDING MATERIALS ARE NOT DESIGNED TO WITHSTAND THE HEAT PRODUCED BY THE NORMAL SAFE OPERATION OF A LISTED APPLIANCE.
- Page 12 B. Place the Anti-Tip Bracket 8 5/8” for this Range from the marked “EDGE” toward centre of opening and against the back wall with a first hole height of 1 ¾” plus “A” (distance between side wall bottom edge and floor after range levelling) as shown in figure 14.
-
Page 13: Connecting The Range
D. Proceed with the reminder of the installation instructions. CONNECTING THE RANGE ELECTRICAL SUPPLY The appliance, when installed, must be electrically grounded in accordance with local codes or, in absence of local codes, with National Electrical Code, ANSI/NFPA 70 In Canada the appliance must be installed in accordance with the current CSA Standard C22.1 - Canadian Electrical Code part 1. - Page 14 WARNING: This appliance requires ground connection for your protection against shock hazard and should be connected directly into a properly grounded receptacle. WARNING: DISCONNECT ELECTRICAL SUPPLY BEFORE SERVICING THE APPLIANCE. When the flexible cord has to be changed it is necessary to follow the procedure hereafter described: -Turn off main gas shut-off valve and disconnect electrical supply -Pull out entire range from the counter.
-
Page 15: Gas Supply
GAS SUPPLY Installation of this range must conform with local codes or, in the absence of local codes, with the National Fuel Gas Code, ANSI Z223.1 latest edition. In Canada the range must be installed in accordance with the current CGA Standard CAN/CGA-B149 –... -
Page 16: Gas Conversion
f) Connect range to gas supply at appliance pressure regulator using adapters supplied with flexible connector. Rigid pipe may also be used. See rating plate for type of gas range has been manufactured for. g) Turn on main gas valve at meter, and relight pilots at other gas appliances. -
Page 17: Service/Parts Information
INLET PRESSURE IN INCHES OF WATER COLUMN. PRESSURE Minimum Maximum Natural gas LP gas GAS BURNER INJECTOR CONVERSION To switch injectors, it is enough to unscrew fixed injector using a proper 7 Hex. key tool and replace it with new injector for new gas setting. For proper injector size, follow Rangetop and Oven Technical Data chart and fig. - Page 18 LOW SETTING VALVE ADJUSTMENT The LOW setting should produce a stable flame when turning the knob from HIGH to LOW. The flame should be 1/8 inch or lower and must be stable on all ports on LOW setting. To adjust: Operate burner on HIGH for about five minutes to preheat burner itself.
-
Page 19: Dimensions Of The Appliances
OVEN TECHNICAL DATA ELECTRICAL DATA VEFSGG30SS VEFSGG31SS 30 in. 30 in. CONVECTION CONVECTION GAS OVEN GAS OVEN VOLTAGE 120 Vac ~ 60Hz. TOTAL POWER 12000 BTU 12000 BTU BROILING GAS BURNER 12000 BTU 12000 BTU BOTTOM GAS BURNER 12000 BTU 12000 BTU OVEN LIGHT 25 W... - Page 20 FIGURES Fig. n° 01 Fig. n° 02 Fig. n° 03 Fig. n° 04 Fig. n° 05 Fig. n° 06 Fig. n° 07 9880021100-CU 30P VERONA PRO 040413040413...
- Page 21 Fig. n° 08 Fig. n° 08A Fig. n° 08B BURNER CUP BURNER CROWN ORIFICE ELECTRODE BURNER BASE Fig. n° 09A Fig. n° 10 9880021100-CU 30P VERONA PRO 040413040413...
- Page 22 Fig. n° 11 Fig. n° 12 9880021100-CU 30P VERONA PRO 040413040413...
- Page 23 Fig. n° 13 Fig. n° 14 9880021100-CU 30P VERONA PRO 040413040413...
- Page 24 Fig. n° 15 Fig. n° 16 9880021100-CU 30P VERONA PRO 040413040413...
- Page 25 Fig. n° 17 Fig. n° 18 A Fig. n° 18 B Fig. n° 19 9880021100-CU 30P VERONA PRO 040413040413...
Need help?
Do you have a question about the verona pro VEFSGG30 and is the answer not in the manual?
Questions and answers