Table of Contents
Advertisement
Quick Links
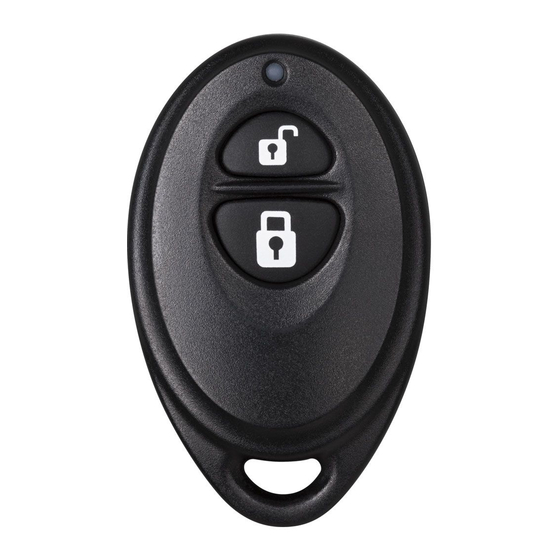
TX-E111 2-Button Keyfob Remote 319.5 MHz
Installation Sheet
Enrolling
Enrollment and functionality will vary depending on the control panel with which the device is used.
Please refer to your specific control panel installation manual for complete instructions.
Each keyfob is learned into a control panel as an unsupervised sensor and uses one available zone slot.
Operation
Lock
Depending on your control panel:
Press once to arm in Stay mode.
Press twice to arm in Away mode.
Unlock
Press this button to disarm your system.
You do not have to enter your access code when you use this button to disarm the system.
Panic or Aux
If the keyfob is programmed using a panic or portable auxiliary group number, pressing the Lock and
Unlock buttons simultaneously will activate an audible or silent alarm (depending on the group
number) and initiate a report to the central station.
A red LED located at the top of the keyfob will flash to indicate that a signal has been transmitted.
Replacing the Battery
Because keyfobs are non-supervised devices, a low battery signal will only be received by the
control panel when the device is within range of the receiver and a button is pressed (a low battery
signal will only be sent when a button is pressed). When the device is carried beyond the range of
the receiver and/or is seldom used or tested, the battery could wholly deplete without a warning of
the battery condition being sent to the panel. If the LED on the device appears dim or does not turn
on when a button is pressed, it is a warning that the battery may be low or depleted and should be
replaced. To ensure proper functionality, test the device weekly.
Steps for replacing the battery:
1. With a small screwdriver carefully separate the front and back piece of plastic to reveal the battery.
2. Replace with a CR2032 battery ensuring the + side of the battery faces up.
3. Re-assemble the plastics and ensure they click together.
466-5248 • REV A • 19MAY16
© 2016 United Technologies Corporation. All rights reserved.
Advertisement
Table of Contents

Summary of Contents for United Technologies Interlogix TX-E111
- Page 1 1. With a small screwdriver carefully separate the front and back piece of plastic to reveal the battery. 2. Replace with a CR2032 battery ensuring the + side of the battery faces up. 3. Re-assemble the plastics and ensure they click together. 466-5248 • REV A • 19MAY16 © 2016 United Technologies Corporation. All rights reserved.
- Page 2 Copyright Copyright © 2016 United Technologies Corporation. All rights reserved. Trademarks Interlogix is a registered trademark of United Technologies Corporation. Interlogix is part of UTC Climate, Controls & Security, a unit of United Technologies Corporation. Limitation of Liability A PROPERLY INSTALLED AND MAINTAINED ALARM/SECURITY SYSTEM MAY ONLY REDUCE THE RISK OF EVENTS SUCH AS BREAK-INS, BURGLARY, ROBBERY OR FIRE;...
Need help?
Do you have a question about the Interlogix TX-E111 and is the answer not in the manual?
Questions and answers