Table of Contents
Advertisement
Quick Links
Advertisement
Table of Contents

Related Manuals for Hitachi RAS-S18CXK


Summary of Contents for Hitachi RAS-S18CXK
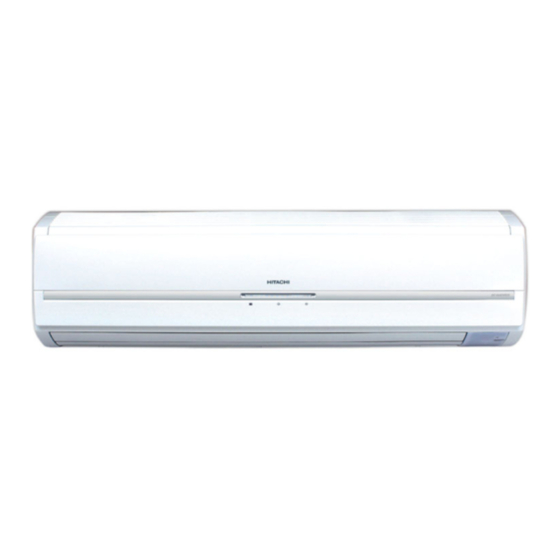
- Page 1 SPLIT TYPE AIR CONDITIONER INDOOR UNIT/OUTDOOR UNIT MODEL RAS-S18CXK/RAC-S18CXK INDOOR UNIT OUTDOOR UNIT RAS-S18CXK RAC-S18CXK Instruction manual Page 1~22 To obtain the best performance and ensure years of trouble free use, please read this instruction manual completely. – 1 –...
-
Page 2: Safety Precaution
SAFETY PRECAUTION Please read the “Safety Precaution” carefully before operating the unit to ensure correct usage of the unit. Pay special attention to signs of “ Warning” and “ Caution”. The “Warning” section contains matters which, if not observed strictly, may cause death or serious injury. The “Caution” section contains matters which may result in serious consequences if not observed properly. - Page 3 PRECAUTIONS DURING OPERATION The product shall be operated under the manufacturer specification and not for any other intended use. Do not attempt to operate the unit with wet hands, this could cause fatal accident. When operating the unit with burning equipments, regularly ventilate the room to avoid oxygen insufficiency.
-
Page 4: Names And Functions Of Each Part
OUTDOOR UNIT Drain pipe Condensed water drain to outside. Connecting cord and insulation pipe for piping Air inlet (Back and Left side) Air outlet MODEL NAME AND DIMENSIONS DEPTH (mm) MODEL WIDTH (mm) HEIGHT (mm) RAS-S18CXK 1030 RAC-S18CXK – 4 –... -
Page 5: Operation Indicator
INDOOR UNIT INDICATORS OPERATION LAMP This lamp lights during operation. HITACHI TIMER LAMP This lamp lights when the timer is working. FILTER LAMP When the device is operated for a total of about 200 hours, the FILTER lamp lights to indicate that it is time to clean the filter. - Page 6 NAMES AND FUNCTIONS OF REMOTE CONTROL UNIT REMOTE CONTROLLER This controls the operation of the indoor unit. The range of control is about 7 meters. If indoor lighting is controlled electronically, the range of control may be shorter. This unit can be fixed on a wall using the fixture provided. Before fixing it, make sure the indoor unit can be controlled from the remote controller.
-
Page 7: Cooling Operation
COOLING OPERATION Use the device for cooling when the outdoor temperature is 21-43°C. If indoor humidity is very high (over 80%), some dew may form on the air outlet grille of the indoor unit. Press the button so that the display indicates (COOL). -
Page 8: Dehumidifying Operation
DEHUMIDIFYING OPERATION Use the device for dehumidifying when the room temperature is over 16°C. When it is under 15°C, the dehumidifying function will not work. Press the button so that the display indicates (DEHUMIDIFY). Dehumidifying operation starts with a beep. The FAN SPEED is set at LOW automatically. -
Page 9: Circulation Operation
CIRCULATION OPERATION Press the button so that the display indicates (CIRCULATION). Circulating operation starts with a beep. Press the FAN SPEED button and select the desired FAN SPEED (the display indicates your choice). Press the temperature control button to set to the desired temperature. - Page 10 HOW TO SET THE SLEEP TIMER Press the (SLEEP) button, and the display changes as shown below. Mode Indication 1 hour 2 hours 3 hours 7 hours Sleep timer Sleep timer off Sleep Timer: The device will continue working for the designated number of hours and then turn off.
-
Page 11: How To Set The Timer
HOW TO SET THE TIMER I ON Timer and OFF Timer are available. I Operation stop at setting time OFF Timer Reservation OFF TIME setting Select the OFF TIME by pressing the (OFF) Button. Setting time will change according to the below sequence when you press the button. - Page 12 ADJUSTING THE AIR DEFLECTORS Adjustment of the conditioned air in the upward and downward directions. According to “Dehumidifying” or “Cooling” operation, the horizontal air deflector is automatically set to the proper angle suitable for each operation. The deflector can be swing up and down and also set to the desired angle using the “...
- Page 13 HOW TO EXCHANGE THE BATTERIES IN THE REMOTE CONTROLLER When using the remote control, if there is no response from the air conditioner unit and or the remote control has fading and dim displays, the batteries in the remote control device need to be removed and replaced with new ones Remove the cover as shown in the figure and take out the old batteries.
- Page 14 THE IDEAL WAYS OF OPERATION Suitable Room Temperature Install curtain or blinds Warning It is possible to Freezing temperature reduce heat is bad for health and a entering the waste of electric power. room through windows. Ventilation Effective Usage Of Timer At night, please use the “OFF or ON timer Caution operation mode”, together with your wake up...
- Page 15 FOR USER’S INFORMATION The Air Conditioner And The Heat Source In The Room Caution If the amount of heat in the room is above the cooling capability of the air conditioner (for example: more people entering the room, using heating equipments and etc.), the preset room temperature cannot be achieved.
- Page 16 ATTACHING THE AIR CLEANSING FILTERS CAUTION Cleaning and maintenance must be carried out only by qualified service personal. Before cleaning, stop operation and switch off the power supply. Open the front panel. Pull up the front panel by holding it at both sides with both hands.
-
Page 17: Maintenance
MAINTENANCE CAUTION Cleaning and maintenance must be carried out only by qualified service personal. Before cleaning, stop operation and switch off the power supply. AIR FILTER Clean the air filter, as it removes dust inside the room. In case the air filter is full of dust, the air flow will decrease and the cooling capacity will be reduced. - Page 18 Washable Front Panel Remove the front panel and wash with clean water. Wash it with a soft sponge. After using neutral detergent, wash thoroughly with clean water. When front panel is not removed, wipe it with a soft dry cloth. Wipe the remote controller thoroughly with a soft dry cloth.
-
Page 19: Regular Inspection
CAUTION Please use earth line. Do not place the earth line near water or gas pipes, lightning-conductor, or the earth line of telephone. Improper installation of earth line may cause electric shock. A circuit breaker should be installed depending on the mounting site of the unit. Without a circuit breaker, the danger of electric shock exists. - Page 20 AFTER SALE SERVICE AND WARRANTY WHEN ASKING FOR SERVICE, CHECK THE FOLLOWING POINTS. CONDITION CHECK THE FOLLOWING POINTS Is the fuse all right? Is the voltage extremely high or low? When it does not operate Is the circuit breaker “ON”? Was the air filter cleaned? Does sunlight fall directly on the outdoor unit? When it does not cool well...
- Page 21 This product conforms with the protection requirements of council directives 89/336/EEC relating to electromagnetic compatibility and 73/23/EEC relating to electrical equipment designed for use within certain voltage limits. Note Avoid to use the room air conditioner for cooling operation when the outside temperature is below 21°C (70°F).
- Page 22 MEMO ....................................................................................................................................................................................................................................................................................................................................................................................................................................................................................................................................................................................................................................................................................................................................................................................................................................................................................................................................................................................................................................................................................................................................................................................................................................................................................................................................................................................................................................................................–...
Need help?
Do you have a question about the RAS-S18CXK and is the answer not in the manual?
Questions and answers