Table of Contents
Advertisement
Quick Links
Advertisement
Table of Contents

Related Manuals for Air Force F-19 Gen3

Summary of Contents for Air Force F-19 Gen3
- Page 1 Owner’s Manual Issue: NHS OCT 2021 Start: S/N AF19-16270...
- Page 2 ©2021 Air Force Hover Mowers. All rights reserved. Printed in the United States of America...
-
Page 3: Table Of Contents
Table of Contents Contents Mower Parts List Specifications Mower Exploded Diagram Introduction Operating the Machine 20-21 Starting the Machine Warranty Information Cutting Flat Landscapes Cutting Slopes and Banks Safety Symbols Stopping the Machine Cutting Height Adjustment Safety Precautions Training Machine & Engine Maintenance 22-25 Preparation Engine diagrams Operation... -
Page 4: Specifications
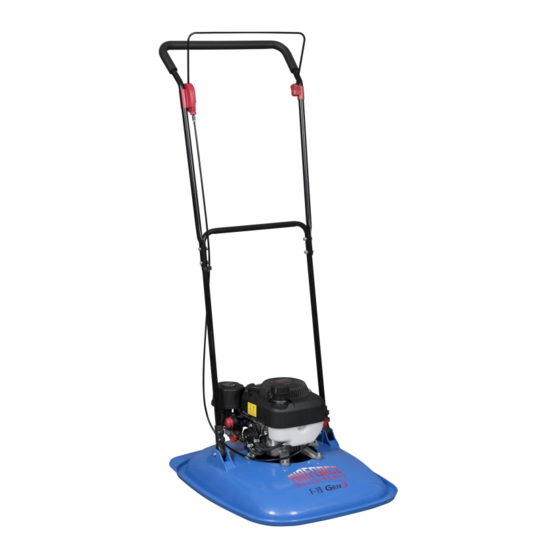
Specifications Main Features: (1) Padded handles (2) Positive pressure keeps OPC locked in place (3) 53” Handle for longer reach (4) Heavy gauge steel handles (5) Double tall air filter (6) Extra thick handle mounts (7) Nylon injected Polymer deck (8) 14”... -
Page 5: Introduction
Introduction Thank you for purchasing the Air Force Hover Mower. The following pages are to give you information about maintenance, operation, safety and specifications instructions regarding your new mower. We strongly recommend reading the manual before your first use. Important: Familiarize yourself with all controls, operations and regular maintenance points before your first use. -
Page 6: Warranty Information
The engine carries a 90 day commercial warranty. To qualify for the full benefit of the Air Force warranty, the warranty registration card must be returned to the distributor. If your selling dealer does not offer this service, please fill out and return the enclosed warranty registration card. -
Page 7: Safety Symbols
Safety Symbols Manual: Read the instruction manual before using machine. Use the Manual: Refer to the manual when making any adjustments or repairs to the machine. Spark Plug: Disconnect the spark plug when doing any work on the machine. Hot Surface: Be aware of the hot surfaces of your machine during and after use. -
Page 8: Safety Precautions
Evaluate the terrain to determine what accessories and attachments are needed to properly and safely perform the job. Only use accessories and attachments approved by Air Force. Inspect the area where the equipment is to be used and remove all objects such as rocks, toys, and wire which can be thrown by the machine. -
Page 9: Operation
Avoid operating the machine in wet grass. Be sure of your footing while using this product, especially when backing up. Reduced footing could cause slipping. Walk, never run when operating the Air Force Hover Mower. Page| 9... -
Page 10: Maintenance & Storage
Safety Precautions Operate across the face of slopes, never up and down. Slow down and use extra care when making turns or changing direction on slopes. Be sure to travel in the recommended direction on slopes. Turf conditions can affect the machine’s stability. - Page 11 Keep all parts in good working condition and all hardware tightened. Replace all worn or damaged decals. Always replace worn or faulty parts with genuine Air Force Hover Mower parts. Allow the engine to cool before storing in any enclosures. To reduce the risk of fire hazard, keep the engine and the surrounding deck area free of grass, leaves, and excessive grease.
-
Page 12: Machine Assembly
FUEL AND OIL RECOMMENDATIONS Oil Type When operating the Air Force Hover Mower, always use a high-quality synthetic oil. Suggested classification is SAE 10W-30. Additives are not recommended. To prolong the life of your engine, change the oil after the initial first five hours of use. -
Page 13: Before Starting The Machine
Before Starting the Machine Prevent Engine Damage To prevent damage to the engine, the machine is shipped without any fluids. The engine must be filled with the correct grade of oil and fuel before starting the engine. Oil Level Check When checking the oil, keep the mower on a level surface. -
Page 14: Engine Exploded Diagram
Exploded Engine Diagram DV0-150 CPC Page| 14... - Page 15 Page| 15...
-
Page 16: Engine Parts List
Engine Part List PART Part name Quantity AF901 BOLT M6X16 AF902 CYLINDER HEAD AF903 CYLINDER HEAD COVER GASKET AF904 ROCKER ARM ( SET OF 2) AF905 ROCKER ARM FASTENING BOLT ASSY (SET OF 2) AF906 INLET VALVE SPRING SEAT (SET OF 2) AF907 LIMIT PLATE ASSY AF908... - Page 17 Engine Part List PART Part name Quantity AF949 AIR FILTER GASKET AF950 AIR FILTER ASSEMBLY 50-1 AF951 AIR FILTER COVER 50-2 AF952 AIR FILTER 50-3 AF953 SCREW 50-4 AF954 AIR FILTER MIDDLE BRACKET 50-5 AF955 AIR FILTER LOWER BRACKET AF956 PRIMER PUMP ASSY (PIPE AND PUMP) AF957 CRANKSHAFT...
-
Page 18: Mower Parts List
14in long AF1260 Extension handle kit #6,31 & cable AF1263 Extended brake cable Red box DV0-150 Engine Not Shown AF1279 Air Force Decal G3 Not Shown AF1230 Safety Decal Not Shown AF1231 Caution Decal Not Shown AF1232 QC Kit Complete #25,27,31... -
Page 19: Mower Exploded Diagram
Exploded Diagram Page| 19... -
Page 20: Operating The Machine
Operating the Machine Starting the Machine Step One: Turn the petcock to the “on” position. Step Two: Press primer bulb NO MORE than 3 times. Move choke to the closed position. Step Three: Release the handlebar from the footstop. Hold the OPC Bail Arm to the upper handle, place your foot on the right side of the deck and slightly tilt the machine toward you. -
Page 21: Cutting Flat Landscapes
Operating the Machine Cutting Flat Landscapes Begin at the edge of the lawn and mow in a straight line back and forth as you would with a regular walk behind machine. Caution: Never stand below or beside the machine while mowing an embankment. -
Page 22: Machine & Engine Maintenance
Machine and Engine Maintenance To prevent accidents, disconnect the spark plug whenever you are performing any maintenance procedures on the machine. Engine: Cleaning the Air Filter The air filter should be cleaned every 8 hours, more often when used in a dusty environment. -
Page 23: Muffler
Machine and Engine Maintenance Muffler Check the muffler often to make sure it is not loose, damaged or rusty. Do not use the machine until the muffler is repaired or replaced. **Before starting the engine, check the two muffler bolts (#21, AF921) are tight. -
Page 24: Cutting System Maintenance
Machine Maintenance Maintaining the Cutting System The condition of the cutting system and supporting mounting system should be checked regularly for signs of wear or damage. A damaged cutting system will become out of balance and cause the machine to vibrate excessively. The cutting system could damage the deck, impeller and other pieces under the deck and lead to damage to the engine or the operator. -
Page 25: Flexiblade Cutting System
Machine Maintenance Flexiblade Cutting System Replacement (1) Drain the fuel by running the engine dry (engine will stop). (2) Remove the spark plug lead and allow the engine to cool. (3) Turn the machine on its left-hand side (carburetor up). (4) Replace the old line with 10 inches of new line. -
Page 26: Maintenance Schedule
Maintenance Schedule Service Schedule Maintenance (1) Check the fuel and oil levels (2) Check blade system and tighten any loose bolts Before Each Use (3) Check air filter – ensure it is dry (4) Remove debris from the cutting system, impeller, and air intake area of engine Every Use CLEAN THE AIR FILTER (Replace if needed) -
Page 27: Troubleshooting
Troubleshooting Problem Causes Corrective Action Engine will not turn over (1) OPC Bail Arm (1) Operate OPC Bail released (2) Incorrect oil level (2) Check oil level (3) Obstruction under (3) Remove obstruction deck Engine smokes (1) Excess oil (1) Check oil level (2) Air cleaner oil-soaked (2) Service air cleaner or blocked... -
Page 28: Warranty Registration
Machine Code: Serial Number: WARRANTY REGISTRATION THIS CARD MUST BE COMPLETED AND RETURNED TO REGISTER YOUR MACHINE Course/Business Name: Address: Phone: Contact Person: Purchase Date: Price Paid: Email: Dealer Name: Dealer Location: Sales Representative: DATA PROTECTION: By submitting this form to Seago International, you are authorizing Seago to hold your information for future warranty and future sales/marketing promotional.
Need help?
Do you have a question about the F-19 Gen3 and is the answer not in the manual?
Questions and answers