
Related Manuals for infaco DSES F3015

Summary of Contents for infaco DSES F3015
- Page 1 Système sécurité DSES (Dispositif Supplémentaire Electronique de Sécurité) Security system DSES Notice d’utilisation / User guide Réf / Item: DSES F3015...
-
Page 2: Fonctionnement Du Système
Attention cependant à ne pas inverser le sous gant de confort avec le gant conducteur. Pour les différencier : seul le gant conducteur N°8 possède un velcro. Il est indispensable d’utiliser des gants conducteurs exclusivement de marque INFACO. Pour toutes ces opérations, débrancher impérativement le sécateur. - Page 3 n°2 n°2 n°6 n°4 n°5 Retourner le gilet et faire passer la languette n°2 Sur la bretelle opposée à la connexion batterie, dans la boucle d’attache centrale des bretelles faire passer la languette n°2 dans la première n°4. boucle n°5 (attache clip dorsale) puis dans la seconde boucle élastique n°6.
- Page 4 n°4 n°2 Si le fil DSES vous parait trop long, il est possible Le tout peut être porté par-dessous un vêtement en faisant passer le fil DSES et la de le raccourcir en effectuant lors de la mise en languette n°2 dans la manche. place expliquée ci-dessus une boucle au niveau l’attache centrale des bretelles n°4 n°9...
- Page 5 Vérification du fonctionnement du système Vérifier de façon journalière le fonctionnement du système DSES. Pour cela : 1- Equipez-vous du gant conducteur n°8 comme indiqué ci-dessus. 2- Effectuez la mise en fonction de votre sécateur en appuyant sur le bouton n°10. 3- Vérifiez que le sécateur n’indique pas de défaut (Si la led n°9 est rouge et que la lecture des données indique un défaut D07, reportez-vous à...
- Page 6 La société INFACO ne pourra être tenue responsable de toute défaillance due à un mauvais état des gants. Indication du défaut DSES Indication de la LED n°9 du sécateur : LED rouge fixe et sécateur fonctionne. Indication à la lecture du sécateur : Défaut D-07. (Uniquement par votre revendeur via l’interface de lecture)
- Page 7 Afi n de renforcer la sécurité du système DSES, un paramétrage supplémentaire (et facultatif) vous est proposé. Activable (et désactivable) chez votre Distributeur agrée INFACO, ce paramétrage, une fois activé, empêche l’utilisation de l’appareil : Dans ces trois cas, la LED d’alimentation - sans gant connecté...
- Page 9 L’utilisateur est bien averti que le système vient en plus de toutes les règles obligatoires et usuelles de sécurité mais ne s’y substitue en aucun cas. Pour toutes manipulations, en dehors des opérations de taille, éteindre le sécateur via le bouton n°10 jusqu’à ce que les led s’éteignent et débrancher le sécateur au niveau de la prise n°11.
- Page 10 Il est strictement interdit de modifier ou de réparer la structure des gants (recoudre, rajout de pièce, etc.…). La société INFACO ne pourra être tenue responsable de toute défaillance due à une modification des gants. Les systèmes DSES ne peuvent être vendus ou prêtés qu’après lecture et signature de ce document et un double doit être...
- Page 11 Les systèmes DSES ne peuvent être vendus ou prêtés qu’après lecture et signature de ce document et un double doit être impérativement remis à votre distributeur. La société INFACO, se dégage de toutes responsabilités en cas d’accident dû au non-respect des règles de sécurité usuelles en la matière.
- Page 13 ENGLISH...
-
Page 14: How The System Works
To differentiate between them: only the conductive glove no. 2 has a Velcro patch. You must use only INFACO conductive gloves. You must disconnect the secateurs for all these operations. Do not use any outer glove over the INFACO conductive glove. Setting up the system n°1 n°3... - Page 15 n°2 n°2 n°6 n°4 n°5 Turn the vest around and slip the fix tongue no. 2 On the opposite suspender to the battery through the central suspender ring no. 4. connection, slip the fix tongue no. 2 through the first strap no. 5, then though the second no. 6. Carry n°7 n°2...
- Page 16 n°4 n°2 If the DSES cable seems too long, it is possible to The complet system can be worn under clothes by passing it in the sleeve no. 2. make it shorter. Do a loop in the central supsender ring no. 4, as shown above. n°9 If the cable seems too long, it is possible to make it shorter.
- Page 17 Checking that the system is operating correctly Check every day that the DSES system is working correctly. To do this : 1- Put the conductive glove no. 8 on as shown above. 2- Switch on your pruning shear by pressing the button no. 10. 3- Check that pruning shears is not indicating a fault (If the led no.
- Page 18 INFACO may not be held liable for any faults caused by the poor condition of the gloves. DSES fault indications Indication on LED no. 10 on the pruning shears : permanent red LED and the pruning shear works. Indication reading pruning shear : Fault D07 (only by your dealer via the « interface »).
- Page 19 ADDITIONAL SETTINGS To make the DSES system safer, an additional (and optional) setting is available. It can be enabled (and disabled) by your INFACO dealer and, when enabled, prevents the device from being used: - without a glove being connected to the DSES system...
- Page 21 Users are advised that the system is extra to all the compulsory and usual safety rules and in no way replaces them. For all forms of handling other than pruning operations, turn off the pruning shear by pressing the button no 10 untill all LEDS turn off and disconnect the secateurs at socket N°...
- Page 22 A copy of the signed document need to be sent back to the Importer/Distributor INFACO may not be held liable for any accidents caused by a failure to observe the normal safety rules Appliance number :........................
- Page 23 A copy of the signed document need to be sent back to the Importer/Distributor INFACO may not be held liable for any accidents caused by a failure to observe the normal safety rules. Appliance number :......................
- Page 25 español...
-
Page 26: Funcionamiento Del Sistema
Preste atención de no invertir el bajo guante de comodidad con el guante conductor. Para diferenciarlos: solo el guante conductor n°8 posée un velcro. Es indispensable utilizar unos guantes conductores exclusivamente de la marca INFACO ELECTROCOUP . Para todas estas operaciones es obligatorio desconectar la podadora. - Page 27 n°2 n°2 n°6 n°4 n°5 Girar el chaleco y dejar pasar la lengüeta N°2 en En los tirantes opuestos a la conexion batería, la hebilla de enganche central de los tirantes N°4. pasar la lengüeta N°2 en la primera hebilla N°5 (Enganche clip dorsal) y luego en la segunda hebilla elástica N°6.
- Page 28 n°4 n°2 Si el cable DSES le parece demasiado largo, es Todo se puede llevar debajo de la ropa haciendo posible acortar haciendo un lazo en el enganche pasar el cable DSES y la lengüeta N°2 en la central de los tirantes N°4 mediante la realización manga.
- Page 29 Verificación del funcionamiento del sistema Comprobar a diario el funcionamiento del sistema DSES. Para ello : 1 - Equípese con el guante conductor como se indica anteriormente. 2 - Realizar la puesta en funcionamiento de su podadora pulsando el botón N°10. 3 - Comprobar que la podadora no indica ningún fallo (Si el led N°9 brilla en rojo y que la lectura de los datos indica un error D07, diríjase a «...
- Page 30 La sociedad INFACO no será responsable de cualquier fallo resultante del mal estado de los guantes. Indicación del error DSES Indicación del LED n°9de la podadora : LED rojo fijo y la tijera funciona. Indicación de lectura de la tijera : Error D-07. (Sólo con el distribuidor a través de la interfaz...
- Page 31 Con el fi n de reforzar la seguridad del sistema DSES, le proponemos una parametrización suplementaria (y facultativa). Puede activarse y desactivarse dirigiéndose a su Distribuidor autorizado INFACO, una vez activada esta parametrización, impide que se utilice el aparato :...
- Page 33 El usuario está advertido de que el sistema cumple todas las reglas obligatorias y de seguridad pero no se reemplaza en ningún caso. Para cualquier manipulación, fuera de las operaciones de tala, apagar la tijera vía el botón n°10 hasta que las led se apagan y desconectar la podadora al nivel de la toma n°11.
- Page 34 Una copia debe ser enviada a la siguiente dirección. La sociedad INFACO, no se hace responsable en caso de accidente debido a la desobediencia de las reglas de seguridad usuales en la materia. Número de aparato :........................
- Page 35 Los sistemas DSES sólo pueden ser vendidos o prestados tras haber leído y firmado este documento. Una copia debe ser enviada a la siguiente dirección. La sociedad INFACO, no se hace responsable en caso de accidente debido a la desobediencia de las reglas de seguridad usuales en la materia.
- Page 37 Deutsch...
- Page 38 Handschuh zu tragen Dieser ist jedoch nicht zwingend erforderlich. Dient für zusätzlichen Wärmeschutz und schützt ggf. Allergiker Es ist zwingend erforderlich, ausschließlich nur die leitenden Handschuhe der Marke INFACO, ELECTROCOUP zu verwenden. Bei jeder dieser Arbeiten unbedingt die Schere vom Anschlußkabel trennen.
- Page 39 n°2 n°2 n°6 n°4 n°5 Die Weste wenden und die Lasche Nr. 2 in die Die Lasche Nr. 2 am der Akkubuchse gegenüberliegenden Schultergut in mittige Anschlussschnalle der Schultergurte Nr. 4 die erste Schnalle Nr. 5 (Rückenclips- stecken. Anschluss), dann in die zweite Gummischnalle Nr.
- Page 40 n°4 n°2 Ist die DSES Schnur für Sie zu lang, kann sie Das Ganze kann auch unter der Kleidung gekürzt werden. Bringen Sie dazu wie getragen werden, indem man die DSES Schnur oben beschrieben eine Schnalle mittig am und die Lasche Nr. 2 im Ärmel trägt. Schultergurtanschluss Nr.
- Page 41 Die Funktion des Systems überprüfen Täglich die Funktion des DSES Systems überprüfen, Hierfür : 1- Wie oben beschrieben den leitenden Strick-Handschuh anziehen. 2- Durch Betätigung von Taste Nr. 10 nehmen Sie die Schere in Betrieb. 3- Sicherstellen, dass die Schere keine Fehleranzeige aufweist (bei roter Led Nr. 9 und Fehleranzeige D07 siehe nachstehende „DSES Fehleranzeigen“)..
- Page 42 Die Firma INFACO kann nicht haftbar gemacht werden für ein Versagen des Systems aufgrund des fehlerhaften Zustands der Handschuhe. Anzeige des DSES-Fehlers LED-Anzeige Nr. 9 der Schere : LED leuchtet rot, die Schere funktioniert. Anzeige an der Schere: Fehleranzeige : D-07. (Nur für den Händler über die...
-
Page 43: Zusätzliche Einstellungen
ZUSÄTZLICHE EINSTELLUNGEN Für eine erhöhte Sicherheit des DSES-Systems werden zusätzliche (nicht verpfl ichtende) Einstellungen angeboten. Sie sind bei Ihrem zugelassenen INFACO-Händler aktivierbar (bzw. deaktivierbar) und verhindern bei Aktivierung die Benutzung des Geräts : - mit einem Handschuh, der nicht mit dem DSES-System verbunden ist In allen drei Fällen leuchtet die... - Page 45 Der Anwender wird ausdrücklich darauf aufmerksam gemacht, dass das System zusätzlich zu allen obligatorischen und üblichen Sicherheitsvorschriften hinzukommt, diese jedoch auf keinen Fall ersetzt. Diese sind weiterhin zu beachten! (Siehe Gebrauchsanleitung der jeweiligen Geräte). Außer zum Schneiden bei der Handhabung der Schere stets darauf achten, dass das Geräte mit Taste Nr.
- Page 46 Exemplar wird ausgehändigt. Für die Ordnungsgemäße Belehrung vor Benutzung durch andere Personen ist der Käufer allein verantwortlich. Die Firma INFACO lehnen jede Haftung im Fall eines Unfalls ab, der auf die Nichteinhaltung der auf diesem Gebiet üblichen Sicherheitsvorschriften zurückzuführen ist.
- Page 47 Fachhändler hinterlegt werden. Ein Exemplar wird ausgehändigt. Für die Ordnungsgemäße Belehrung vor Benutzung durch andere Personen ist der Käufer allein verantwortlich. Die Firma INFACO lehnen jede Haftung im Fall eines Unfalls ab, der auf die Nichteinhaltung der auf diesem Gebiet üblichen Sicherheitsvorschriften zurückzuführen ist Geräte Nummer :........................
- Page 49 italiano...
-
Page 50: Funzionamento Del Sistema
Per differenziarli : solo il guanto conduttore n°8 possiede il velcro. E’ indispensabile utilizzare guanti conduttori esclusivamente di marchio INFACO ELECTROCOUP Tassativo: Per tutte queste operazioni, disinserire le forbici. Non indossare mai altri guanti non conduttori sui due guanti INFACO PREPARAZIONE n°1 n°3... - Page 51 n°2 n°2 n°6 n°4 n°5 Girare il gilet e far passare la linguetta n. 2 nella Sulla bretella opposta alla connessione batteria, fibbia del raccordo centrale delle bretelle n. 4 far passare la linguetta n. 2 nella prima fibbia n. 5 (Attacco clip dorsale), quindi nella seconda fibbia elasticizzata n.
- Page 52 n°4 n°2 È possibile indossare il gilet sotto i propri Se il cavo DSES vi pare essere troppo lungo, è indumenti facendo passare il cavo DSES e la possibile accorciarlo inserendo, in fase di messa in opera (cfr. istruzioni seguenti), una fibbia in linguetta n.
- Page 53 Verifica del funzionamento del sistema Verificare quotidianamente il funzionamento del sistema DSES. A questo scopo : 1- Preparatevi il guanto conduttore come indicato sopra.Effettuare la messa in funzione della forbice premendo il pulsante n. 10. 2- Verificare che la forbice non mostri alcun segnale di errore (se il led n. 9 è rosso e la lettura dei dati presenta il messaggio di errore D07, consultare il riquadro sottostante “Messaggio di errore DSES”).
- Page 54 La società INFACO non può assumersi la responsabilità di eventuali guasti dovuti al cattivo stato dei guanti. Indicazione del difetto DSES Indicazione del LED n. 9 della forbice : LED rosso fisso - la forbice funziona. Indicazione per la lettura della forbice : Errore D-07. (Esclusivamente da parte del vostro rivenditore con l’ausilio dell’interfaccia di lettura).
- Page 55 Al fi ne di incrementare la sicurezza del sistema DSES, proponiamo un sistema supplementare (facoltativo). Tale sistema può essere attivato (e disattivato) presso il vostro Fornitore INFACO autorizzato e, una volta in funzione, impedisce l’utilizzo del dispositivo nei seguenti casi: - quando l’utente è...
- Page 57 L’utente è consapevole che il sistema costituisce un complemento a tutte le regole di sicurezza obbligatorie e usuali ma non può sostituirle in nessun caso. Per qualunque manipolazione che non dovesse essere direttamente correlata alle operazioni di taglio, spegnere la forbice premendo il pulsante n. 10 fino all’avvenuto spegnimento dei LED, quindi scollegare la forbice a livello della presa n.
- Page 58 E’ rigorosamente vietato modificare o riparare la struttura dei guanti (ricucire, aggiungere una pezza, ecc.…). La società INFACO non può assumersi la responsabilità di eventuali guasti dovuti al cattivo stato dei guanti I SISTEMI DSES POSSONO ESSERE VENDUTI O PRESTATI SOLO DOPO...
- Page 59 RIVENDITORE Da conservarea cura del rivenditore per schedario clienti INFACO I SISTEMI DSES POSSONO ESSERE VENDUTI O PRESTATI SOLO DOPO AVER LETTO E FIRMATO QUESTO DOCUMENTO, IL QUALE DEVE OBBLIGATORIAMENTE ESSERE RESTITUITO IN COPIA AL VOSTRO DISTRIBUTORE. La società INFACO, non potrà assumere la responsabilità d’eventuali...
- Page 61 português...
-
Page 62: Funcionamento Do Sistema
Para diferenciar as duas só a luva conductora n°8 tem uma banda edesiva É indispensável usar luvas condutoras exclusivamente da marca INFACO ELECTROCOUP . Para realizar todas estas operações, é obrigatório desligar a tesoura de podar da bateria. Não utilisar a luva exterior por baixo da luva conductora INFACO Colocação n°1 n°3... - Page 63 n°2 n°2 n°6 n°4 n°5 Virar o colete e passar a lingueta nº2 na fivela de Na alça oposta à ligação da bateria, passar a fixação central das alças nº4. lingueta nº2 na primeira fivela nº5 (Fixação do clip dorsal) e depois na segunda fivela elástica nº6.
- Page 64 n°4 n°2 Caso o fio DSES pareça muito comprido, é O conjunto pode ser utilizado sob o vestuário aopassar o fio DSES e a lingueta nº2 pela possível encurtá-lo ao efetuar, durante a manga. colocação explicada acima, um laço ao nível da fixação central das alças nº4.
- Page 65 Verificação do funcionamento do sistema Verifique diariamente o funcionamento do sistema DSES. Para tal : 1- Utilise a luva conductora n°8 como indicádo em cima. 2- Coloque a sua tesoura em funcionamento ao pressionar o botão nº10. 3- Verifique se a tesoura não indica anomalias (Caso o led n.º 9 esteja vermelho e a leitura dos dados indique uma anomalia D07, consulte o quadro abaixo «indicação da anomalia DSES»)..
- Page 66 A empresa INFACO não poderá ser responsabilizada por toda e qualquer falha devida a um mau estado das luvas Indicação da falha DSES Indicação do LED n.º 9 da tesoura : LED vermelho fixo e tesoura em funcionamento. Indicação na leitura da tesoura: Anomalia D-07. (Apenas para o seu revendedor através da interface de...
- Page 67 Para reforçar a segurança do sistema DSES, é-lhe proposta uma confi guração adicional (e facultativa). Ativável (e desativável) no vosso Distribuidor autorizado INFACO, esta confi guração, após ativada, impede a utilização do aparelho : Nestes três casos, o LED de alimentação - sem luva ligada ao sistema DSES está...
- Page 69 O utilizador está avisado de que o sistema complementa todas as normas de segurança obrigatórias e habituais mas não as substitui em caso algum. Para quaisquer manuseamentos, além das operações de corte, desligar a tesoura através do botão nº10 até que os led se apaguem e desligar a tesoura da tomada nº11.
- Page 70 É estritamente proibido modificar ou arranjar a estrutura das luvas (coser, remendar, etc.). A empresa INFACO não poderá ser responsabilizada por toda e qualquer falha devida a uma modificação nas luvas. Os sistemas DSES só podem ser vendidos, ou emprestádos, depois da leitura e assinatura deste documento, e uma cópia...
- Page 71 REVENDEDOR A guardar pelo revendedor para Ficheiro Clientes INFACO Os sistemas DSES só podem ser vendidos, ou emprestádos, depois da leitura e assinatura deste documento, e uma cópia deve obrigatóriamente ser entregue ao seu revendedor A empresa INFACO não assume qualquer responsabilidade em caso de acidente devido ao desrespeito das normas de segurança...
- Page 73 български...
- Page 74 грешен начин. : Разлика между тях е, че само на предпазната ръкавица n°8 има велкро лепенка. Трябва да използвате предпазна ръкавица само на фирма INFACO Трябва да изключите електрическата ножица за всички тези операции. Да не се поставя външна ръкавица върху предпазната ръкавицата на INFACO. Настройване на системата n°1 n°3...
- Page 75 n°2 n°2 n°6 n°4 n°5 Обърнете жилетката и прекарайте фиксатора По презрамката на ръката с ръкавицата, N°2 през централната халка N°4 прекарайте фиксатора N°2 през халките N°5 и N°6 НОСЕНЕ n°7 n°2 n°8 Сложете си жилетката с батерията и си я Поставете...
- Page 76 n°4 n°2 Ако кабела за ръкавицата е прекалено дълъг Цялата система може да се носи под дрехите, направете един кръг и го закрепете към като прекарате кабела за ръкавицата през централната придържаща халка no. 4 както е ръкава. показано на снимката. n°9 Ако...
- Page 77 Проверявайте всеки ден, че системата DSES функционира правилно. Направете следното : 1- Поставете предпазната ръкавица n°8 както е показано по-горе. 2- Включете електрическата ножица като натиснете бутон n°10. 3- Убедете се, че ножицата е изправна и не показва грешка. LED индикатор n°9 свети 3- Убедете...
- Page 78 INFACO не може да носи отговорност за каквито и да било повреди, причинени от лошото ъстояние на ръкавицата Индикация за грешки при DSES LED индикатор n°9 : постоянно свети червено и ножицата работи. Показания на електрическата ножица : Грешка D07 (разчита се само от дистрибутора чрез софтуер) Ако...
- Page 79 ДОПЪЛНИТЕЛНИ НАСТРОЙКИ За да направим системата DSES по-безопасна е налична допълнителна настройка (като опция) Тя може да бъде активирана (и деактивирана) от Вашия дистрибутор на ИНФАКО и когато е включена предотвратява използването на устройството: - Без да е свързана ръкавицата към системата DSES - Със...
- Page 81 Потребителите трябва да знаят, че системата е допълнение към всички. задължителни и обичайни правила за безопасност, но в никакъв случай не ги замества. За всички форми на манипулация различни от резитба, изключете ножицата като натиснете бутон n°10 докато всички LED светлини изгаснат и извадете жак...
- Page 82 Строго се забранява да се променя или възстановява структурата на предпазната ръкавица (да се шие, кърпи и т.н….) INFACO не носи отговорност за повреди и наранявания причинени от извършени промени по предпазната ръкавица Cистемата DSES може да се продава само когато общите правила и...
- Page 83 Cистемата DSES може да се продава само когато общите правила и условия са прочетени и подписани. Копие от подписания документ трябва да се върне обратно на фирмата вносител/дистрибутор: INFACO не носи отговорност за инциденти предизвикани в следствие на неспазване на нормалните правила за безопасност. Сериен номер на уреда: :....................
- Page 85 Notes : .....................................................................................................................................................................................................................................................................................................................................................................................................................................................................................................................................................................................................................
- Page 86 Notes : .....................................................................................................................................................................................................................................................................................................................................................................................................................................................................................................................................................................................................................
- Page 87 Notes : .....................................................................................................................................................................................................................................................................................................................................................................................................................................................................................................................................................................................................................
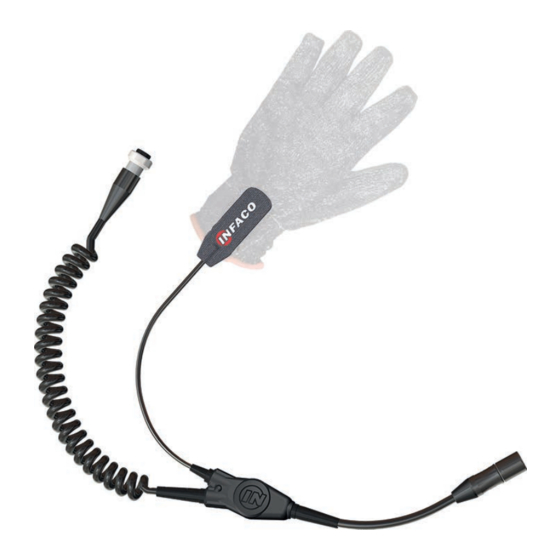
- Page 88 Uniquement avec / only with : Gant pour DSES Glove for DSES Réf. Droite & Gauche Item. Right & Left 355G29 - 355G29G...
Need help?
Do you have a question about the DSES F3015 and is the answer not in the manual?
Questions and answers