Table of Contents
Advertisement
Available languages
Available languages
Quick Links
OWNER'S MANUAL
AIR
CONDITIONER
Please read this manual carefully before operating
your set and retain it for future reference.
Ceiling Cassette
ATNQ18GPLE7
ATNQ24GPLE7
I.15.LEI8.02016.0319
*MFL67798208*
MFL67798208
Rev.01_300421
ATNQ30GNLE7
I.15.LEI2.02225.0519
Copyright © 2019-2021 LG Electronics Inc. All Rights Reserved.
ATNQ36GNLE7
ATNQ48GMLE7
I.15.LEI7.01614.0319
www.lg.com
Advertisement
Table of Contents

Related Manuals for LG ATNQ18GPLE7


Summary of Contents for LG ATNQ18GPLE7
- Page 1 OWNER’S MANUAL CONDITIONER Please read this manual carefully before operating your set and retain it for future reference. Ceiling Cassette ATNQ18GPLE7 ATNQ30GNLE7 ATNQ36GNLE7 ATNQ24GPLE7 ATNQ48GMLE7 I.15.LEI8.02016.0319 I.15.LEI2.02225.0519 I.15.LEI7.01614.0319 *MFL67798208* www.lg.com MFL67798208 Copyright © 2019-2021 LG Electronics Inc. All Rights Reserved. Rev.01_300421...
- Page 2 TIPS FOR SAVING ENERGY TIPS FOR SAVING ENERGY Here are some tips that will help you minimize the power consumption when you use the air conditioner. You can use your air conditioner more efficiently by referring to the instructions below: •...
-
Page 3: Important Safety Instructions
IMPORTANT SAFETY INSTRUCTIONS IMPORTANT SAFETY INSTRUCTIONS READ ALL INSTRUCTIONS BEFORE USING THE APPLIANCE. Always comply with the following precautions to avoid dangerous situations and ensure peak performance of your product WARNING It can result in serious injury or death when the directions are ignored CAUTION It can result in minor injury or product damage when the directions are ignored WARNING... - Page 4 IMPORTANT SAFETY INSTRUCTIONS Operation • Take care to ensure that power cable could not be pulled out or damaged during operation. There is risk of fire or electric shock. • Do not place anything on the power cable. There is risk of fire or electric shock. •...
- Page 5 IMPORTANT SAFETY INSTRUCTIONS • Do not install the product where it will be exposed to sea wind (salt spray) directly. It may cause corrosion on the product. Corrosion, particularly on the condenser and evaporator fins, could cause product malfunction or inefficient operation. Operation •...
-
Page 6: Table Of Contents
TABLE OF CONTENTS TABLE OF CONTENTS TIPS FOR SAVING EN- OWNER'S INSTRUC- ERGY TION Cooling Mode -Standard Operation IMPORTANT SAFETY IN- Cooling Mode - Power Cooling STRUCTIONS Auto Operation Mode BEFORE USE Dehumidification Mode Fan Mode Preparing for operation Temperature Setting/Room Tempera- Usage ture checking Cleaning and maintenance... -
Page 7: Before Use
BEFORE USE BEFORE USE Preparing for operation - Contact an installation specialist for installation. - Use a dedicated circuit. Usage - Being exposed to direct airflow for an extended period of time could be hazardous to your health. Do not expose occupants, pets, or plants to direct airflow for extended periods of time. - Due to the possibility of oxygen deficiency, ventilate the room when used together with stoves or other heating devices. -
Page 8: Product Introduction
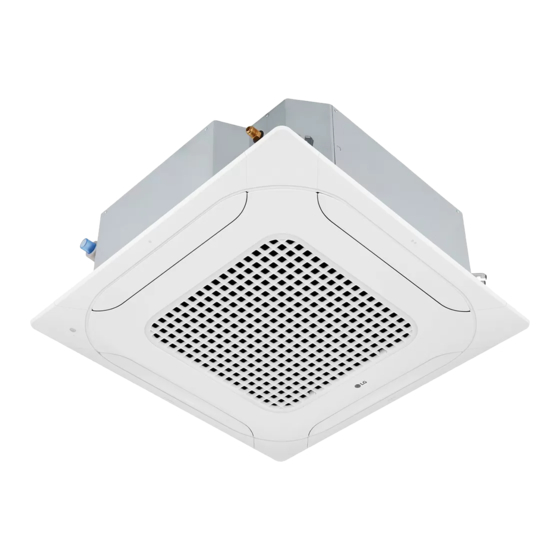
PRODUCT INTRODUCTION PRODUCT INTRODUCTION Name and function of parts Indoor unit Outdoor unit Remote controller Inlet air Discharge air Refrigerant piping, connection electric wire Drain pipe Ground wire Wire to ground outdoor unit to prevent electrical shocks. -
Page 9: Operation Indication Lamps
PRODUCT INTRODUCTION Operation Indicator Lamp Lamp Forced operation Switch Cooling mode Green Heating mode Green Time to clean filter in cooling/heating Mode Yellowish Green Time to clean filter when product is not operating Orange Hot start or defrost mode before starting heating mode Green When reservation set on Yellowish Green... - Page 10 PRODUCT INTRODUCTION Wireless Remote Controller This air-conditioner is equipped with wireless remote controller basically. But if you want to be available with wired remote controller, you pay for it. Vane Angle button Used to set each vane angle. Air Purify button (Optional) Used to start or stop the air purification function.
- Page 11 PRODUCT INTRODUCTION CAUTION Caution of handling the Remote Controller - Aim at the signal receiver on the wired re- mote controller so as to operate. - Be sure that there are no obstructions be- tween the remote controller and the sig- nal receptor.
-
Page 12: Wireless Remote Controller Mainte- Nance
OPERATING INSTRUCTION OPERATING INSTRUCTION How to insert the Batteries Wireless Remote Controller Maintenance Remove the battery cover by pulling it accord- ing to the arrow direction. Choose a suitable place where its safe & easy Insert new batteries making sure that the (+) to reach. -
Page 13: Installation Instructions
INSTALLATION INSTRUCTIONS INSTALLATION INSTRUCTIONS Installer Setting - Setting Address of Central Control With the MODE button pressed, press the RESET button. By using the temperature setting button, set the indoor unit address. • Setting range : 00 ~ FF After setting the address, press the ON/OFF button toward the indoor unit 1 time. -
Page 14: Owner's Instruction
OWNER'S INSTRUCTION OWNER'S INSTRUCTION Cooling Mode - Cooling Mode - Power Cooling Standard Operation Press the ON/OFF button. Press the ON/OFF button. The unit will respond with beep sound. The unit will respond with beep sound. Press MODE button to select Cooling Press MODE button to select Cooling Mode. -
Page 15: Auto Operation Mode
OWNER'S INSTRUCTION Auto Operation Mode ❈ Please select the code depend on your feeling. Code Feel Cold Slightly cool Neutral Slightly warm Warm During Auto Operation Mode - If the system is not operating as de- sired, manually switch to another mode. The system will not automatically switch from the cooling mode to the heating mode, or from heating to cool-... -
Page 16: Dehumidification Mode
OWNER'S INSTRUCTION Dehumidification Mode During Dehumidification Mode - If you select the dehumidification mode on the operation selection button, the indoor unit starts to run the dehumidifi- cation function, automatically setting the room temp. and air volume to the best condition for dehumidification based on the sensed room temp. -
Page 17: Fan Mode
OWNER'S INSTRUCTION Fan Mode Natural Wind by the auto Logic - For more fresh feeling than other fan speed, press the Indoor Fan Speed Se- lector and set to auto mode. In this mode, the wind blows like natural breeze by automatically changing fan speed according to the auto logic. -
Page 18: Temperature Setting/Room Temperature Checking
OWNER'S INSTRUCTION Temperature Setting/Room Temperature checking We can simply adjust the desired tem- perature - Press the buttons to adjust the desired temperature : Increase 1 °C or 1 °F per one time pressing : Decrease 1 °C or 1 °F per one time pressing Room temp: Indicate the current room temperature... -
Page 19: Airflow Setting
OWNER'S INSTRUCTION Airflow setting Up/down airflow direction control The SWING (up/down) airflow can be adjusted by using the remote controller. Press the ON/OFF button to start the unit. Press SWING (up/down) airflow button and the louvers will swing up and down. NOTE - Always use the remote controller to ad- just the up/down airflow direction. -
Page 20: Individual Vane Angle Control
OWNER'S INSTRUCTION Individual vane angle control It is the function that can control 4 vane an- Press SET/CLEAR button to reserve or gles individually in the ceiling type 4Way cas- cancel the individual vane angle control sette product group. function. - There may be differences between wireless remote controller up/down/left/right buttons and the wind... -
Page 21: Timer
OWNER'S INSTRUCTION Timer Setting the Current Time Press the SET/CLEAR button for 3 seconds. Press TIME SETTING buttons until the desired time is set. Press the SET / CLEAR button. NOTE Check the indicator for A.M. and P.M. Timer Setting Press the TIMER button to turn timer on or off. -
Page 22: Sub Function
Sub function Sub function Sub function may not work in some products. Air Purification (Optional) Press the button to start the unit. Press the button. Air Purification will start when the button is pressed and stop when the button is pressed again. -
Page 23: Checking The Air Quality Level During Air Purification Operation (Optional)
Sub function Checking the air quality level Note during air purification operation • The dust concentration is displayed from 8 to 999 by the unit of 1. (Optional) • The dust concentration referred to the data sheet of the sensor manufacturer. Press button for 3 seconds, Air quality level will •... -
Page 24: How To Set Air Quality Level Color
Sub function How to set Air quality level color With the button pressed, press the reset button. By using the button, set function code and Setting ‘bC’ value. Function code Setting code Press the button toward the indoor unit 1 time. Each countries have different standards for indicating Overall air quality. -
Page 25: Maintenance And Service
MAINTENANCE AND SERVICE MAINTENANCE AND SERVICE Indoor Unit Remove the Air filters. Take hold of the tab and pull slightly forward Grille, Case and Remote Control to remove the filter. - Turn the system off before cleanining, To clean, wipe with a soft, dry cloth. Do not use CAUTION bleach or abrasives. -
Page 26: Purifying Filter(Optional)
MAINTENANCE AND SERVICE Purifying filter(Optional) - Open front panel and remove air filter. Cleaning The PLASMA filter behind the air filters should be checked and cleaned once every 3 months or more often if necessary. - Remove air purifying filter. - Insert new air purifying filter. -
Page 27: Operation Tips
MAINTENANCE AND SERVICE Operation tips! Do not overcool the room. Keep blinds or curtains closed. Keep the room temperature uniform. This is not good for the health Do not let direct sunshine and wastes electricity. enter the room when the air Adjust the vertical airflow di- conditioner is in operation. -
Page 28: Troubleshooting Tips! Save Time And Money
MAINTENANCE AND SERVICE Troubleshooting Tips! Save time and money! Check the following points before requesting repairs or service..If the malfunction persist, please contact your dealer. The air conditioner The room has a pecu- It seems that conden- Air conditioner does does not operate. - Page 31 ĐIỀU HÒA KHÔNG KHÍ Vui lòng đọc kỹ hướng dẫn này trước khi vận hành thiết bị của bạn và giữ lại để tham khảo về sau. Âm Trần Cassette www.lg.com Copyright © 2019-2021 LG Electronics Inc. All Rights Reserved.
- Page 32 HƯỚNG DẪN TIẾT KIỆM ĐIỆN HƯỚNG DẪN TIẾT KIỆM ĐIỆN Dưới đây là một số hướng dẫn giúp bạn giảm thiểu mức tiêu thụ điện khi bạn sử dụng điều hòa không khí. Bạn có thể sử dụng điều hòa không khí hiệu quả hơn bằng cách tham khảo các hướng dẫn dưới đây: •...
- Page 33 CÁC HƯỚNG DẪN AN TOÀN QUAN TRỌNG CÁC HƯỚNG DẪN AN TOÀN QUAN TRỌNG ĐỌC KỸ TẤT CẢ HƯỚNG DẪN TRƯỚC KHI SỬ DỤNG THIẾT BỊ NÀY. Luôn tuân thủ các lưu ý sau đây để tránh các trường hợp nguy hiểm và đảm bảo hiệu quả hoạt động cao nhất của sản phẩm CẢNH BÁO Nó...
- Page 34 CÁC HƯỚNG DẪN AN TOÀN QUAN TRỌNG • Cần đảm bảo khu vực lắp đặt không gây ra lão hóa. Nếu đế bị đổ, máy điều hòa không khí có thể bị rơi theo và gây ra hư hỏng tài sản, hư hỏng sản phẩm và tổn thương đến người. •...
- Page 35 CÁC HƯỚNG DẪN AN TOÀN QUAN TRỌNG • Giữ thăng bằng ngay cả khi đang lắp đặt sản phẩm. Để tránh rung hoặc rò rỉ nước. • Không được lắp đặt sản phẩm tại nơi mà tiếng ồn hoặc không khí nóng sinh ra từ bộ phậ n ngoà...
- Page 36 MỤC LỤC MỤC LỤC HƯỚNG DẪN TIẾT HƯỚNG DẪN SỬ DỤNG KIỆM ĐIỆN Chế Độ Làm Mát - Vận Hành Tiêu Chuẩn CÁC HƯỚNG DẪN AN Chế Độ Làm mát - Làm Mát Mạnh TOÀN QUAN TRỌNG Chế độ Vận hành Tự động Chế...
- Page 37 TRƯỚC KHI SỬ DỤNG TRƯỚC KHI SỬ DỤNG Chuẩn bị vận hành - Liên hệ với kỹ thuật viên lắp đặt để lắp đặt sản phẩm. - Sử dụng mạch được chỉ định. Cách sử dụng - Việc tiếp xúc với luồng không khí trực tiếp trong một khoảng thời gian dài có thể gây nguy hại cho sức khỏe của bạn.
- Page 38 GIỚI THIỆU VỀ SẢN PHẨM GIỚI THIỆU VỀ SẢN PHẨM Tên và chức năng của các bộ phận Bộ phậ n trong nhà Bộ phậ n ngoài trời Bộ điều khiển từ xa Không khí đầu vào Không khí đầu ra Đường ống chất làm lạnh, dây điện kết nối Ống thoát nước Dây nối đất...
- Page 39 GIỚI THIỆU VỀ SẢN PHẨM Đèn hiển thị hoạt động Đèn Công tắc chuyển đổi Miêu tả Màu sắc đèn Chế độ làm mát Xanh Chế độ sưởi ấm Xanh Thời điểm vệ sinh tấm lọc cho chế độ làm mát/ sưởi ấm Vàng chanh Thời điểm vệ...
- Page 40 GIỚI THIỆU VỀ SẢN PHẨM Bộ điều khiển từ xa không dây Thiết bị điều hòa không khí này về cơ bản được trang bị một thiết bị điều khiển từ xa không dây. Nhưng nếu bạn muốn có thiết bị điều khiển từ xa có dây, bạn có thể mua. Nút GÓC CÁNH QUẠT Được sử...
- Page 41 GIỚI THIỆU VỀ SẢN PHẨM THẬN TRỌNG THẬN TRỌNG về việc xử lý Điều khiển Từ xa - Hãy nhắm vào máy thu tín hiệu trên bộ điều khiển từ xa có dây để vận hành. - Hãy đảm bảo không có vật cản giữa bộ điều khiển từ...
- Page 42 HƯỚNG DẪN VẬN HÀNH HƯỚNG DẪN VẬN HÀNH Cách lắp pin Bảo Dưỡng Thiết Bị Điều Khiển Từ Xa Không Dây Tháo nắp pin bằng cách kéo nó theo hướng mũi tên. Chọn vị trí thích hợp ở đó có thể với một cách Lắp pin mới, đảm bảo rằng đầu (+) và...
- Page 43 HƯỚNG DẪN LẮP ĐẶT HƯỚNG DẪN LẮP ĐẶT Cà i Đặ t Trình Cài Đặt - Cài Đặt Địa Chỉ Bộ Điều Khiển Trung Tâm Khi nhấn nút CHẾ ĐỘ , nhấn nút CÀ I ĐẶ T LẠ I . Bằng cách sử...
- Page 44 HƯỚNG DẪN SỬ DỤNG HƯỚNG DẪN SỬ DỤNG Chế Độ Làm Mát - Vận Hành Chế Độ Làm mát - Làm Mát Tiêu Chuẩn Mạnh Nhấn nút Bật/Tắt. Thiết bị sẽ phát ra tiếng bíp. Nhấn nút Bật/Tắt. Nhấn nút CHẾ ĐỘ để chọn Chế Độ Làm Thiết bị...
- Page 45 HƯỚNG DẪN SỬ DỤNG Chế độ Vận hành Tự động ❈ Vui lòng chọn mã tùy vào cảm giác của bạn. Mã Cảm giác Lạnh Hơi mát Dây trung hòa Hơi ấm Ấm Trong quá trình vận hành chế độ Vận hành Tự...
- Page 46 HƯỚNG DẪN SỬ DỤNG Chế độ Khử ẩm Ở Chế Độ Khử Ẩm - Nếu bạn chọn chế độ khử ẩm trên nút chọn thao tác, bộ phận trong nhà bắt đầu chạy chức năng khử ẩm, tự động cài đặt nhiệt độ trong phòng và thể tích khí...
- Page 47 HƯỚNG DẪN SỬ DỤNG Chế độ Quạt Gió Tự Nhiên theo Logic Tự Động - Để có cảm giác mới hơn tốc độ quạt khác, hãy nhấn Nút Chọn Tốc Độ Quạt Trong Nhà và cài đặt chế độ tự động. Ở...
- Page 48 HƯỚNG DẪN SỬ DỤNG Cài đặt Nhiệt độ/Kiểm tra Nhiệt độ Trong phòng Chúng ta có thể điều chỉnh nhiệt độ mong muốn một cách đơn giản - Nhấn cá c nút để điều chỉnh nhiệt độ mong muốn. : Tăng 1 °C hoặc 1 °F mỗi lần nhấn : Giảm 1 °C hoặc 1 °F mỗi lần nhấn...
- Page 49 HƯỚNG DẪN SỬ DỤNG Cài đặt Luồng không khí Điều chỉnh hướng luồng khí lên/xuống Có thể điều chỉnh luồng không khí SWING (lên/xuống) bằng cách sử dụng thiết bị điều khiển từ xa. Nhấn nút BẬT/TẮT để khởi động thiết bị. Nhấn nút điều chỉnh luồng không khí...
- Page 50 HƯỚNG DẪN SỬ DỤNG Điều khiển góc lá cánh quạt riêng lẻ Nó là chức năng có thể điều khiển 4 góc Nhấn nút CÀ I ĐẶ T /XÓ A để đăng ký trước cánh quạt riêng lẻ ở nhóm sản phẩm hộp 4 hoặc hủy chức năng điều khiển góc lá...
- Page 51 HƯỚNG DẪN SỬ DỤNG Bộ hẹn giờ Cài đặt Thời gian Hiện tại Nhấn nút CÀ I ĐẶ T /XÓ A trong 3 giây. Nhấn nút CÀ I ĐẶ T THỜ I GIAN cho đến khi thời gian mong muốn được cài đặt. Nhấn nút CÀ...
- Page 52 Chức năng phụ Chức năng phụ...
- Page 53 Chức năng phụ PM10 PM10...
- Page 54 Chức năng phụ...
- Page 55 BẢO TRÌ VÀ BẢO DƯỠNG BẢO TRÌ VÀ BẢO DƯỠNG Bộ phậ n Trong nhà - Tháo các Bộ lọc không khí ra. Giữ vấu hãm và kéo nhẹ về phía trước để Lưới, Vỏ và Điều khiển Từ xa tháo bộ...
- Page 56 BẢO TRÌ VÀ BẢO DƯỠNG Làm sạch bộ lọc (Tù y chọn) - Mở tấm chắn trước và tháo bộ lọc không khí. Làm sạch Cần phải kiểm tra và vệ sinh các bộ lọc PLASMA ở sau bộ lọc không khí 3 tháng một lần hoặc thường xuyên hơn nếu cần.
- Page 57 BẢO TRÌ VÀ BẢO DƯỠNG Các Hướng dẫn Vận hành! Không được bật quá lạnh Không được để ánh nắng Luôn giữ nhiệt độ trong trong phòng. trực tiếp vào phòng khi điều phòng tỏa đều. hòa không khí đang hoạt Điều này không tốt cho sức Điều chỉnh luồng không khí...
- Page 58 BẢO TRÌ VÀ BẢO DƯỠNG Hướng dẫn Xử lý sự cố! Tiết kiệm thời gian và tiền bạc! Hãy kiểm tra các mục sau trước khi yêu cầu sửa chữa hay bảo dưỡng..Nếu chưa khắc phục được trục trặc, hãy liên hệ với đại lý bán hàng của bạn. Điều hòa không khí...
- Page 62 Địa chỉ : PT. LG ELECTRONICS VIETNAM Lô CN2, Khu công nghiệp Tràng Duệ, Xã Lê Lợi, huyện An Dương, thành phố Hải Phòng, Việt Nam...
- Page 63 PANDUAN BAGI PENGGUNA PENDINGIN RUANGAN Bacalah panduan ini dengan saksama sebelum mengoperasikan unit, dan simpanlah untuk rujukan di kemudian hari. Ceiling Cassette ATNQ18GPLE7 ATNQ36GNLE7 ATNQ48GMLE7 ATNQ24GPLE7 ATNQ30LNLE7 I.15.LEI8.02016.0319 I.15.LEI2.02225.0519 I.15.LEI7.01614.0319 www.lg.com Hak cipta © 2019-2021 LG Elektronik. Semua hak cipta di lindungi.
- Page 64 TIPS UNTUK MENGHEMAT LISTRIK TIPS UNTUK MENGHEMAT LISTRIK Berikut beberapa tips yang akan menghemat daya saat menggunakan AC. Anda dapat menggunakan AC dengan mengikuti petunjuk di bawah ini supaya lebih efisien: • Jangan mendinginkan ruangan secara berlebihan. Ini dapat membahayakan kesehatan dan boros listrik.
- Page 65 PETUNJUK KESELAMATAN PENTING PETUNJUK KESELAMATAN PENTING BACA SEMUA PETUNJUK SEBELUM MENGGUNAKAN PERANGKAT. Selalu patuhi tindakan pencegahan berikut ini untuk menghindari situasi berbahaya dan memastikan produk Anda bekerja dengan baik PERINGATAN Mengabaikan arahan dapat mengakibatkan cedera serius atau kematian HATI-HATI Mengabaikan arahan dapat mengakibatkan cedera ringan atau kerusakan pada produk PERINGATAN •...
- Page 66 PETUNJUK KESELAMATAN PENTING • Pastikan area pemasangan tidak rusak karena termakan usia. Jika bagian bawah roboh, AC dapat jatuh sehingga menyebabkan kerusakan properti, kerusakan produk, dan cedera badan. • Jangan biarkan AC bekerja dalam waktu lama jika tingkat kelembapan sangat tinggi dan jika pintu atau jendela dalam keadaan terbuka.
- Page 67 PETUNJUK KESELAMATAN PENTING HATI-HATI Pemasangan • Selalu periksa kebocoran gas (refrigeran) setelah pemasangan atau perbaikan produk. Kadar refrigeran yang rendah dapat merusak produk. • Pasang pipa pembuangan untuk memastikan bahwa air telah disalurkan dengan benar. Sambungan yang buruk dapat menyebabkan kebocoran air. •...
- Page 68 DAFTAR ISI DAFTAR ISI TIPS UNTUK PETUNJUK BAGI MENGHEMAT LISTRIK PENGGUNA Mode Pendinginan - Pengoperasian PETUNJUK Standar KESELAMATAN Mode Pendinginan - Pendinginan Kuat PENTING Mode Pengoperasian Otomatis Mode Pengatur kelembapan SEBELUM Mode Kipas MENGGUNAKAN Pengaturan Suhu/Pemeriksaan Suhu Ruangan Persiapan pengoperasian Pengaturan aliran udara Penggunaan Pengalihan Celsius/Fahrenheit...
- Page 69 SEBELUM MENGGUNAKAN SEBELUM MENGGUNAKAN Persiapan pengoperasian - Hubungi spesialis pemasangan untuk memasang unit. - Gunakan sirkuit khusus. Penggunaan - Terpapar aliran udara secara langsung dalam waktu yang lama dapat membahayakan kesehatan. Jangan memaparkan penghuni, hewan piaraan, atau tanaman kepada aliran udara langsung dalam waktu lama.
- Page 70 PENGENALAN PRODUK PENGENALAN PRODUK Nama dan fungsi setiap komponen Unit dalam-ruangan Unit luar-ruangan Remote control Udara masuk Udara keluar Pipa refrigeran, sambungan kabel listrik Pipa pembuangan air Kabel arde Sambungkan ke arde unit luar-ruangan untuk mencegah kejutan listrik.
- Page 71 PENGENALAN PRODUK Lampu Indikator Pengoperasian LAMPU LAMPU OPERASI MANUAL Deskripsi Warna Lampu Mode Pendinginan Hijau Mode Pemanasan Hijau Saatnya Membersihkan Filter saat unit Beroperasi Hijau Kekuningan Saatnya Membersihkan Filter saat unit Tidak Beroperasi Orange Hot Start atau Mode Pencairan sebelum memulai Mode Pemanasan Hijau Saat perintah diterima Hijau Kekuningan...
- Page 72 PENGENALAN PRODUK Remote Control Nirkabel Pada dasarnya, AC ini dilengkapi dengan remote control nirkabel. Tetapi jika Anda ingin menggunakan remote control kabel, Anda harus membayar sendiri. Tombol VANE ANGLE (arah kipas) Gunakan untuk mengatur sudut setiap bilah. Tombol Penjernihan Udara (Opsional) Digunakan untuk menyalakan atau menghentikan fungsi pemurnian udara.
- Page 73 PENGENALAN PRODUK HATI-HATI Berhati-hatilah saat menangani Remote Control - Bertujuan agar penerima sinyal pada remote control kabel dapat beroperasi dengan benar. - Pastikan tidak ada halangan antara remote control dan penerima sinyal. - Jangan menjatuhkan atau melempar remote control. - Jangan menaruh remote control di lokasi yang terpapar sinar matahari langsung, atau berada di sebelah unit pemanas, atau sumber panas lainnya.
- Page 74 PETUNJUK PENGOPERASIAN PETUNJUK PENGOPERASIAN Cara memasang Baterai Perawatan Remote Control Nirkabel Geser penutup baterai sesuai arah tanda panah. Pilih lokasi yang cocok, aman, & mudah Pasang baterai baru dan pastikan kutub (+) dijangkau. dan (-) pada baterai terpasang dengan benar. Pasang wadah remote dengan kencang di Pasang kembali penutup dengan menggeser tembok dengan sekrup yang disertakan.
- Page 75 PETUNJUK PEMASANGAN PETUNJUK PEMASANGAN Pengaturan Installer - Penetapan Pengaturan Kontrol Pusat Bersamaan dengan menekan tombol MODE, tekan tombol RESET. Dengan menggunakan tombol pengaturan suhu, atur tetapan unit dalam-ruangan. • Kisaran pengaturan : 00 ~ FF Setelah menetapkan alamat, tekan tombol HIDUP/MATI ke arah unit dalam-ruangan 1 kali.
- Page 76 PETUNJUK BAGI PENGGUNA PETUNJUK BAGI PENGGUNA Mode Pendinginan - Mode Pendinginan - Pengoperasian Standar Pendinginan Kuat Tekan tombol ON/OFF. Tekan tombol ON/OFF. Unit akan merespons dengan bunyi bip. Unit akan merespons dengan bunyi bip. Tekan tombol MODE untuk memilih mode Tekan tombol MODE untuk memilih mode Cooling (Pendinginan).
- Page 77 PETUNJUK BAGI PENGGUNA Mode Pengoperasian Otomatis ❈ Pilih kode sesuai yang Anda rasakan. Kode Yang Dirasakan Dingin Agak dingin Netral Agak hangat Hangat Selama Mode Pengoperasian Otomatis - Jika sistem tidak beroperasi seperti yang diinginkan, ubah secara manual ke mode lain.
- Page 78 PETUNJUK BAGI PENGGUNA Mode Pengatur kelembapan Selama Mode Pengatur kelembapan - Jika Anda memilih mode dehumidifikasi dengan tombol pilihan pengoperasian, unit dalam-ruangan akan mulai menjalankan fungsi dehumidifikasi; yang secara otomatis mengatur suhu ruangan dan volume udara ke kondisi terbaik untuk dehumidifikasi berdasarkan suhu ruangan yang dirasakan.
- Page 79 PETUNJUK BAGI PENGGUNA Mode Kipas Udara Alami menurut Logika otomatis - Untuk rasa yang lebih segar dari kecepatan kipas lainnya, tekan Kecepatan Kipas Dalam-Ruangan dan setel ke mode otomatis. Dalam mode ini, udara bertiup seperti hembusan udara alam dengan cara mengubah-ubah kecepatan kipas secara otomatis menurut logika otomatis.
- Page 80 PETUNJUK BAGI PENGGUNA Pengaturan Suhu/Pemeriksaan Suhu Ruangan Kita dapat menyesuaikan suhu yang diinginkan dengan mudah. - Tekan tombol untuk menyetel suhu yang diinginkan. : Akan menaikkan suhu sebesar 1 ° C atau 1 ° F per sekali tekan : Akan menurunkan suhu sebesar 1 °...
- Page 81 PETUNJUK BAGI PENGGUNA Pengaturan aliran udara Kontrol arah aliran udara naik/turun Aliran udara SWING (Berayun) (Naik/Turun) dapat disetel dengan remote control. Tekan tombol ON/OFF untuk menghidupkan unit. Tekan tombol Aliran udara SWING (Berayun) (Naik/Turun) dan bilah akan berayun ke atas dan ke bawah. CATATAN - Selalu gunakan remote control untuk mengatur arah aliran udara naik/turun.
- Page 82 PETUNJUK BAGI PENGGUNA Kontrol sudut bilah satuan Ini adalah fungsi yang dapat mengontrol 4 Tekan tombol SET/CLEAR untuk sudut bilah secara individual di kelompok menetapkan atau membatalkan fungsi produk kaset 4-Arah tipe bilah. kontrol sudut bilah individu. - Mungkin ada perbedaan antara tombol atas/bawah/ kiri/kanan pada remote control nirkabel dan arah port pembuangan angin.
- Page 83 PETUNJUK BAGI PENGGUNA Timer Menyetel Waktu Sekarang Tekan tombol SET/CLEAR (Tetapkan/ Hapus) selama 3 detik. Tekan tombol TIME SETTING (pengaturan waktu) hingga waktu yang diinginkan disetel. Tekan Tombol SEL / CLEAR (pilih/hapus). CATATAN Periksa indikator A.M dan P.M. Pengaturan Timer Tekan tombol TIMER untuk mematikan atau menghidupkan timer.
- Page 84 Sub fungsi Sub fungsi Sub fungsi mungkin tidak berfungsi di beberapa produk. Tombol Penjernihan Udara (Opsional) Tekan tombol untuk menyalakan unit Tekan tombol Pemurnian Udara akan dimulai saat tombol ditekan dan berhenti saat tombol ditekan lagi. Hanya Pemurnian Udara Ketika tombol ditekan saat unit dihentikan, Air Pemurnian akan menyala secara mandiri.
- Page 85 Sub fungsi Memeriksa tingkat kualitas udara CATATAN selama operasi pemurnian udara • Konsentrasi debu ditampilkan dari 8 hingga 999 dengan satuan 1. (Opsional) • Konsentrasi debu mengacu pada data dari produsen sensor. Tekan tombol selama 3 detik, tingkat kualitas • Kriteria konsentrasi debu untuk debu mikro halus udara akan selalu ditampilkan pada Indikator Pintar ditetapkan berdasarkan kriteria yang sama dengan debu ultra halus.(Standar Perusahaan)
- Page 86 Sub fungsi Cara mengatur warna tingkat kualitas udara Dengan tetap menekan tombol ,tekan tombol reset Dengan menggunakan tombol ,atur kode fungsi dan Setting nilai 'bC'. Kode Fungsi Kode Pengaturan Tekan tombol ke arah unit sebanyak 1 kali. Setiap negara memiliki standar yang berbeda untuk menunjukkan kualitas udara secara keseluruhan.lihat tabel di bawah ini.
- Page 87 PERAWATAN DAN SERVIS PERAWATAN DAN SERVIS Unit Dalam-Ruangan - Lepaskan Filter udara. Pegang panel kemudian tarik perlahan-lahan Kisi-kisi, Casing, dan Remote Control ke arah depan untuk melepas filter. - Matikan sistem sebelum dibersihkan. Untuk membersihkan, usaplah dengan kain lembut HATI-HATI yang kering.
- Page 88 PERAWATAN DAN SERVIS Filter Pemurnian (Opsional) - Buka panel depan dan lepaskan filter udara. Pembersihan Filter PLASMA di belakang filter udara harus diperiksa dan dibersihkan setiap tiga bulan sekali atau lebih sering jika perlu. - Lepaskan filter pemurni udara. - Pasang filter pemurni udara. - Setelah melepas filter udara, tarik sedikit ke depan untuk melepas filter PLASMA.
- Page 89 PERAWATAN DAN SERVIS Tips pengoperasian! Jangan menyetel suhu di Tutup kerai maupun tirai. Usahakan suhu ruangan tetap dalam-ruangan terlalu dingin. seragam. Jangan biarkan sinar matahari Ini kurang baik untuk masuk ke dalam-ruangan saat Setel arah aliran udara vertikal kesehatan juga boros energi. AC dioperasikan.
- Page 90 PERAWATAN DAN SERVIS Tips Pemecahan Masalah! Menghemat waktu dan uang! Periksa hal-hal berikut ini sebelum meminta perbaikan atau servis... Jika masih terjadi gangguan, hubungi dealer. AC tidak bekerja. Bau aneh di dalam- Sepertinya kondensasi AC tidak bekerja ruangan. AC bocor. selama sekitar 3 - Apakah Anda menit sejak restart.
- Page 92 Diimpor oleh : PT. LG ELECTRONICS INDONESIA GANDARIA 8 OFFICE TOWER, LT.29 BC & 31 ABCD. JL. SULTAN ISKANDAR MUDA KEBAYORAN LAMA, JAKATA SELATAN 12240, DKI JAKARTA RAYA, INDONESIA...
Need help?
Do you have a question about the ATNQ18GPLE7 and is the answer not in the manual?
Questions and answers
What is the error code for my AC error blinking 4x green lite. it cuts out the outdoor operation. LG Smart Inverter brand,ceiling cassette. model is ATNQ24GPLE7
The error code for the LG Smart Inverter ceiling cassette model ATNQ24GPLE7 when the green light blinks 4 times and outdoor operation cuts out is not provided in the given context.
This answer is automatically generated