Chapters
Table of Contents

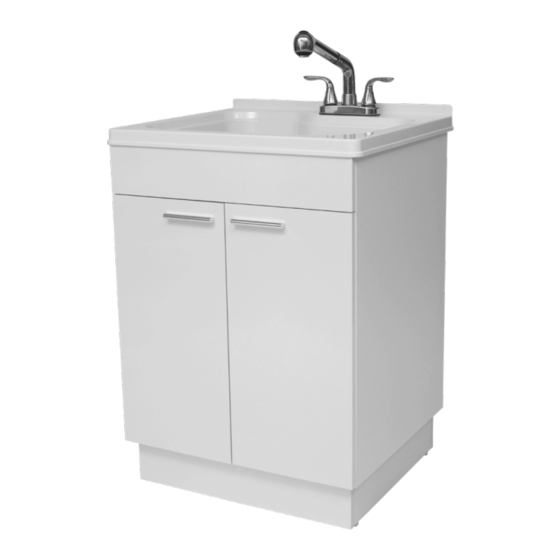
Related Manuals for Tuscany QL642


Summary of Contents for Tuscany QL642
- Page 1 UTILITY SINK, STORAGE CABINET AND FAUCET ALL-IN-ONE TODO EN UNO FREGADERO DE SERVICIO, GABINET DE ALMACENAMIENTO Y GRIFO QL642 # 720995 OWNER’S MANUAL MANUAL DEL USUARIO Rev. 20201001...
-
Page 2: Table Of Contents
. If you have any questions, contact the manufacturer . 3 . Installation work and plumbing must be done by qualified person(s) in accordance with all applicable codes and standards . 4 . Protect the entire surface during installation . QL642... -
Page 3: Warranty
Warranty ONE YEAR LIMITED WARRANTY A thorough inspection must be made before installation and any damage must be promptly reported . We will not be liable for failures or damage that could have been discovered or avoided by proper inspection and testing prior to installation . Conglom warrants this product to be free from defects in materials or workmanship for one (1) year from the date of purchase . -
Page 4: Pre-Installation
Pre-Installation TOOLS/MATERIALS REQUIRED (NOT SUPPLIED) Adjustable Needle nose Phillips wrench pliers screwdriver Utility knife Pipe wrench Sealant Carpenter’s level Hacksaw Safety gloves Safety goggles Hexagonal Key PARTS REQUIRED (NOT SUPPLIED) P-Trap Tail Pipe Supply Lines QL642... -
Page 5: Package Contents
Pre-Installation (continued) PACKAGE CONTENTS Carefully check the utility cabinet for damage and/or missing parts prior to installation If there is any damage or if you are missing parts, do not proceed with the installation Report damage and/or missing parts immediately to our customer service team at cs@conglomkb.com or 1-877-333-0098 (Service available in English and French, Monday - Friday from 8:30 am - 5:00 pm EST) Please do not dispose of packaging before you are satisfied with your new utility cabinet. -
Page 6: Installation
4 . The lateral adjustment screw adjusts the door left or right . 5 . The horizontal adjustment screw adjusts the door forward or backward . 6 . The vertical adjustment screw adjusts the door up or down . QL642... -
Page 7: Faucet And Sprayer Installation
Installation (continued) FAUCET AND SPRAYER INSTALLATION Sprayer Head (7) Remove the retaining nut (1) and rubber gasket (2) from the faucet shank (3) . Insert the sprayer hose (4) and the faucet shank (3) through the faucet holes in the sink and rest the faucet on the sink . -
Page 8: Strainer Installation
. Do not overtighten . Fiber Washer (10) - Remove excess sealant from around the drain opening . Strainer Locknut (11) NOTE: Plastic Flange (12) The tail pipe is not supplied. Tailpipe (13) Connecting Nut (14) QL642... -
Page 9: Mounting The Utility Sink
Installation (continued) MOUNTING THE UTILITY SINK Position the cabinet (E) in the intended location . If required, level the cabinet (E) by adjusting the four leveling legs and checking the alignment of the top using a carpenter’s level . Carefully place a bead of sealant all around the top of the cabinet . Ease the sink (D) onto the cabinet, and ensure it is placed evenly and centered on the cabinet (E) . -
Page 10: Maintenance
. thinners, gasoline, pine oil, etc . - Use caution when using sharp instruments that may - Use caution when using sharp instruments that may fall and scratch the surface . fall and scratch the surface . QL642... -
Page 11: Service Parts
Service Parts If you are missing parts or if you require replacement parts, please contact our customer service team at cs@conglomkb.com or 1-877-333-0098, 8:30 am – 5 pm, EST, Monday–Friday . Identify the required part(s) and have the part number(s) ready . Part Description Code Quantity... -
Page 12: Manual Del Usuario
. Si tiene alguna pregunta, póngase en contacto con el fabricante . 3 . La instalación y plomería deben estar a cargo de una persona calificada de acuerdo con los códigos y normas correspondientes . 4 . Proteja toda la superficie durante la instalación. QL642... -
Page 13: Garantía
Garantía UN AÑO DE GARANTÍA LIMITADA Debe realizarse una inspección a conciencia antes de la instalación, y cualquier daño debe reportarse inmediatamente. No nos hacemos responsables por fallos o daños que pudieran haberse descubierto o evitado con una inspección y pruebas adecuadas antes de la instalación . Conglom garantiza este producto contra defectos en materiales y de fabricación durante 1 (un) año a partir de la fecha de compra. -
Page 14: Preinstalación
HERRAMIENTAS/MATERIALES NECESARIOS (NO INCLUIDOS) Destornillador de Pinzas de punta Llave inglesa estrella (Phillips) Navaja Llave grifa Sellador Nivel de Segueta Guantes de seguridad carpintero Gafas de Llave hexagonal seguridad PIEZAS NECESARIAS (NO INCLUIDAS) Tubo de Líneas de Sifón desagüe abastecimiento QL642... -
Page 15: Contenido Del Paquete
Preinstalación (continuación) CONTENIDO DEL PAQUETE Antes de llevar a cabo la instalación, verifique cuidadosamente que la unidad no presente ningún daño ni que falten piezas. En caso de que la unidad esté dañada o falten piezas, comuníquese con el departamento de servicio al cliente vía cs@conglomkb.com o al 1-877-333-0098 (servicio en inglés y francés, de lunes a viernes, de 8:30 a .m . -
Page 16: Instalación
5 . El tornillo de ajuste horizontal ajusta la puerta hacia adelante o hacia atrás . 6 . El tornillo de ajuste vertical ajusta la puerta hacia arriba o hacia abajo . QL642... -
Page 17: Instalación Del Grifo Y El Difusor
Instalación (continuación) INSTALACIÓN DEL GRIFO Y DIFUSOR Cabezal del difusor (7) Retire la tuerca de retención (1) y la junta de goma (2) del vástago del grifo (3) . Inserte la manguera del difusor (4) y el vástago del grifo (3) a través de los orificios del grifo en el fregadero y apoye el grifo en el fregadero . -
Page 18: Instalación Del Escurridor
. No la apriete demasiado . de fricción (10) - Retire el exceso de sellador de la abertura de drenaje . Contratuerca (11) NOTA: Brida de plástico (12) El tubo de desagüe no está incluido. Tubo final (13) Tuerca de conexión (14) QL642... -
Page 19: Instalar El Fregadero
Instalación (continuación) INSTALAR EL FREGADERO Coloque el gabinete (E) en la ubicación deseada . Si hace falta, nivele el gabinete ajustando la cuatro patas niveladoras (E) y compruebe la alineación de la parte superior utilizando un nivel de burbuja. Con cuidado, agregue un poco de sellador alrededor de la parte superior del armario Coloque cuidadosamente el lavabo (D) en el armario (A) . -
Page 20: Mantenimiento
. - Tenga precaución cuando utilice instrumentos afilados - Evite el uso de navajas de afeitar y otros instrumentos que puedan caer y rasguñar la superficie. que puedan caer y rayar la superficie. QL642... -
Page 21: Piezas De Refacción
Piezas de repuesto Si le faltan piezas o requiere refacciones, escriba a nuestro equipo de servicio al cliente a cs@conglomkb.com o llame al 1-877-333-0098, de lunes a viernes, de 8:30 a.m. a 5:00 p.m., hora del Este. Identifique la(s) pieza(s) requerida(s) y tenga lista el número correspondiente. Pieza Descripción Código... - Page 22 Imported by / Importado por: St-Laurent, Québec, H4S 2C3 1-888-449-9197 | cs@conglomkb.com (service available in English and French, Monday - Friday from 8:30 am - 5 pm EST) (De lunes a viernes, de 8:30 a. m. a 5 p. m., hora del Este; servicio disponible en inglés y francés). www.conglomkb.com...
Need help?
Do you have a question about the QL642 and is the answer not in the manual?
Questions and answers