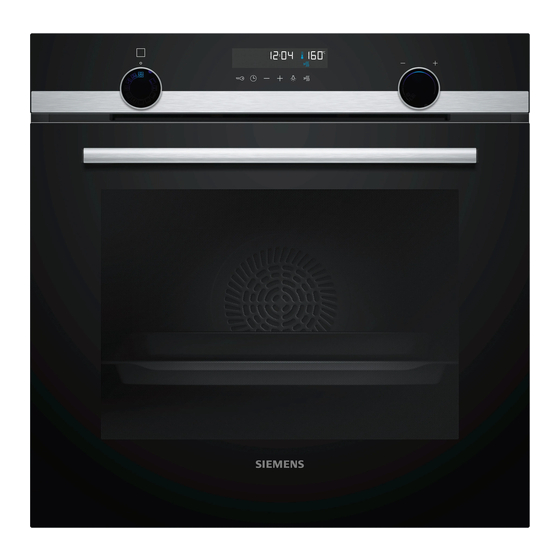
Summary of Contents for Siemens IQ500 HB 78 C 6B Series
Page 1
Oven HB.78.C.6B User manual and installation instructions Register your product on My Siemens and discover exclusive ser- vices and offers. siemens-home.bsh-group.com/welcome The future moving in. Siemens Home Appliances...
en Safety For further information, please refer to the Digital User Guide. Table of contents 1 Safety Observe the following safety instructions. 1.1 General information USER MANUAL ¡ Read this instruction manual carefully. Safety .............. 2 ¡ Keep the instruction manual and the Preventing material damage .......
Page 3
Safety en Hot steam may escape when you open the 1.4 Safe use appliance door. Steam may not be visible, de- Always place accessories in the cooking com- pending on the temperature. partment the right way round. ▶ Open the appliance door carefully. → "Accessories", Page 9 ▶...
en Safety If the appliance or the power cord is dam- 1.6 Meat probe aged, this is dangerous. WARNING ‒ Risk of electric shock! ▶ Never operate a damaged appliance. Using the wrong meat probe could damage ▶ Never operate an appliance with a cracked the insulation.
Preventing material damage en The outside of the appliance gets very hot WARNING ‒ Risk of burns! when the cleaning function is in progress. The cooking compartment gets very hot when ▶ Never touch the appliance door. the cleaning function is in progress. ▶...
Page 6
en Environmental protection and saving energy Open the appliance door as little as possible during operation. ¡ This will maintain the temperature in the cooking compartment and eliminate the need for the appli- ance to reheat. When baking multiple dishes, do so in succession or in parallel.
Familiarising yourself with your appliance en 4 Familiarising yourself with your appliance 4.1 Controls Buttons and display The buttons are touch-sensitive surfaces. To se- You can use the control panel to configure all functions lect a function, simply press lightly on the relev- of your appliance and to obtain information about the ant field.
Page 8
en Familiarising yourself with your appliance Symbol Type of heating and What it's used for/how it works temperature range 3D hot air Bake and roast on one or more levels. 30 - 275 °C The fan distributes the heat from the ring-shaped heating element in the back wall evenly around the cooking compartment.
Page 9
Accessories en Lighting Notes ¡ The heat-up indicator will only show the temperature The oven light lights up the cooking compartment. increasing for types of heating for which a temperat- With most types of heating and functions, the lighting ure is set. For grill settings, for example, the heat-up lights up during operation.
You will find a comprehensive range of products for your appliance in our brochures and online: www.siemens-home.bsh-group.com Accessories vary from one appliance to another. When Baking tray Slide the tray, e.g. the universal pan, purchasing accessories, always quote the exact E.g.
Before using for the first time en 6 Before using for the first time Configure the settings for initial start-up. Clean the ap- 6.2 Cleaning the appliance before using pliance and accessories. it for the first time Clean the cooking compartment and accessories be- 6.1 Initial use fore using the appliance to prepare food for the first You need to make settings for initial use before you...
en Rapid heating 8 Rapid heating To save time, rapid heating can shorten the preheating Set a suitable type of heating and a temperature of time for set temperatures over 100 °C. at least 100 °C. Rapid heating is possible for the following types of Rapid heating automatically switches off at temper- heating: atures of 200 °C and above.
Page 13
Time-setting options en a The appliance starts heating and the cooking time a Once the time has elapsed, an audible signal counts down after a few seconds. sounds and the display shows the cooking time as zero. a If the cooking time has elapsed, an audible signal When the cooking time has elapsed: sounds and the display shows the cooking time as Press any button to end the signal prematurely.
en Meat thermometer 10 Meat thermometer Cook with precision by inserting the meat probe into Notes the food and setting a core temperature on the appli- ¡ If you remove the meat thermometer while the food ance. Once the set core temperature has been is cooking, all the settings will be reset.
Programme en 11 Programme The programmes help you to use your appliance to Cookware made from the following material is not prepare different dishes by selecting the optimum set- suitable: tings automatically. ¡ Bright, shiny aluminium ¡ Unglazed clay ¡ Plastic or plastic handles 11.1 Cookware for programmes You should therefore use heat-resistant cookware that is suitable for temperatures up to 300 °C.
Page 16
en Programme No. Food Cookware Weight range Add liquid Shelf Information posi- Weight setting tion Roasting dish with 0.6 - 2.5 kg Place in the cook- 13 Chicken, unstuffed Ready to cook, glass lid Chicken weight ware with the breast seasoned facing up Roasting dish with 0.1–0.8 kg Cover the...
Page 17
Programme en No. Food Cookware Weight range Add liquid Shelf Information posi- Weight setting tion Roasting dish with 0.5–2.5 kg Cover the Do not sear the meat 25 Joint of veal, lean E.g. tenderloin or eye Weight of meat bottom of the beforehand roasting dish, and add up...
en Childproof lock For some programmes, the button can be When the programme ends: ‒ used to delay the end. Press any button to end the audible signal pre- ‒ → "Setting the end time", Page 13 maturely. To set a cooking time for further cooking, press a After a few seconds, the programme starts and the ‒...
Home Connect en Display Basic setting Selection Button tone when pressing a button = off = on Brightness of the display illumination = dark = medium = bright Time display = hide the time = display the time ...
Page 20
en Home Connect Open the Home Connect app and scan the follow- 15.1 Setting up Home Connect ing QR code. Requirements ¡ The appliance is connected to the power supply and is switched on. ¡ You have a mobile device with a current version of the iOS or Android operating system, e.g.
Cleaning and servicing en 15.3 Operating the appliance with the Notes ¡ You can continue to use your appliance as normal Home Connect app while updates are downloading. Depending on your You can use the Home Connect app to set and start personal settings in the app, software updates can the appliance remotely.
en Cleaning and servicing Suitable cleaning agents Only use cleaning products that are suitable for the dif- Follow the instructions on cleaning the appliance. ferent surfaces on your appliance. → "Cleaning the appliance", Page 23 Appliance front Surface Suitable cleaning agents Information Stainless steel ¡...
Page 23
Self-cleaning en 16.2 Cleaning the appliance WARNING ‒ Risk of fire! Loose food remnants, fat and meat juices may catch In order to avoid damaging the appliance, you must fire. clean your appliance only as specified, and with suit- Before using the appliance, remove the worst of the able cleaning products.
Page 24
en Shelf supports Once the appliance has cooled down sufficiently, Cleaning set- Cleaning Duration in hours the appliance door unlocks and goes out. ting level Prepare the appliance for use. → Page 24 Lightly soiled Approx. 1:15 Medium Approx. 1:30 17.3 Preparing the appliance for use High Approx.
Page 25
Appliance door en 19 Appliance door To ensure that your appliance retains its appearance Close the appliance door fully . Grab hold of the and remains fully functioning for a long time, you can appliance door with both hands (on the left and detach the appliance door and clean it.
Page 26
en Appliance door Using both hands, press down on the left and right Undoing and removing the left- and right-hand of the door cover from above to check whether the screws on the appliance door appliance has been pushed in as far as it will go. Place a folded-up tea towel in the appliance door.
Troubleshooting en Turn the intermediate pane until the arrow is in Push the front pane to the appliance until the left- the top right. and right-hand hook is opposite the support . Insert the intermediate pane into the retainer Push the front pane in at the bottom until you the bottom and push it in firmly at the top.
Page 28
en Troubleshooting Fault Cause and troubleshooting Appliance is not heat- Demo mode is activated. ing, the colon flashes Briefly disconnect the appliance from the power supply by switching the circuit breaker in in the display and a the fuse box off and then on again. appears.
Disposal en Pull out the halogen bulb without turning it . WARNING ‒ Risk of electric shock! When changing the bulb, the bulb socket contacts are live. Before replacing the bulb, ensure that the appliance ▶ is switched off in order to prevent a potential electric shock.
Page 30
BSH Hausgeräte GmbH hereby declares that the appli- A detailed Declaration of Conformity can be found on- ance with Home Connect functionality conforms to the line at www.siemens-home.bsh-group.com/uk/ among basic requirements and other relevant provisions of Dir- the additional documents on the product page for your ective 2014/53/EU.
How it works en ¡ Place the food to be grilled on the wire rack. In ad- 24.3 Notes on roasting and grilling dition, slide the universal pan in at least one shelf The setting values are based on the assumption that position lower, with the slanted edge facing the ap- unstuffed, chilled, ready-to-roast poultry, meat or fish is pliance door.
Page 32
en How it works Food Accessories/cookware Shelf pos- Type of Temperature Cooking ition heating in °C/grill time in mins setting Scones Baking sheet on wire 190-200 10-15 rack Biscuits Baking sheet on wire 140-160 10-20 rack Small cakes 12-cup tin 25-35 Pavlova Baking sheet on wire 100-110...
Page 33
How it works en Recommended settings for yoghurt Food Accessories/cookware Shelf position Type of Temperature in Cooking heating °C time in mins Yoghurt Individual moulds Cooking compartment 40-45 8–9 hrs floor Preheat the cooking compartment and cookware for 24.6 Slow cooking approx. 15 minutes. Slow cooking is a technique for cooking food over a Sear the meat on all sides on the cooking zone at a long period at low temperatures.
Page 34
en Installation instructions Position baking tins/dishes either next to one another or offset on different shelves so that they are not dir- ectly one above the other in the cooking compartment. Recommended settings for baking Food Accessories/cookware Shelf pos- Type of Temperature in Cook- ition...
Installation instructions en ¡ Wear protective gloves so that you do not cut yourself. Parts that are accessible dur- ing installation may have sharp edges. ¡ Dimensions of the figures in mm. WARNING ‒ Risk of fire! It is dangerous to use an extended power 25.1 General installation instructions cord and non-approved adapters.
Page 36
en Installation instructions ¡ To ventilate the appliance, the intermediate floor ¡ The fuse protection must correspond to the power must have a ventilation cut-out. rating specified on the appliance's rating plate and ¡ In combination with induction hobs, the gap to local regulations.
Page 37
Installation instructions en 25.7 Installing the appliance Slide the appliance in fully and centre it. Screw the appliance into place. For handleless kitchens with vertical bar handle strips: Attach a suitable filling piece in order to cover ‒ any sharp edges and to guarantee a safe install- ation.
Page 40
Valid within Great Britain: Imported to Great Britain by BSH Home Appliances Ltd. Grand Union House Old Wolverton Road Wolverton, Milton Keynes MK12 5PT United Kingdom Manufactured by BSH Hausgeräte GmbH under the trademark licence of Siemens AG *9001666135* 9001666135 (010825)
Need help?
Do you have a question about the IQ500 HB 78 C 6B Series and is the answer not in the manual?
Questions and answers