Table of Contents
Advertisement
Quick Links
GV-R687OC-1GD/
GV-R687UD-1GD Rev2.0/
GV-R687UD-1GD Rev1.0
TM
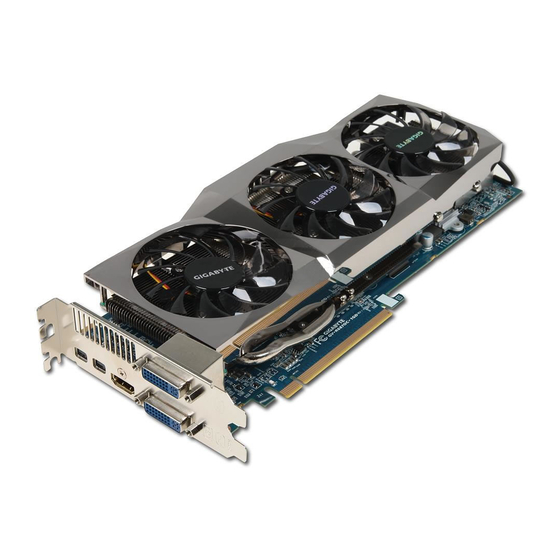
AMD Radeon
HD6870 Graphics Accelerator
User's Manual
Rev. 103
12MM-R687OGD-103AR
Copyright
© 2011 GIGABYTE TECHNOLOGY CO., LTD
Copyright by GIGA-BYTE TECHNOLOGY CO., LTD. ("GBT"). No part of this manual may be reproduced or trans-
mitted in any form without the expressed, written permission of GBT.
Trademarks
Third-party brands and names are the properties of their respective owners.
Notice
Please do not remove any labels on this graphics card. Doing so may void the warranty of this card.
manual.The author assumes no responsibility for any errors or omissions that may appear in this document nor does
the author make a commitment to update the information contained herein.
Rovi Product Notice:
This product incorporates copyright protection technology that is protected by U.S. patents and other intellectual
property rights.Use of this copyright protection technology must be authorized by Rovi Corporation, and is intended
for home and other limited viewing uses only unless otherwise authorized by Rovi Corporation. Reverse engineering
or disassembly is prohibited.
Advertisement
Table of Contents

Related Manuals for Gigabyte GV-R687OC-1GD


Summary of Contents for Gigabyte GV-R687OC-1GD
- Page 1 User's Manual Rev. 103 12MM-R687OGD-103AR Copyright © 2011 GIGABYTE TECHNOLOGY CO., LTD Copyright by GIGA-BYTE TECHNOLOGY CO., LTD. (“GBT”). No part of this manual may be reproduced or trans- mitted in any form without the expressed, written permission of GBT. Trademarks Third-party brands and names are the properties of their respective owners.
-
Page 5: Table Of Contents
Table of Contents 1. Introduction ........................6 1.1. Features ......................... 6 1.2. Minimum System Requirements ..................6 2. Hardware Installation ....................7 2.1. Board Layout ........................7 2.2. Hardware Installation ....................10 3. Software Installation ....................12 3.1. Driver and Utility Installation ..................12 3.1.1. -
Page 6: Introduction
1. Introduction 1.1. Features AMD Radeon HD 6870 Graphics Processing Unit (GPU) ® 1.2. Minimum System Requirements Hardware ® ® Intel Pentium 2 or AMD Athlon 1 GB or more of system memory for best performance Optical drive for software installation (CD-ROM or DVD-ROM drive) A power supply that provides at least 500-watt and with two 75w 2x3-pin PCIe power Operating System ®... -
Page 7: Hardware Installation
2. Hardware Installation 2.1. Board Layout CrossFire Connector Mini Display Port Connector Mini Display Port Connector HDMI Connector DVI-D Connector DVI-I Connector Mini Display Port Connector Digital LCD Monitor Mini Display Port Connector HDMI Connector HDMI TV DVI-I Connector 1 DVI-D DVI Output Connector 1... - Page 8 2.GV-R687UD-1GD Rev2.0 CrossFire Connector Mini Display Port Connector Mini Display Port Connector HDMI Connector DVI-D Connector DVI-I Connector Mini Display Port Connector Digital LCD Monitor Mini Display Port Connector HDMI Connector HDMI TV DVI-I Connector 1 DVI-D DVI Output Connector 1 Digital LCD Monitor D-Sub DVI-I to D-Sub...
- Page 9 The entire Radeon HD 6870 series support HDMI output which can handle both audio and video signals. However, audio output from the onboard audio controller or the external sound card will be disabled when HDMI output is activated. If no need for HDMI output function, set the onboard audio controller or the external sound card to be the default Sound Playback device to obtain audio output from your system.
-
Page 10: Hardware Installation
2.2. Hardware Installation Now that you have prepared your computer, you are ready to install your graphics card. Step 1. Locate the PCI Express x16 slot. If necessary, remove the metal cover from this slot; then align your graphics card with the PCI Express x16 slot, and press it in firmly until the card is fully seated. - Page 11 How to enable the ATI CrossFireX technology? Step 1: nect the graphics cards via two CrossFire bridge interconnect cables (Figure 1). Then users can enable the Two CrossFire bridge Two CrossFire graphics cards of the same type. interconnect cables. Figure 1 Step 2: check box (Figure 2).
-
Page 12: Software Installation
3. Software Installation Notice the following guidelines before installing the drivers: 2. Make sure your system has installed the appropriate motherboard drivers (for the motherboard drivers, please contact the motherboard manufacturer.) 3.1. Driver and Utility Installation 3.1.1. Driver Installation After installing the operating system, insert the driver disk into your optical drive. The driver Autorun screen is automatically displayed which looks like that shown in the screen shot below. - Page 13 Step 5: Click the Accept button. Setp 4: Click the Express or Custom icon and then click Next. The system is installing the components. Step 6: Click the Finish button to restart the computer. Then the driver installation is completed. - 13 - Software Installation...
-
Page 14: Taskbar Icon
3.2. Taskbar Icon to enter the ATI Catalyst Control Center. The ATI Catalyst Control Center graphics card settings. Right-click the ATI icon to enter the ATI Catalyst Control Center. Or you can right-click on the desktop and select Catalyst(TM) Control Center. GV-R6800 Series Graphics Accelerator - 14 -... - Page 15 Step 1: Go to Start > Control Panel > Hardware and Sound > Manage audio devices. Figure 2 Figure 1 Figure 3 Step 2: In the Manage audio devices dialog box, click the Playback tab. Using the picture to the left as the example, to set HDMI audio to be the default Sound Playback device, select Digital Output Device (HDMI).
-
Page 16: Display Properties
Select Display Settings to adjust the screen resolution and color quality settings. You can move the slider to change the resolution. You can click the item to change the color quality. Click the Advanced button for advanced settings. Model GV-R687OC-1GD GV-R687UD-1GD D i s p l a y DVI+mini DP Matrix... - Page 17 ® ATI Catalyst Control Center Basic View : terface provides access to the basic settings and advanced features of your ATI graphics products. You can switch between Basic View and Advanced View at any time. To access more settings in Basic View, click Basic, and then click Next.
- Page 18 Step 4: In the Output Video Format list, select a file Output File area. Finally, click Next conversion. for desktop viewing. This wizard will take you to set up the HydraVision GV-R6800 Series Graphics Accelerator - 18 -...
- Page 19 Quick Settings: The Quick Settings page provides access to three main settings. 3D Quality 3D Performance and Quality Settings allows your 3D games and applications to get faster perfor- mance and better quality with a more balanced setting. Video Playback Use this option to optimize video playback in dif- ferent room environment or to select how video playback appears on the second display.
- Page 20 ATI Catalyst Control Center Advanced View View Properties: The CATALYST Control Center dashboard supports three types of views. Hotkeys Properties: The Hotkeys Manager allows you to create shortcut key combinations to quickly perform tasks such as such as Ctrl, Alt, or Shift, and any letter from the alphabet. GV-R6800 Series Graphics Accelerator - 20 -...
- Page 21 association. Note: is more than one graphics card installed in your computer, you need to select the appropriate card Preferences Properties: The Preferences page helps to restore defaults, change skins, and update the Catalyst Control Center. The Catalyst Control Center Preferences page contains the following options: Always on Top Hide Tooltips Hide Splash Screen...
- Page 22 Help Properties: The Catalyst Control Center Help feature allows you to access the comprehensive online help, register your product, or generate a problem report should you require technical support. The Catalyst Control Center Help feature offers the following options: Help for this Page Help Contents ...
- Page 23 Displays Manager: Displays Manager to change your display setup and arrange your desktop in a multi-monitor environment. Note: The stretch vertically and horizontally options are not supported on systems running Windows Vista. Display Options: The Display Options aspect gives you additional control to optimize performance of OpenGL and Direct 3D applications.
- Page 24 Monitor Properties 1: Attributes Monitor Attributes provides information about the attached monitor. You can also enable Extended Dis- mation provided by the attached monitor to determine the limits for the resolution and refresh rate. Adjustments Use Monitor Adjustments to resize and reposition the computer desktop on your monitor’s display screen.
- Page 25 Standard Settings The Standard Settings page provides access to a universal slider control where you can simultane- ously adjust all of the standard 3D settings for any type of 3D application. The slider enables you to adjust for overall system performance, overall 3D image quality, or a balance between the two.
- Page 26 Anisotropic Filtering Anisotropic Filtering is a technique that preserves detail on surfaces that have three-dimensional perspective and fade away into the background. It works best when used in conjunction with Mipmap- ping. Anisotropic Filtering can be set to favor either an increase in system processing performance or improved image quality: plications that display objects with smooth, simple...
- Page 27 Avivo Video: Presets To quickly adjust your video settings choose one of the video presets. Note: These settings will only affect applications with video overlay support. Basic Color Use the Avivo Color: Basic option to manually set Gamma, Brightness, Contrast, Saturation, and Tint for video playback.
- Page 28 Basic Quality You can control the deinterlacing settings by checking the Use automatic deinterlacing item. The bar determines how the two interlaced video Note: These settings will only affect applications with video overlay support. Theater Mode Use Theater Mode to change the way you view streaming video.
- Page 29 ATI Overdrive: Use Overdrive to maximize your viewing experience by dynamically and safely overclocking the graphics pro- the graphics processor clock and video memory clock. Alternatively, manually set these speeds to meet your running 3D applications. Note: If your computer cannot restart after setting a higher clock speed, press and hold the <Shift>...
-
Page 30: Troubleshooting Tips
4. Troubleshooting Tips The following troubleshooting tips may help if you experience problems. Contact your dealer or GIGABYTE for more advanced troubleshooting information. Check that the card is seated properly in the PCI Express x16 slot. Ensure that the display cable is securely fastened to the card's display connector. -
Page 31: Appendix
5. Appendix 5.1. Resolutions and Color Depth Tables Radeon HD 6870 Series 2D Single Display Modes Display Refresh Color Depth (bpp) Screen Rate 8bpp(256 color) 16bpp(65K color) 32bpp(16.7M) Resolution (Hz) Standard mode High mode True mode 640 x 480 800 x 600 1024 x 768 1152 x 864 1280 x 768... -
Page 32: Regulatory Statements
Contravention will be prosecuted. We believe that the information contained herein was accurate in all respects at the time of printing. GIGABYTE cannot, however, assume any responsibility for errors or omissions in this text. Also note that the information in this document is subject to change without notice and should not be construed as a commitment by GIGA- BYTE. - Page 33 Finally, we suggest that you practice other environmentally friendly actions by understanding and using the energy-saving features of this product (where applicable), recycling the inner and outer packaging (including shipping containers) this product was delivered in, and by disposing of or recycling used batteries properly. With your help, we can reduce the amount of natural resources needed to produce electrical and electronic quality of life by ensuring that potentially hazardous substances are not released into the environment and are disposed of properly.
- Page 34 GV-R6800 Series Graphics Accelerator - 34 -...
- Page 35 - 35 - Appendix...
- Page 36 GV-R6800 Series Graphics Accelerator - 36 -...
- Page 37 - 37 - Appendix...
- Page 38 GV-R6800 Series Graphics Accelerator - 38 -...
Need help?
Do you have a question about the GV-R687OC-1GD and is the answer not in the manual?
Questions and answers