Table of Contents
Advertisement
Quick Links
Advertisement
Table of Contents

Related Manuals for Bosch HBG13B550B


Summary of Contents for Bosch HBG13B550B
- Page 1 Built-in oven HBG13B5.0B [en] Instruction manual...
-
Page 3: Table Of Contents
Defrost ... 20 Drying... 20 Preserving ... 21 Acrylamide in foodstuffs ... 21 Test dishes... 22 Baking ... 22 Grilling... 22 Produktinfo Additional information on products, accessories, replacement parts and services can be found at www.bosch-home.com and in the online shop www.bosch-eshop.com... -
Page 4: Safety Precautions
: Safety precautions Please read this instruction manual carefully. Please keep the instruction and installation manuals in a safe place. Please pass on these manuals to the new owner if you sell the appliance. Before installation Damage during transport Check the appliance for damage after unpacking it. Do not connect the appliance if it has been damaged in transit. -
Page 5: Your New Oven
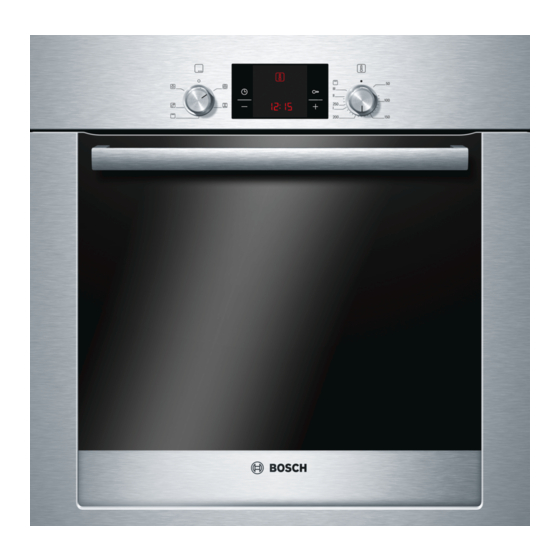
Your new oven Here you will learn about your new oven. The control panel and the individual operating controls are explained. You will find information on the cooking compartment and the accessories. Control knobs The control knobs are retractable. To lock it in or out, press the control knob in the off position. -
Page 6: Cooking Compartment
Cooking compartment The oven light is located in the cooking compartment. A cooling fan protects the oven from overheating. Oven light During operation, the oven light in the cooking compartment is on. The setting on the function selector can be used to switch on the light without heating the oven. - Page 7 Special accessories Enamel baking tray with non-stick coating Universal pan with non-stick coating Profi extra-deep pan with wire insert Lid for the Profi extra-deep pan Glass roasting dish Telescopic shelves 2-level 3-level 3-level complete pull-out 3-level complete pull-out with stop function Self-cleaning side walls Appliance with one oven light Appliances with one oven light and automatic...
-
Page 8: Before Using The Oven For The First Time
Before using the oven for the first time In this section, you can find out what you must do before using your oven to prepare food for the first time. First read the section on Safety information. Setting the clock After the appliance has been connected, the four zeros light up in the display. -
Page 9: Cooking Time
Checking the time settings If several time-setting options are set, the relevant symbols are illuminated on the display. The symbol for the time-setting option that is visible in the display is shown in brackets. To call up the timer, cooking time, clock, press the button repeatedly until the brackets are around the relevant symbol. -
Page 10: Clock
Changing the end time Use the button to change the end time. After a few seconds, the change is adopted. If the timer has been set, first press the button twice. Do not change the end time if the cooking time has already started to elapse. The cooking result would no longer be correct. -
Page 11: Care And Cleaning
Care and cleaning With good care and cleaning, your oven will remain clean and fully-functioning for a long time to come. Here we will explain how to maintain and clean your oven correctly. Notes Slight differences in the colours on the front of the oven are ■... -
Page 12: Folding Down The Grill Element
Refitting the rails First insert the rail into the rear socket, press it to the back slightly (figure A), and then hook it into the front socket (figure B). The rails fit both the left and right sides. Ensure that, as shown in figure B, levels 1 and 2 are below and levels 3, 4 and 5 are above. -
Page 13: Removing And Installing The Door Panels
Removing and installing the door panels To facilitate cleaning, you can remove the glass panels from the oven door. Removal Detach the oven door and lay it on a cloth with the handle facing down. Unscrew the cover at the top of the oven door. To do this, undo the left and right screws (fig. -
Page 14: Replacing The Bulb In The Oven Ceiling Light
Replacing the bulb in the oven ceiling light If the bulb in the oven light fails, it must be replaced. Heat- resistant, 40 watt spare bulbs can be obtained from our after- sales service or a specialist retailer. Only use these bulbs. Risk of electric shock! Switch off the circuit breaker in the fuse box. -
Page 15: Tested For You In Our Cooking Studio
Tested for you in our cooking studio Here you will find a selection of dishes and the ideal settings for them. We will show you which type of heating and which temperature are best suited for your dish. You can find information about suitable accessories and the height at which they should be inserted. -
Page 16: Baking Tips
Food Dish Meringues Universal pan Pavlova Universal pan Soufflé Wire rack + 1,2 l soufflé dish Wire rack + pie dish Yorkshire pudding Universal pan + 12-cup tin Jacket potatoes Universal pan Pizza (homemade) Universal pan * Preheat. ** Preheat at higher temperature, then reduce and insert food. Food Dish Victoria sandwich, 2 levels 2 wire racks + 4 x Ø... -
Page 17: Meat, Poultry, Fish
Meat, poultry, fish Ovenware The universal pan with insert wire rack is suitable for large roasts. You may also use any heat-resistant ovenware. Glass ovenware is the most suitable. Ensure that the lid of the roasting dish fits well and closes properly. Add a little more liquid when using enamelled roasting dishes. - Page 18 Food Lamb Rack of lamb Pork Roast joint Belly Poultry Chicken Chicken, portion (200-250 g each) Chicken, quarter (450 g each) Duck Grilling When grilling, preheat the oven for approx. 3 minutes, before putting the food in. Always grill with the oven door closed. As far as possible, the pieces of food you are grilling should be of equal thickness.
-
Page 19: Tips For Roasting And Grilling
Food Fish Whole trout, 300 g each Fillets, 150 g each Tips for roasting and grilling The table does not contain information for the weight of the joint. How to tell when the roast is ready. The roast is too dark and the crackling is partly burnt. -
Page 20: Special Dishes
Food Dish Fried foods, frozen Fish fingers Universal pan Chicken nuggets Universal pan Lasagne, frozen Lasagne, 400 g Wire rack Lasagne, 1200 g Wire rack Lasagne, chilled Lasagne, 400 g Wire rack Lasagne, 1200 g Wire rack * Preheat. Special dishes At low temperatures, 3D hot air is equally useful for producing creamy yoghurt as it is for proving light yeast dough. -
Page 21: Preserving
Preserving For preserving, the jars and rubber seals must be clean and intact. If possible, use jars of the same size. The information in the table is for round, one-litre jars. Caution! Do not use jars that are larger or taller than this. The lids could crack. -
Page 22: Test Dishes
Test dishes These tables have been produced for test institutes to facilitate the inspection and testing of the various appliances. In accordance with EN 50304/EN 60350 (2009) and IEC 60350. Baking Baking on 2 levels: Always insert the universal pan above the baking tray. Baking on 3 levels: Insert the universal pan in the middle. - Page 24 Robert Bosch Hausgeräte GmbH Carl-Wery-Straße 34 81739 München Germany www.bosch-home.com *9000728098* 920118 9000728098...
Need help?
Do you have a question about the HBG13B550B and is the answer not in the manual?
Questions and answers