Table of Contents
Advertisement
Quick Links
Advertisement
Table of Contents

Related Manuals for AEG T6DB82GP


Summary of Contents for AEG T6DB82GP
- Page 1 T6DB82GP User Manual Tumble Dryer USER MANUAL...
-
Page 2: Table Of Contents
1369/2017........................22 FOR PERFECT RESULTS Thank you for choosing this AEG product. We have created it to give you impeccable performance for many years, with innovative technologies that help make life simpler features you might not find on ordinary appliances. Please spend a few minutes reading to get the very best from it. -
Page 3: Safety Information
ENGLISH SAFETY INFORMATION Before beginning the installation and use of this appliance, carefully read the supplied instructions. The manufacturer is not responsible for any injuries or damages that are the result of incorrect installation or usage. Always keep the instructions in a safe and accessible location for future reference. - Page 4 If the tumble dryer is put on top of a washing • machine, use the stacking kit. The stacking kit, available from your authorized vendor, can be used only with the appliance specified in the instructions supplied with the accessory. Read it carefully before installation (refer to the Installation leaflet).
-
Page 5: Safety Instructions
ENGLISH be washed in hot water with an extra amount of detergent before being dried in the tumble dryer. Items such as foam rubber (latex foam), shower caps, • waterproof textiles, rubber backed articles and clothes or pillows fitted with foam rubber pads should not be dried in the tumble dryer. - Page 6 2.3 Use • Do not use water spray and steam to clean the appliance. WARNING! • Clean the appliance with a moist soft Risk of injury, electric shock, cloth. Only use neutral detergents. Do fire, burns or damage to the not use any abrasive products, appliance.
-
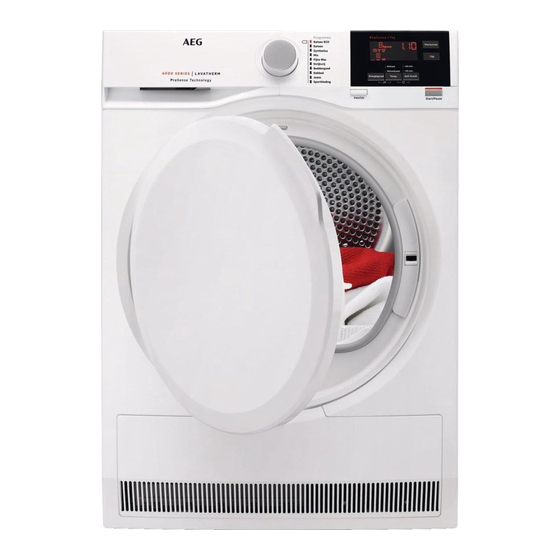
Page 7: Product Description
ENGLISH 3. PRODUCT DESCRIPTION Water container Airflow slots Control panel Condenser lid Appliance door Condenser cover Filter Adjustable feet Rating plate For ease of loading laundry or ease of installation the door is reversible. (see separate leaflet). -
Page 8: Control Panel
4. CONTROL PANEL Program dial Aan/Uit button Display Programs Start/Pauze button Options 4.1 Display Symbol on the display Symbol description laundry maximum load delay start option on delay start selection (30min-20h) cycle time indication buzzer off... -
Page 9: Programs
ENGLISH Symbol on the display Symbol description child lock on laundry dryness: iron dry, cupboard dry, cupboard dry +, extra dry drain the water container indicator: clean the filter indicator: check the condenser indicator: time dry option on time programme selection (10min-2h) drying phase indicator: crease guard phase... - Page 10 Programma Properties / Fabric mark Load Single or double duvets and pil- Dekbed 3 kg lows (with feather, down or syn- thetic fillings). Leisure clothing such as jeans, sweat-shirts of different material Jeans 8 kg thicknesses (e.g. at the neck, cuffs and seams).
-
Page 11: Options
ENGLISH 5.2 Consumption data Energy consump- Program Spun at / residual humidity Drying time tion Katoen ECO8 kg 1400 rpm / 50% 120 min 4,10 kWh kastdroog 1000 rpm / 60% 139 min 4,81 kWh 1400 rpm / 50% 93 min 3,11 kWh strijkdroog 1000 rpm / 60%... -
Page 12: Before First Use
6.5 Tijd Time of delay is on the display (e.g. if the program has to start after 12 For cottons, synthetics and mixed. Lets hours.) the user to set drying time from 3. To activate Startuitstel option, touch minimum 10 min to maximum of 2 hours the Start/Pauze button. - Page 13 ENGLISH 8.2 Loading the laundry 8.5 Setting a programme CAUTION! Ensure the laundry is not trapped between the appliance door and the rubber seal. 1. Pull open the appliance door. 2. Load the laundry one item at a time. 3. Close the appliance door. 8.3 Turning on the appliance Use the programme dial to set the programme.
-
Page 14: Hints And Tips
8.7 Child lock option To start the program: Touch the Start/Pauze button. The child lock can be set to prevent The appliance starts and the LED above children from playing with the appliance. the button stops flashing and stays on. -
Page 15: Care And Cleaning
ENGLISH • Always keep the airflow slots at the 5. To memorise the setting touch and bottom of the appliance clear. hold down the Droogtegraad and • Make sure there is good airflow where Anti-kreuk buttons at the same time the appliance is to be installed. - Page 16 3. Use a moist hand to clean the filter. 2. Pull the plastic connection out and drain the water into a basin or equivalent receptacle. 3. Push the plastic connection back in and place the water container back into position.
- Page 17 ENGLISH 7. Put the condenser back inside the bottom compartment. 8. Close the condenser lid. 9. Lock 2 levers until they snap. 10. Close the condenser cover. 10.4 Cleaning the drum WARNING! Disconnect the appliance before you clean it. 4. Lower the condenser lid. Use a standard neutral soap detergent to clean the inner surface of the drum and drum lifters.
-
Page 18: Troubleshooting
11. TROUBLESHOOTING Possible cause Remedy Problem The tumble dryer is not connected Connect it to the mains socket. to the mains supply. Check the fuse in the fuse box (do- mestic installation). The door is open. Close the door. -
Page 19: Technical Data
ENGLISH Possible cause Remedy Problem Unexpected du- The drying duration is calculated This is automated - the appliance ration time ap- according to load size and damp- is working correctly. pears on the dis- ness. play. The water container is full. Drain the water container, push A programme is inactive. - Page 20 Drum volume 118 l Maximum load volume 8 kg Voltage 230 V Frequency 50 Hz Sound power level 65 dB Total power 2800 W Energy efficiency class Energy consumption on the standard cotton 4,81 kWh programme with the full load.
-
Page 21: Accessories
ENGLISH 13. ACCESSORIES 13.1 Stacking kit For thorough draining of the condensed water into a basin, siphon, gully, etc. After installation, the water container is drained automatically. The water container must stay in the appliance. The installed hose must be minimum 50 cm to maximum 100 cm from floor level. -
Page 22: Product Information Sheet In Reference To E.u. Regulation 1369/2017
14. PRODUCT INFORMATION SHEET IN REFERENCE TO E.U. REGULATION 1369/2017 Product Information Sheet Trade Mark Model T6DB82GP, PNC916097930 Rated capacity in kg Air vented or condenser tumble dryer Condenser Energy efficiency class Energy consumption in kWh per year, based on 160 drying cy-... - Page 23 ENGLISH Average condensation efficiency of the standard cotton pro- gramme at partial load as a percentage Weighted condensation efficiency for the 'standard cotton programme at full and partial load' Sound power level in dB Built in appliance Y/N The information given in the chart above is compliant with the EU Commission regulation 392/2012 implementing directive 2009/125/EC.
- Page 24 www.aeg.com/shop...
Need help?
Do you have a question about the T6DB82GP and is the answer not in the manual?
Questions and answers