
Subscribe to Our Youtube Channel
Related Manuals for LG MJ3283BKG


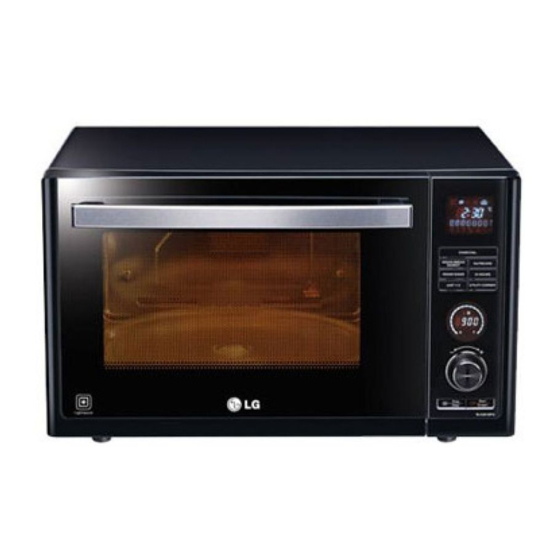
Summary of Contents for LG MJ3283BKG
- Page 1 삼 흥 정 판 Internal Use Only MICROWAVE OVEN SERVICE MANUAL MODEL: MJ3283BKG CAUTION BEFORE SERVICING THE UNIT, READ THE SAFETY PRECAUTIONS IN THIS MANUAL. July, 2013 Printed in India...
-
Page 2: Safety Precautions
CAUTION MICROWAVE RADIATION DO NOT BECOME EXPOSED TO RADIATION FROM THE MICROWAVE GENERATOR OR OTHER PARTS CONDUCTING MICROWAVE ENERGY. Copyright © 2009 LG Electronics. Inc. All right reserved. LGE Internal Use Only Only for training and service purposes... -
Page 3: Table Of Contents
REPLACEMENT PARTS LIST - - - - - - - - - - - - - - - - - - - - - - - - - - - - - - - - - - - - - - - - - - - - - - - - - - - - - - - - - - - - - - - - - - - - - - - - - - - - - - - - - - - - 7-1 LGE Internal Use Only Copyright © 2009 LG Electronics. Inc. All right reserved. Only for training and service purposes... -
Page 4: Specifications
Multi Rotisserie and Rotisserie Handle Steam Chef This microwave oven is designed for household use only. It is not recommended for commercial purposes. Copyright © 2009 LG Electronics. Inc. All right reserved. LGE Internal Use Only Only for training and service purposes... -
Page 5: Cautions
• NEVER put iron tools on the magnetron. • NEVER put anything into the latch hole and the PERSONNEL. interlock switches area. LGE Internal Use Only Copyright © 2009 LG Electronics. Inc. All right reserved. Only for training and service purposes... -
Page 6: Installations
L or colored red. 10cm Copyright © 2009 LG Electronics. Inc. All right reserved. LGE Internal Use Only Only for training and service purposes... -
Page 7: Operating Instructions
Check the recipe manual Just 4 U/Utility corner Check the recipe manual COOK MODE/DIAL START/Add 30 Secs STOP START Clear Add 30 Secs LGE Internal Use Only Copyright © 2009 LG Electronics. Inc. All right reserved. Only for training and service purposes... -
Page 8: Operating Sequence
8. MORE AND LESS 5. QUICK START START/ STOP/ Desired COOK START/ STOP/ COOK CLEAR cook MODE QUICK START CLEAR MODE QUICK START Copyright © 2009 LG Electronics. Inc. All right reserved. LGE Internal Use Only Only for training and service purposes... -
Page 9: Schematic Diagram
SCHEMATIC DIAGRAM LGE Internal Use Only Copyright © 2009 LG Electronics. Inc. All right reserved. Only for training and service purposes... -
Page 10: Circuit Description
POWER LEVEL. (refer to page 1-1) • One complete cycle of relay 2 is 22 seconds. Copyright © 2009 LG Electronics. Inc. All right reserved. LGE Internal Use Only Only for training and service purposes... -
Page 11: Service Information
4 mW/cm . Always start measuring of an unknown field to assure safety for operating personnel from radiation leakage. LGE Internal Use Only Copyright © 2009 LG Electronics. Inc. All right reserved. Only for training and service purposes... - Page 12 5 mW/cm.sq. Leakage for a fully assembled oven (Before the latch switch (primary) is interrupted) with the door in a slightly opened position-less than 2 mW/cm.sq. Copyright © 2009 LG Electronics. Inc. All right reserved. LGE Internal Use Only Only for training and service purposes...
-
Page 13: Measurement Of Microwave Power Output
2) Disconnect two terminals, and remove one screw of the earth terminal. CAUTION: DISCHARGE THE HIGH VOLTAGE CAPACITOR BEFORE SERVICING (refer to page 2-1) LGE Internal Use Only Copyright © 2009 LG Electronics. Inc. All right reserved. Only for training and service purposes... - Page 14 2) Disconnect the leadwire from magnetron, high voltage transformer, and capacitor. 3) Remove the screw holding the high voltage Magnetron transformer to the baseplate. Air Duct Copyright © 2009 LG Electronics. Inc. All right reserved. LGE Internal Use Only Only for training and service purposes...
- Page 15 2. Be sure to grasp the connector, not the wires, when removing. Suction Guide H.V. Transformer H.V. Capacitor Taptite Screw Wire Leads Turntable Motor LGE Internal Use Only Copyright © 2009 LG Electronics. Inc. All right reserved. Only for training and service purposes...
- Page 16 • Adjust the latch board in the arrow direction so that oven door will not have any play in it when the door is closed. • Tighten the mounting screw. Copyright © 2009 LG Electronics. Inc. All right reserved. LGE Internal Use Only Only for training and service purposes...
-
Page 17: Interlock Continuity Test
Primary Switch Monitor Switch Secondary Switch NOTE : After checking for the continuity of switches, make sure that are correctly connected. LGE Internal Use Only Copyright © 2009 LG Electronics. Inc. All right reserved. Only for training and service purposes... -
Page 18: Component Test Procedure
Normal: Less than 1 ohm • Filament terminal 2. Measure the resistance. (Ohm-meter scale: Rx1000) Normal: Infinite • Filament to chassis Copyright © 2009 LG Electronics. Inc. All right reserved. LGE Internal Use Only Only for training and service purposes... - Page 19 Some inexpensive meters may indicate infinite resistance in both direction. Normal: Infinite. Measure the continuity (Reverse). (Ohm-meter scale: Rx10000) Abnormal: Continuity. LGE Internal Use Only Copyright © 2009 LG Electronics. Inc. All right reserved. Only for training and service purposes...
- Page 20 Normal: more than 0.5 Mohm NOTE: Make sure heater is fully cooled when tested. 0°C~Approx.145°C Over 145°C OVEN THERMOSTAT MAGNETRON THERMOSTAT Copyright © 2009 LG Electronics. Inc. All right reserved. 5-10 LGE Internal Use Only Only for training and service purposes...
- Page 21 • MAKE SURE THE WIRE LEADS ARE IN THE CORRECT POSITION. • WHEN REMOVING THE WIRE LEADS FROM THE PARTS, BE SURE TO GRASP THE CONNECTOR, NOT THE WIRES. LGE Internal Use Only 5-11 Copyright © 2009 LG Electronics. Inc. All right reserved. Only for training and service purposes...
- Page 22 MAKE SURE THE WIRE LEADS ARE CORRECT POSITION. WHEN REMOVING THE WIRE LEAD FROM THE PARTS, BE SURE TO GRASP THE CONNECTOR, NOT THE WIRES. Copyright © 2009 LG Electronics. Inc. All right reserved. 5-12 LGE Internal Use Only Only for training and service purposes...
-
Page 23: Trouble Shooting
2. Use plastic wrap or lid. characteristics. 3. Stir once or twice while cooking soup, cocoa or milk, etc. LGE Internal Use Only 5-13 Copyright © 2009 LG Electronics. Inc. All right reserved. Only for training and service purposes... - Page 24 4. Random programming when touching other pads. 5. Display is fixed at some figure and can not accept any input. Copyright © 2009 LG Electronics. Inc. All right reserved. 5-14 LGE Internal Use Only Only for training and service purposes...
- Page 25 Continuity. Check continuity No continuity. Defective power Replace power of power supply supply cord. supply cord. cord. LGE Internal Use Only 5-15 Copyright © 2009 LG Electronics. Inc. All right reserved. Only for training and service purposes...
- Page 26 NOTE: Simple test of power output-conducted by heating one liter water for one min. if available. Copyright © 2009 LG Electronics. Inc. All right reserved. 5-16 LGE Internal Use Only Only for training and service purposes...
- Page 27 Check H.V. Defective high Replace high Abnormal diode. voltage Diode. voltage Diode. normal Check Defective Replace Abnormal Magnetron. magnetron. magnetron. LGE Internal Use Only 5-17 Copyright © 2009 LG Electronics. Inc. All right reserved. Only for training and service purposes...
- Page 28 * When removing the wire leads from parts be sure to grasp the connector not the wires. * When removing the magnetron, be sure to install the magnetron gasket in the correct position and in good condition. Copyright © 2009 LG Electronics. Inc. All right reserved. 5-18 LGE Internal Use Only...
- Page 29 5-19...
- Page 30 5-20...
- Page 31 5-21...
-
Page 32: Exploded View
#EV# EXPLODED VIEW INTRODUCTION MODEL: OVEN CAVITY PARTS INTERIOR PARTS BASE PLATE PARTS DOOR PARTS LATCH BOARD PARTS CONTROL PANEL PARTS -6-1-... - Page 33 #EV# DOOR PARTS 13581A 14510L -6-2-...
- Page 34 #EV# CONTROL PANEL PARTS 24781S -6-3-...
- Page 35 #EV# OVEN CAVITY PARTS 55238B 348102 35300A 330522 353002 445102 44980A 43500A 445101 33112U 33550S 33390G 33390M 55238A 34370T 35026G 335021 35889A 35026C 36549S 33301R 33390C -6-4-...
- Page 36 #EV# LATCH BOARD PARTS 43500B 43501A 568771 466001 466003 466003 -6-5-...
- Page 37 #EV# INTERIOR PARTS 568772 535041 55900N 56411A 535042 36549C 56930V 56930H 55900C 568774 56322A 55300A 56851F 54974S 56912B 56851D 56851E 56324A 56930G 34810H 34810H -6-6-...
- Page 38 #EV# BASE PLATE PARTS 56170D 647781 64970A -6-7-...
-
Page 39: Replacement Parts List
REPLACEMENT PARTS LIST R: SERVICE PARTS...
Need help?
Do you have a question about the MJ3283BKG and is the answer not in the manual?
Questions and answers