Table of Contents
Advertisement
Quick Links
Advertisement
Table of Contents

Subscribe to Our Youtube Channel
Related Manuals for Artusi ACD7000W

Summary of Contents for Artusi ACD7000W
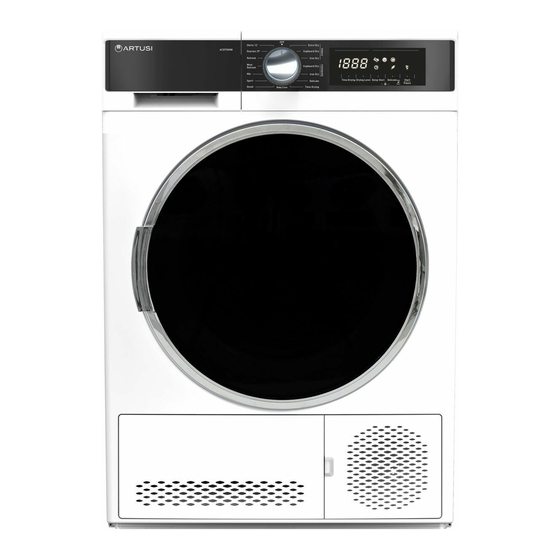
- Page 1 AP PL I ANC ES FO R L I VI NG ACD7000W OPERATION MANUAL...
- Page 2 ARTUSI Family. This instruction manual has been specially created to inform you of the full range of features your ARTUSI appliance has to offer and serves as an introduction to getting the very best out of your ARTUSI appliance.
- Page 3 Tumble Dryer / User Manual ACD7000W...
- Page 4 Thank you for choosing this product. This User Manual contains important safety information and instructions on the operation and maintenance of your appliance. Please take the time to read this User Manual before using your appliance and keep this book for future reference. Icon Caption Description...
-
Page 5: Table Of Contents
CONTENTS 1. SAFETY INSTRUCTIONS ................. 3 1.1. Electrical Safety ....................3 1.2. Children's Safety ..................... 4 1.3. Product Safety ....................5 1.4. Correct Use ..................... 6 1.5. Installing On Top Of a Washing Machine............7 2. INSTALLATION ....................9 2.1. Connection to Water Outlet (with optional drain hose) ........9 2.1.1. - Page 6 9. AUTOMATIC FAULT WARNINGS AND WHAT TO DO ........25 10. ENVIRONMENTAL PROTECTION AND PACKAGING INFORMATION ..26 10.1. Packaging Information ................. 26 11. DESCRIBING THE ENERGY LABEL AND SAVING ENERGY..... 26 11.1. Energy Labelling ..................26 11.2. Energy Efficiency ..................27 EN - IV...
- Page 7 PRIMARY CONSIDERATIONS • This appliance can be used by children aged from 8 years and above and persons with reduced physical, sensory or mental capabilities or lack of experience and knowledge if they have been given supervision or instruction concerning use of the appliance in a safe way and understand the hazards involved.
- Page 8 • Before installation, check the product for visible damage. Never install or operate a damaged product. • Keep pets away from the dryer. • Fabric softeners, or similar products, should be used in accordance with the manufacturers instructions. • Remove all objects from pockets such as lighters and matches.
-
Page 9: Safety Instructions
1. SAFETY INSTRUCTIONS This section contains safety instructions that will help protect you from risk of personal injury or property damage. Failure to follow these instructions will void any warranty. 1.1. Electrical Safety • The appliance must not be supplied through an external switching device, such as a timer, or connected to a circuit that is regularly switched on and off by a utility. -
Page 10: Children's Safety
A damaged power cord/plug can cause fire or give you an electric shock. When damaged it must be replaced, this should only be done by qualified personnel. To avoid the risk or fire or electric shock, do not use extension cords, multi sockets or adapters to connect the dryer to mains power. -
Page 11: Product Safety
• Keep cleaning materials out of the reach of children Electrical products are dangerous for children. • Keep children away from the product while it is running. • To prevent children from interrupting the dryer cycle, you can use the child lock to avoid any changes in the running programme. -
Page 12: Correct Use
• Operating the dryer in environments that contain flour or coal dust may cause explosion. ATTENTION: Underwear that contains metal reinforcements should not be put in the dryer. The dryer may be damaged if metal reinforcements come loose and break off during drying. 1.4. -
Page 13: Installing On Top Of A Washing Machine
• Do not lean against or sit on the door of the dryer. The dryer may tip over. • To maintain a temperature that will not harm the laundry (e.g. to prevent the laundry from catching fire), a cooling process starts after the heating process. - Page 14 ATTENTION: The dryer can only be placed on washing machines that have a same capacity and above. • To use the dryer on the washing machine, a fixing part must be used between the two products. The fixing part must be attached by an Authorised Service Provider.
-
Page 15: Installation
2. INSTALLATION • Do not place the dryer onto the power cable. • Before contacting the local Authorised 2.1. Connection to Water Outlet (with Service Provider for the installation optional drain hose) of the dryer, check the information in the user manual to make sure that the In products with a condenser unit, water electrical installation and water outlet is accumulates in the water tank during... -
Page 16: Electrical Connection
3. OVERVIEW balanced on its feet. Adjust the feed to ensure that the product is balanced. • Rotate the feet to the right and to the left until the dryer is even and stable. IMPORTANT: Never remove the adjustable feet. 2.3. -
Page 17: Preparing The Laundry
4. PREPARING THE LAUNDRY 4.1. Sorting the Laundry to be Dried Follow the instructions on the labels of the laundry to be dried. Only dry items that have a statement/symbol that indicates "they can be dried in a dryer". • Do not operate the product with load amounts and laundry types other than those given in 4.3. -
Page 18: Preparing The Laundry To Be Dried
4.3. Load Capacity IMPORTANT: Delicate fabrics, Follow the instructions in the "Programme embroided fabrics, woolen/silk fabrics, selection and consumption table". (See: 5.2 clothes made of delicate and expensive Programme selection and consumption fabrics, airtight clothes and tulle curtains table). Do not load the product with more are not suitable for drying in the dryer. -
Page 19: Using The Tumble Dryer
5. USING THE TUMBLE DRYER 5.1.2. Electronic Indicator and Additional Functions 5.1. Control Panel 1. Programme Selection Knob Display symbols: 2. Electronic indicator and additional functions Water tank warning indicator 5.1.1. Programme Selection Knob Use the programme selection knob to select the desired drying programme Lint filter cleaning warning indicator Condenser cleaning warning indicator... -
Page 20: Programme Selection And Consumption Table
5.2. Programme Selection and Consumption Table Press the Start/Pause button to start the programme. The Start/Pause LED that indicates that the programme has started and the Drying LED will come on. Approximate Washing amount of Duration Programme Load (kg) machine remaining (minutes) spin speed... -
Page 21: Auxiliary Functions
5.2.1. Auxiliary Functions The table that summarises the options that can be selected in programmes is given below. Option Description The humidity level obtained after drying can be increased by 3 levels. This way, level of required dryness can be selected. The levels that can be selected other Drying Level than the standard setting: 1, 2, 3. -
Page 22: Starting The Programme
5.2.2. Starting the Programme The Start/Pause LED will flash during programme selection.Press the Start/Pause button to start the programme. The Start/Pause LED that indicates that the programme has started and the drying LED will come on. Programme Description This programme dries thick and multi-layer fabrics, such as cotton towels, Cotton Extra Dry bedsheets, pillowcases, bathrobes, at a high temperature to allow you to place them in a closet. -
Page 23: Programme Progress
5.2.3. Programme Progress During the Programme If you open the door when the programme is running, the product will switch to standby mode. Once the door has been closed, press the Start/Pause key to resume the programme. Do not open the loading door when the programme is running. - Page 24 OPTIONS PROGRAMMES Buzzer Child Time Drying Delay Start Delicate Cancel Lock Drying Level Cotton Extra Dry Cotton Cupboard Dry Cotton Iron Dry Synthetics Cupboard Synthetics Iron Dry Delicate Time Drying Baby Care Jeans Sport Wool Refresh Refresh Express 29' Shirts 12' Not selectable Selectable EN - 18...
-
Page 25: Cleaning And Care
6. CLEANING AND CARE After the dryer has been used for a certain period of time, if you encounter a layer that will cause obstruction on the filter surface, IMPORTANT: Do not use industrial wash the filter with warm water to clean the chemicals to clean your dryer. -
Page 26: Cleaning The Condenser
6.4. Cleaning the Humidity Sensor IMPORTANT: Never remove the water tank when the programme is running. The water condensed in the water tank is not suitable for human consumption. IMPORTANT: DO NOT FORGET TO EMPTY THE WATER TANK AFTER EACH USE. -
Page 27: Cleaning The Inner Surface Of The Loading Door
6.5. Cleaning the Inner Surface of the Loading Door IMPORTANT: DO NOT FORGET TO CLEAN THE INNER SURFACE OF THE LOADING DOOR AFTER EACH DRYING PROCESS. Open the loading door of the dryer and clean all of the inner surfaces and the gasket with a soft, damp cloth. -
Page 28: Technical Specifications
7. TECHNICAL SPECIFICATIONS Brand ARTUSI Model name ACD7000W Height Min: 845 mm / Max: 855 mm* Width 596 mm Depth 563 mm Capacity (max.) 7 kg** Net weight (with plastic door) 35,2 kg Net weight (with glass door) 37,5 kg... -
Page 29: Troubleshooting
8. TROUBLESHOOTING Your dryer is fitted with systems that continuously perform checks during the drying process to take the necessary measures and warn you in case of any malfunction. WARNING: If the problem persists even if you have applied the steps in this section, please contact the your dealer or an Authorised Service Provider. - Page 30 PROBLEM REASON SOLUTION Clothes have shrunk, felted or The programme used might not be Check the care labels on the deteriorated. suitable for the type of laundry. laundry items, select a suitable programme for the type of laundry. Water leaking from the loading door. There might be lint accumulated on Clean the inner surfaces of the the inner surfaces of the loading...
- Page 31 9. AUTOMATIC FAULT WARNINGS AND WHAT TO DO Your tumble dryer is equipped with a built-in fault detection system, indicated by a combination of flashing operation lights. The most common failure codes are shown below. ERROR CODE SOLUTION Empty the water tank, if problem does not solved, E03 / contact the nearest authorised service agent.
- Page 32 10. ENVIRONMENTAL PROTECTION AND PACKAGING INFORMATION 10.1. Packaging Information The packaging of this product is made of recyclable materials. Do not dispose of the packaging, waste together with household or other waste. Instead, take it to a packaging collection point defined by your local authority.
- Page 33 O ce: 2. What is not Covered by the Warranty. 48-50 Moore Street, Leichhardt N.S.W 2040 The Warranty does not apply if an artusi product Post: is defective by a factor other than a defect arising Locked Bag 3000, Annandale, N.S.W 2038...
- Page 34 Last Name: First Name: Address: State: Postcode: Email: Home Phone: Mobile: Purchase Date: (Please attach proof of purchase to validate warranty) SERIAL NUMBER MODEL NUMBER (if you cannot locate the serial number please call ARTUSI on 1300 694 583) 01032014...
- Page 36 Product dimensions indicated in our literature is indicative only. Actual product only should be used to define dimension cutouts. Distributors, and retailers are not agents of ARTUSI and are not authorised to bind ARTUSI by any express or implied undertaking or representation.
Need help?
Do you have a question about the ACD7000W and is the answer not in the manual?
Questions and answers