
Related Manuals for A2T A2T-65W21K-U

Summary of Contents for A2T A2T-65W21K-U
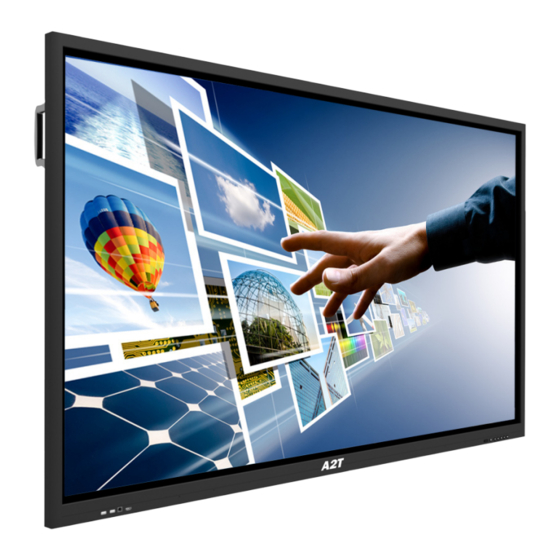
- Page 1 All manuals and user guides at all-guides.com Touch Instruction Manual A2T-55W21K-U A2T-65W21K-U A2T-75W21K-U A2T-86W21K-U A2T-98W11S-H...
- Page 2 All manuals and user guides at all-guides.com...
-
Page 3: Table Of Contents
All manuals and user guides at all-guides.com Contents Safety Warning and Precautions ..................Installation & Connection ......................Packing List ..............................Interfaces ............................... Connection Diagram ........................Controls ................................ Remote Control ........................... Basic Operations Startup / Shutdown ..................... Source Switching ......................Display Settings ....................... -
Page 4: Safety Warning And Precautions
To ensure your safety, prolong the service life of the product and give full play to optimum performance, please read and understand these instructions and nameplates carefully before use and follow them strictly in use. Immediately shutdown your A2T touchscreen if... • Power outage or unstable voltage. • The product emits abnormal sounds or smell. • AC power cord is damaged • Damage occurs due to fall, strike or impact. - Page 5 All manuals and user guides at all-guides.com Warnings • Keep the device away from open fire (e.g. • Do not use the power source other than a lit candle), as it may cause electric AC 220V, 50Hz. shock or fire. • All connecting cables shall be connected • Keep the product away from water drops to and disconnected from the interfaces or splashes. Do not put any container only when power is disconnected. filled with water on the product, or there • Do not install on an unstable place, as could be a risk of fire or electric shock.
- Page 6 All manuals and user guides at all-guides.com Warnings (Continued) • If the LCD screen is broken to cause • Do not allow the children to climb on the splashes on skin, please wash with product. clean water for 15min and seek medical • Keep small attachments out of reach of advice. children to avoid accidental swallowing. • When handling the product with hands, • If the product will not be used in a long please hold four corners tightly and prop time, please power it off and remove the the bottom, but do not exert force on the power plug.
-
Page 7: Installation & Connection
All manuals and user guides at all-guides.com Installation and Connection 30cm 10cm 10cm Allow the clearance detailed (left) and do not install in an unventilated recess. 10cm • Place the Touchscreen nearby an AC • Do not put the product in a place where power socket which is easy to plug and bugs may enter easily. unplug. • Do not install the product facing an air • For your safety, you are recommended to conditioner, or it may cause some fault use a suitable wall bracket or base. -
Page 8: Packing List
All manuals and user guides at all-guides.com Packing List 1 x Touchscreen 1 x Remote control 1 x User manual 1 x Power cord (3m) 1 x Stylus 1 x HDMI cables (3m) 1 x Wall mount 1 x USB cable (A-B - 3m) 2 x Batteries... -
Page 9: Interfaces
All manuals and user guides at all-guides.com Interfaces Rear AUDIO OUT Front Left PC & ANDROID USB PC & ANDROID USB 1. Power 10. YPbPr/YCbCr Input 2. HDMI 11. AV In 3. Display Port 12. AV Out 4. USB 2.0 13. -
Page 10: Connection Diagram
All manuals and user guides at all-guides.com Connection Diagram Touchscreen & PC Touchscreen (Rear) AUDIO OUT PC & ANDROID USB PC & ANDROID USB Touchscreen (Front) -
Page 11: Controls
All manuals and user guides at all-guides.com Controls 1. Power indicator light, remote control receiver & light sensing receiver 2. Standby power (single touch) / Full shutdown (hold for 4 seconds) 3. Homepage 4. Return 5. Settings 6 & 7. Volume up and down keys 8. Mains power switch located at right underside rear 9. OPS PC slot (rear) -
Page 12: Remote Control
All manuals and user guides at all-guides.com Remote Control Power Switch between working mode and standby states Source Open/close the signal source list Navigation Keys Select or adjust menu options Confirm the operation Menu Show/hide the main menu Home Display the Android home page Back Return to the previous interface Switch to OPS source... - Page 13 All manuals and user guides at all-guides.com Installation of the batteries: burn used batteries. Please dispose of Remove the battery compartment cover waste batteries in accordance with local and install two AAA batteries (1.5V) into environmental regulations. the battery compartment as per the polarity symbols “+” and “-”. Precautions: • The remote control should aim at the IR sensor (at the bottom right hand side of...
-
Page 14: Basic Operations
All manuals and user guides at all-guides.com Basic Operations Turn power on / Standby mode 1. Insert the power plug into the power off the OPS module from the “START” socket. menu. The “STANDBY” key on the panel or remote control can be used to turn 2. -
Page 15: Source Switching
All manuals and user guides at all-guides.com Change source signal (method 1) 1. Press the “ALL SOURCE” key on the remote control to bring up the All Source Menu. 2. Press the up an down keys on the remote control or the Channel +/- keys on the control panel to select a signal source (eg HDMI). -
Page 16: Display Settings
All manuals and user guides at all-guides.com Basic Operations (Continued) Image Mode 1. Select sidebar menu. 2. Select Source (TV) icon. 3. Select the slider icon (bottom right) to enter the various Source Setttings pages. 4. Use the left right arrows at the top of the page to navigate to the Image Mode page. - Page 17 All manuals and user guides at all-guides.com Voice Mode 1. Select sidebar menu. 2. Select Source (TV) icon. 3. Select the slider icon (bottom right) to enter the various Source Setttings pages. 4. Use the left right arrows at the top of the page to navigate to the Voice Mode page. 5. Here you can adjust the Volume, Bass etc.
-
Page 18: Network Settings
All manuals and user guides at all-guides.com Basic Operations (Continued) Network Settings 1. Select sidebar menu. 2. Select System Settings (cog) icon. 2. Select Network Settings (Wi-Fi) icon. 3. You will now be able to adjust your wireless, wired network and hotspot network settings. Wireless Network Hotspot Network 1. Select sidebar menu. 1. -
Page 19: Interface Settings
3. Select Clock icon. 4. Adjust your wallpaper, screensaver etc. 4. Select Date Settings & Language to configure. NB: Wallpaper and screen lock background images can be PNG, JPG at 1920x1080 or 3840x2160. Avoid very large files. The initial password is "888888". If the modified password is forgotten, please contact A2T support - email address. If the device requires a factory reset, please contact your reseller for guidance. - Page 20 All manuals and user guides at all-guides.com Basic Operations (Continued) Control Lock & Centralised Control Setting 1. Select sidebar menu. 2. Select System Settings (cog) icon. 3. Select Lock Control Settings icon. 4. You will now be able to lock/unlock your remote control, touchscreen and the buttons at the right hand front of the touchscreen.
- Page 21 All manuals and user guides at all-guides.com Power On/Off Setting 1. Select sidebar menu. 2. Select System Settings (cog) icon. 3. Select Power Settings icon. 4. You will now be able to have the touchscreen wake upon the LAN network connecting, plus set the power off time.
-
Page 22: Whiteboard Writing Software
All manuals and user guides at all-guides.com Basic Operations (Continued) Whiteboard Writing Software Allows you to set: 1. Background 2. Undo/restore 3. Select brushes 4. Clear Screens 5. Save 6. Import picture 7. Split screen 8. Spotlight (highlight a circular area of the screen). -
Page 23: File Manager
All manuals and user guides at all-guides.com File Manager The File Manager is accessed from the home screen and allows you to: 1. Upload files off a USB drive onto the touchscreen's 8GB storage device. 2. Play audio and video files, show image slide shows etc. 3. - Page 24 All manuals and user guides at all-guides.com Basic Operations (Continued) Quick Access (Gestures) 1. Swiping the left an right of the screen 3. Two fingers touching and holding the will bring up the sidebar menus. middle of the screen will bring up the popup menu.
-
Page 25: Instructions For Android Os
All manuals and user guides at all-guides.com Android OS Basic Operation Music 1. Press the “Home” key on the remote 1. From the Android OS homepage, select control to display the intelligent File Manager > Music, and press the homepage. “OK”... - Page 26 All manuals and user guides at all-guides.com Android OS (Continued) APK Installer Multimedia player • The APK installer option assists in 1. Connect to the USB storage device via managing applications. The user can USB interface install any installation file saved in a 2. From the Android OS homepage, select local disk or remove any application File Manager and press the “OK”...
-
Page 27: Troubleshooting
All manuals and user guides at all-guides.com Troubleshooting Fault Possible Cause Solution Dot line or stripe • The signal is interfered, such as cars, neon • Do not use the electric hair dryer near- interference on the screen lights and electric hair dryers by the product and adjust the antenna orientation to reduce interference Slow operation or not... -
Page 28: Features & Specifications
5 Year Warranty ^Windows only. 10 touch for Android. Single touch on Mac OSX. Specifications Type 55" Interactive Touchscreen Monitor Screen size 55 inches (16:9) Model A2T-55W21K-U Panel LED panel Screen Size 1210 x 680mm Resolution 3840 x 2160 Display Colours 1.07 billion colours... - Page 29 All manuals and user guides at all-guides.com Built-in Speakers 8Ω x 15W × 2 Audio Stereo Stereo 1 x DP (Display Port) 1 x VGA Component 4 x USB Port (Media formats for playback and recording: JPG, BMP, PNG images... AVI, MPG, DAT, VOB, DIV, MOV, MKV, RM, RMVB, MP4, Inputs MPEG, TS, TRP, WMV, ASF and FLV video...
- Page 30 5 Year Warranty ^Windows only. 10 touch for Android. Single touch on Mac OSX. Specifications Type 65" Interactive Touchscreen Monitor Screen size 65 inches (16:9) Model A2T-65W21K-U Panel LED panel Screen Size 1428 x 803mm Resolution 3840 x 2160 Display Colours 1.07 billion colours...
- Page 31 All manuals and user guides at all-guides.com Built-in Speakers 8Ω x 15W × 2 Audio Stereo Stereo 1 x DP (Display Port) 1 x VGA Component 4 x USB Port (Media formats for playback and recording: JPG, BMP, PNG images... AVI, MPG, DAT, VOB, DIV, MOV, MKV, RM, RMVB, MP4, Inputs MPEG, TS, TRP, WMV, ASF and FLV video...
- Page 32 5 Year Warranty ^Windows only. 10 touch for Android. Single touch on Mac OSX. Specifications Type 75" Interactive Touchscreen Monitor Screen size 75 inches (16:9) Model A2T-75W21K-U Panel LED panel Screen Size 1650 x 928mm Resolution 3840 x 2160 Display Colours 1.07 billion colours...
- Page 33 All manuals and user guides at all-guides.com Built-in Speakers 8Ω x 15W × 2 Audio Stereo Stereo 1 x DP (Display Port) 1 x VGA Component 4 x USB Port (Media formats for playback and recording: JPG, BMP, PNG images... AVI, MPG, DAT, VOB, DIV, MOV, MKV, RM, RMVB, MP4, Inputs MPEG, TS, TRP, WMV, ASF and FLV video...
- Page 34 5 Year Warranty ^Windows only. 10 touch for Android. Single touch on Mac OSX. Specifications Type 86" Interactive Touchscreen Monitor Screen size 86 inches (16:9) Model A2T-86W21K-U Panel LED panel Screen Size 1895 x 1066mm Resolution 3840 x 2160 Display Colours 1.07 billion colours...
- Page 35 All manuals and user guides at all-guides.com Built-in Speakers 8Ω x 15W × 2 Audio Stereo Stereo 1 x DP (Display Port) 1 x VGA Component 4 x USB Port (Media formats for playback and recording: JPG, BMP, PNG images... AVI, MPG, DAT, VOB, DIV, MOV, MKV, RM, RMVB, MP4, Inputs MPEG, TS, TRP, WMV, ASF and FLV video...
- Page 36 5 Year Warranty ^Windows only. 10 touch for Android. Single touch on Mac OSX. Specifications Type 98" Interactive Touchscreen Monitor Screen size 98 inches (16:9) Model A2T-98W11S-H Panel LED panel Screen Size 2159 x 1214mm Resolution 3840 x 2160 Display Colours 1.07 billion colours...
- Page 37 All manuals and user guides at all-guides.com Built-in Speakers 8Ω x 15W × 2 Audio Stereo Stereo 1 x DP (Display Port) 1 x VGA Component 4 x USB Port (Media formats for playback and recording: JPG, BMP, PNG images... AVI, MPG, DAT, VOB, DIV, MOV, MKV, RM, RMVB, MP4, Inputs MPEG, TS, TRP, WMV, ASF and FLV video...
-
Page 38: Rohs Compliance
All manuals and user guides at all-guides.com ROHS Compliance Names and contents of toxic and hazardous substances or elements contained in the product Cr6+ PBDE • • • • • Display screen × Housing • • • • • • PCB assembly* ×... - Page 39 All manuals and user guides at all-guides.com • Provided by our material suppliers and verified by us, the data in the table above indicates that the product contains hazardous substances. Due to the limitation of the existing technology, the hazardous substances in some materials cannot be replaced, although we have been striving to improve this situation.
- Page 40 For more information contact: info@a2t.io ©A2T. All rights reserved. Specifications are subject to change without further notice. A2T is a registered trademark of A2T in Australia and other countries. All trademarks are used with permission or are for identification purposes only and are the property of their respective companies.