Table of Contents
Advertisement
Quick Links
Advertisement
Table of Contents

Related Manuals for LG GM-F223DLXQ


Summary of Contents for LG GM-F223DLXQ
- Page 1 OWNER’S MANUAL BOTTOM FREEZER REFRIGERATOR Read this owner’s manual thoroughly before operating the appliance and keep it handy for reference at all times. ENGLISH GM-F223DLXQ www.lg.com MFL67851614 Rev.00_210601 Copyright © 2021 LG Electronics Inc. All Rights Reserved.
-
Page 3: Table Of Contents
TABLE OF CONTENTS SAFETY INSTRUCTIONS SAFETY INSTRUCTIONS WARNING CAUTION PRODUCT OVERVIEW Product Features 11 INSTALLATION Before Installing Choosing the Proper Location Removing/Assembling the Handles Removing/Assembling the Doors and Drawers 19 Connecting the Water Line Leveling and Door Alignment Turning on the Power 24 OPERATION Before Use Control Panel... -
Page 4: Safety Instructions
4 SAFETY INSTRUCTIONS SAFETY INSTRUCTIONS READ ALL INSTRUCTIONS BEFORE USE Safety Messages Your safety and the safety of others are very important. We have provided many important safety messages in this manual and on your appliance. Always read and follow all safety messages. This is the safety alert symbol. - Page 5 SAFETY INSTRUCTIONS • Do not bend or pinch the power cord excessively or place heavy objects on it. • When positioning the appliance, ensure the supply cord is not trapped or damaged. • Do not locate multiple portable socket-outlets or portable power supplies at the rear of the appliance. Operation •...
- Page 6 6 SAFETY INSTRUCTIONS • Do not use electrical appliances inside the food storage compartments of the appliance, unless they are of the type recommended by the manufacturer. • Do not store explosive substances such as aerosol cans with a flammable propellant in this appliance. •...
-
Page 7: Caution
SAFETY INSTRUCTIONS Risk of Fire and Flammable Materials This appliance contains a small amount of isobutane refrigerant (R600a), which is combustible. When transporting and installing the appliance, care should be taken to ensure that no parts of the refrigerating circuit are damaged. Refrigerant squirting out of the pipes could ignite or cause an eye injury. -
Page 8: Product Overview
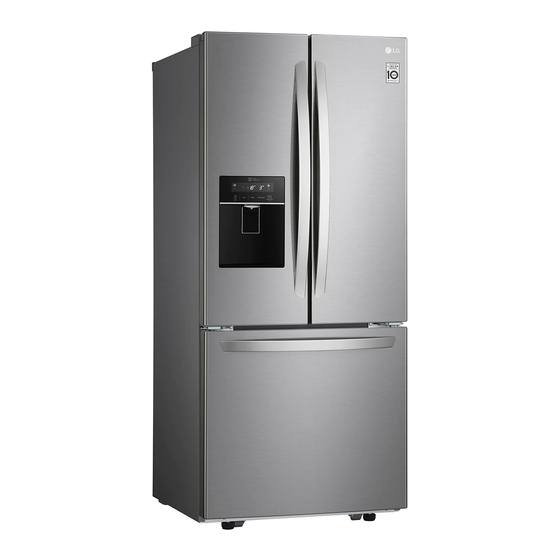
PRODUCT OVERVIEW PRODUCT OVERVIEW Product Features The images in this guide may be different from the actual components and accessories, which are subject to change by the manufacturer without prior notice for product improvement purposes. Exterior Control Panel Sets the refrigerator temperature and freezer temperature, the water filter condition and the dispenser mode. - Page 9 PRODUCT OVERVIEW Interior LED Interior Lighting Lights up the inside of the refrigerator. Water Filter Purifies water. Replace the water filter every six months. See the Replacing the Water Filter section in this manual for details. Folding Door Mullion Blocks the cold air of the refrigerator from escaping when the doors are closed. Fixed Door Bin Stores chilled food or drinks.
- Page 10 *The appearance and specifications listed in this manual may vary due to constant product improvements. Electrical requirements: 230 V, 50 Hz Min. / Max. water pressure: 20 - 120 psi (138 - 827 kPa) Model GM-F223DLXQ Description Standard-depth, bottom freezer Net weight 246.9 lb (112 kg)
-
Page 11: Installation
INSTALLATION INSTALLATION Before Installing Installation Overview Please read the following installation instructions first after purchasing this product or transporting it to another location. Unpacking the Refrigerator Choosing the Proper Location Disassembling/Assembling Connecting the Water Line Leveling and Door Alignment WARNING •... -
Page 12: Choosing The Proper Location
12 INSTALLATION Choosing the Proper Unpacking the Refrigerator Location WARNING • Use two or more people to move and install the Water refrigerator. Failure to do so can result in back Water supply must be easily connected for the injury or other injury. automatic icemaker. - Page 13 Allow at least 27 inches (686 mm) in front of the refrigerator to open the doors, and at least 2 inches (51 mm) between the back of the refrigerator and the wall. Dimension/Clearance GM-F223DLXQ Depth without Handle 31 1/2” (800 mm) Width 29 3/4”...
-
Page 14: Removing/Assembling The Handles
14 INSTALLATION fasteners and tightening the set screws Removing/Assembling the with a 3/32 in. Allen wrench. Handles When moving the refrigerator through a narrow opening, removing the doors is preferred. The appearance of the handles may vary from what is shown. WARNING Removing the Freezer Drawer •... -
Page 15: Removing/Assembling The Doors And Drawers
INSTALLATION Removing/Assembling the Remove the screw from the hinge cover at Doors and Drawers the top of the refrigerator. Lift the hook (not If the entrance door is too narrow for the visible), located at the bottom of the front side refrigerator to pass through, remove the of the cover with a flat-head screwdriver. - Page 16 16 INSTALLATION Removing the Freezer Drawers WARNING • Use two or more people to remove and install the refrigerator doors and freezer drawer. • Be careful of sharp hinges on both sides of the Removing the Right Refrigerator drawer. Door •...
- Page 17 INSTALLATION Assembling the Freezer Drawer Pull out both rails simultaneously, until they are fully extended. Grip both sides of the drawer and pull it up to remove it from the rails. CAUTION • Do not hold the handle when removing or replacing the drawer.
- Page 18 18 INSTALLATION Insert the drawer into the frame, and push the drawer back until it clicks into place. Hook the tabs on right side of hinge cover under the edge of the top hinge and posi- tion the cover in place. Insert and tighten the cover screw Replace the ice bin in the drawer.
-
Page 19: Connecting The Water Line
INSTALLATION Install the grounding screw and connect the Place the cover in place. Insert and tighten two wire harnesses . Push the water tube , the cover screw located at the top of the left door into the hole beside the left hinge on the top of the cabinet until it exits through the back. - Page 20 20 INSTALLATION Water Pressure You will need a cold water supply. Water Pressure models with water 20 - 120 psi (138 - 827 kPa) filter where reverse 40 - 60 psi minimum to osmosis water reverse osmosis system (2.8 filtration system is kgf/cm2 - 4.2 kgf/ cm2, or •...
- Page 21 INSTALLATION Shut off the main water supply. • Turn on the nearest faucet to relieve the pressure on the line. Choose the valve location. • Choose a location for the valve that is easily accessible. It is best to connect into the side of a vertical water pipe.
- Page 22 22 INSTALLATION Connect the tubing to the valve. NOTE • Place the compression nut and ferrule • Insert the end of the copper tubing into the (sleeve) for copper tubing onto the end of connection as far as possible. While holding the the tubing and connect it to the shutoff tubing, tighten the fitting.
-
Page 23: Leveling And Door Alignment
INSTALLATION Leveling and Door Insert additional snap rings until the right Alignment door is aligned. (Two snap rings are provided with the unit.) Leveling The refrigerator has two front leveling legs. Adjust the legs to alter the tilt from front-to-back or side-to side. -
Page 24: Operation
OPERATION OPERATION Before Use Checklist Clean the refrigerator. Clean the refrigerator thoroughly and wipe off all dust that accumulated during shipping. CAUTION • Do not scratch the refrigerator with a sharp object or use a detergent that contains alcohol, a flammable liquid or an abrasive when removing any tape or adhesive from the refrigerator. -
Page 25: Control Panel
OPERATION Control Panel Depending on the model, some of the following functions may not be available. The actual control panel may differ from model to model. Control Panel Features Door Alarm When power is connected to the refrigerator, the door alarm is initially set to ON. When you press the Door Alarm button, the display will change to OFF and the Door Alarm function will deactivate. - Page 26 OPERATION Water Filter Replace the water filter when the Water Filter indicator turns on. After replacing the water filter, press and hold the Water Filter button for three seconds to turn the indicator light off. Replace the water filter approximately every six months. CAUTION Display Mode (For Store Use Only) •...
-
Page 27: Water Dispenser
• Keep children away from the dispenser. Children may play with or damage the controls. • If ice or water dispenses unexpectedly, turn off the water supply and contact an LG Electronics Customer Information Center. To replace the tray, slightly tilt up the front of the tray and snap the tabs into the holes. -
Page 28: Storing Food
OPERATION necessary if the refrigerator has not been used NOTE for a longtime. • The ice bin should be emptied any time the • The automatic freezer icemaker produces 12 icemaker power button is turned to the OFF cubes at a time, 50-110 pieces within a 24 hour mode. - Page 29 OPERATION have food odor and taste transfer throughout the Food How to Store refrigerator and could also dry out frozen food. Leafy Remove store wrapping, trim or tear Packaging recommendations Vegetables off bruised and discolored areas, • Rigid plastic containers with tight-fitting lids wash in cold water, and drain.
-
Page 30: Humidity Controlled Crispers
OPERATION Humidity Controlled To reassemble, insert the cover into the Crispers refrigerator with both hands and lower it onto the guides. Using the Humidity Controlled Crispers This feature is only available on some models. The crispers provide fresher tasting fruit and vegetables by letting you easily control humidity inside the drawer. -
Page 31: Refrigerator Shelves
OPERATION To assemble, slightly tilt up the front, insert CAUTION the Glide’N’Serve into the frame and push it • Do not clean glass shelves with warm water back into place. while they are cold. Shelves may break if exposed to sudden temperature changes or impact. -
Page 32: Durabase
OPERATION To replace the bin, slide it in above the desired support and push down until it snaps into place. Durabase Using the Durabase CAUTION • If the Durabase divider is removed, there is enough open space for children or pets to crawl inside. -
Page 33: Smart Functions
LG ThinQ Application Features Follow the instructions below to use the audible diagnosis method. • Launch the LG ThinQ application and select the Communicate with the appliance from a Smart Diagnosis feature in the menu. Follow the smartphone using the convenient smart features. -
Page 34: Maintenance
MAINTENANCE MAINTENANCE Cleaning Inside Walls • Allow freezer to warm up so the cloth will not WARNING stick. • Use non-flammable cleaner. Failure to do so can To help remove odors, wash the inside of the result in fire, explosion, or death. refrigerator with a mixture of baking soda and warm water. -
Page 35: Water Filter
• Visit your local dealer or distributor system. Systems certified for cyst reduction may • Search using “water filter”on lg.com be used on disinfected water that may contain • Use replacement cartridge: ADQ36006101 filterable cysts. - Page 36 MAINTENANCE After changing the filter, press and hold the NOTE Water Filter button for three seconds to reset • Replacing the water filter causes a small amount the indicator light. of water (around 1 oz. or 25 cc) to drain. •...
- Page 37 MAINTENANCE Before Replacing the Water Filter Model: LT1000P, LT1000PC, LT1000PCS NSF System Trade Name Code: MDJ64844601 The concentration of the indicated substances in water entering the system was reduced to a concentration less than or equal to the permissible limit for water leaving the system as specified in NSF/ ANSI Standard 42, Standard 53 and Standard 401.
- Page 38 NOTE • While the testing was performed under standard laboratory conditions, actual performance may vary. For replacement filters, visit your local dealer or distributor or search under “water filters” on the lg.com website. Replacement Cartridge: LT1000P, LT1000PC or LT1000PCS LG is a trademark of LG corp.
-
Page 39: Product Fiche
PRODUCT FICHE ENGLISH PRODUCT FICHE Trade Mark LG Electronics Model GM-F223DLXQ Category 7 (Refrigerator-Freezer) Energy efficiency class Energy efficiency class Actual energy consumption will depend on how the appliance is used and where it is located Fresh Food Storage Volume (L) Frozen Food Storage Volume (L) Design temperature of other compartments (>14°C) -
Page 40: Troubleshooting
TROUBLESHOOTING TROUBLESHOOTING FAQs Frequently Asked Questions What are the best temperature settings for my refrigerator and freezer? The default setting for the refrigerator is 37° Fahrenheit (3° Celsius). The default setting for the freezer is 0° Fahrenheit (-18° Celsius). Adjust these settings as necessary to keep food at desired temperatures. -
Page 41: Before Calling For Service
TROUBLESHOOTING Before Calling for Service Cooling Problem Possible Cause & Solution Refrigerator and The refrigerator control is set to OFF (some models). Freezer section are • Turn the control ON. Refer to the Setting the Controls section for proper temperature not cooling. - Page 42 TROUBLESHOOTING Problem Possible Cause & Solution Interior moisture Doors are opened often or for long periods of time. buildup. • When the doors are opened often or for long periods of time, warm, humid air enters the compartment. This raises the temperature and moisture level within the compartment. To lessen the effect, reduce the frequency and duration of door openings.
- Page 43 TROUBLESHOOTING Problem Possible Cause & Solution Refrigerator or Refrigerator was recently installed. Freezer section is too • It may take up to 24 hours for each compartment to reach the desired temperature. warm. The air vents are blocked. Cold air circulates from the freezer to the fresh food section and back again through air vents in the wall dividing the two sections.
- Page 44 TROUBLESHOOTING Ice & Water Problem Possible Cause & Solution Icemaker is not Demand exceeds ice storage capacity. making enough ice. • The icemaker will produce approximately 70-184 cubes in a 24 hour period. House water supply is not connected, valve is not turned on fully, or valve is clogged. •...
- Page 45 TROUBLESHOOTING Problem Possible Cause & Solution Icemaker is not Refrigerator was recently installed or icemaker recently connected. making ice • It may take up to 24 hours for each compartment to reach the desired temperature and for the icemaker to begin making ice. Icemaker is not turned on.
- Page 46 TROUBLESHOOTING Parts & Features Problem Possible Cause & Solution Doors will not close Food packages are blocking the door open. correctly or pop • Rearrange food containers to clear the door and door shelves. open. Ice bin, crisper cover, pans, shelves, door bins, or baskets are out of position. •...
- Page 47 TROUBLESHOOTING Problem Possible Cause & Solution Rattling Rattling noises may come from the flow of refrigerant, the water line on the back of the unit, or items stored on top of or around the refrigerator. • Normal Operation Refrigerator is not resting solidly on the floor. •...
Need help?
Do you have a question about the GM-F223DLXQ and is the answer not in the manual?
Questions and answers