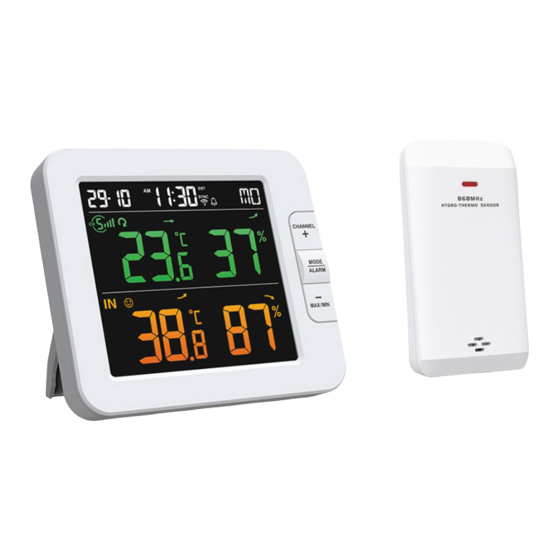
Summary of Contents for CCL ELECTRONICS C6082A
- Page 1 Smart multi-channel weather station with wireless sensor Model: C6082A / C3126A User Manual *Smart phone not included...
- Page 2 This device complies with Part 15 of the FCC Rules. Operation is subject to the following two conditions: (1) this device may not cause harmful interference, and (2) this device must accept any interference received, including interference that may cause undesired operation. Warning: Changes or modifications to this unit not expressly approved by the party responsible for compliance could void the user’s authority to operate the equipment.
-
Page 3: Table Of Contents
TABLE OF CONTENTS PRECAUTIONS ..........INTRODUCTION . -
Page 4: Introduction
- Do not subject the unit to excessive force, shock, dust, temperature or humidity. - Do not cover the ventilation holes with any items such as newspapers, curtains etc. - Do not immerse the unit in water. If you spill liquid over it, dry it immediately with a soft, lint-free cloth. -
Page 5: Overview
OVERVIEW CONSOLE 1. [ ALARM/SNOOZE ] key 7. [ / CAL ] key 13. [ Refresh ] key 2. LCD display 8. [ TIME SET ] key 14. [ RESET ] key 3. [ CHANNEL / + ] key 9. Table stand 15. -
Page 6: Wireless Thermo-Hygro Sensor
WIRELESS THERMO-HYGRO SENSOR 1. LED indicator 2. Wall mounting holder 3. Channel slide switch 4. [ RESET ] key 5. Battery compartment INSTALLATION AND SETUP INSTALL WIRELESS THERMO-HYGRO SENSOR 1. Remove the battery door of the sensor. 2. Use the channel slide switch to set the channel number for the sensor (e.g. -
Page 7: Install Wireless Thermo-Hygro Sensor
SETUP THE CONSOLE INSTALL THE BACKUP BATTERY Backup battery provides power to the console to retain clock time and date, max/min records and calibration value. Step 1 Step 2 Step 3 Remove the console Insert a new CR2032 Replace the battery door. battery door with coin button cell battery NOTE:... -
Page 8: Additional Wireless Sensor(S) (Optional)
ADDITIONAL WIRELESS SENSOR(S) (OPTIONAL) The console can support up to 7 wireless sensors. 1. In the new wireless sensor, slide the Channel switch to a new CH number 2. Press the [ RESET ] key on the new sensor. 3. At the back of the console, press the [ SENSOR / WI-FI ] key enter sensor synchronization mode 4. - Page 9 Step 2: On "Add Manually" screen, choose Step 3: "Sensors" in the left menu bar and Step 1: Make sure you select the 2.4G network then select "Temperature and Humidity At the home screen , tap the on the and enter your Wi-Fi password then tap Sensor(Wi-Fi)".
-
Page 10: Device Screen Overview
3. The console will automatically exit AP mode and return to normal operation once it's connected to Wi-Fi router. NOTE : - Smart weather station can only connect to 2.4G WI-FI network - Enable the location information in your mobile when you add your console to App. for 6 seconds to exit AP mode any time. -
Page 11: To Set Alert Notification
TO SET ALERT NOTIFICATION You can set the temperature and humidity high / low alarm. Step 1: Step 2: Step 3: Tap the "Setting" on the bottom of the Tap the "Temperature Alarm" or Tap the "INDOOR" or "CH 1 ~ 7 ". "device Screen". -
Page 12: Iot Application
IOT APPLICATIONS Through the Smart life App, you can create the temperature and humidity trigger conditions to control other Smart Life compatible device(s) automatically. Step 1: Step 2: Step 3: Tap the " Smart" icon on Home Tap the " "... -
Page 13: Firmware Update
FIRMWARE UPDATE The console can be updated through your WI-FI network. If new firmware is available, a notification or pop up message will be shown on your mobile when you open the App. Follow the instruction in the App to do the update. During the update process, the console will show the progress status percentage at the bottom of the screen. -
Page 14: Activating Alarm Function
ACTIVATING ALARM FUNCTION 1. In normal mode, press [ MODE / ALARM ] key to show the alarm time for 5 seconds. 2. When the alarm time displays, press [ MODE / ALARM ] key Alarm off Alarm on again to activate the alarm function. When clock reach the alarm time, alarm sound will start. -
Page 15: To View Max / Min
TREND INDICATOR The trend indicator shows the temperature or humidity trends of changes based on later 15 minutes. Rising Steady Falling MAX / MIN DATA RECORD The console can record MAX / MIN readings both daily and since last Daily MAX MAX reading reset. -
Page 16: Set Lcd Display Contrast
SET LCD DISPLAY CONTRAST In normal mode, press [ / CAL ] key to adjust LCD contrast for best viewing on table stand or wall mounted. MAINTENANCE BATTERY REPLACEMENT When low battery indicator “ ” is displayed in CH section of the LCD display, it indicates that the current channel sensor battery power give wireless sensor shown is low respectively. -
Page 17: Wireless Thermo-Hygro Sensor
In Humidity Humidity unit 1 ~ 20% RH ± 6.5% RH @ 25°C (77°F) 21 ~ 80% RH ± 3.5% RH @ 25°C (77°F) Accuracy 81 ~ 99% RH ± 6.5% RH @ 25°C (77°F) Resolution WI-FI Communication Specification 802.11 b/g/n Standard 2.4GHz Operating frequency :...


Need help?
Do you have a question about the C6082A and is the answer not in the manual?
Questions and answers