Advertisement
Available languages
Available languages
Quick Links
Touchscreen
Programmable
Thermostat
Owner's Manual
Read and save these
instructions.
For help please visit
yourhome.honeywell.com
Installation is Easy
1. Label wires and remove your old thermostat
2. Install and wire your new thermostat
3. Set your new thermostat to match your heating/cooling system
This thermostat works with virtually all System Types
•
It is preset for the most common system
•
RTH7600
RET97C
Do you need assistance? We are here to help.
Call 1-800-468-1502 for wiring assistance before returning
the thermostat to the store.
This thermostat works on 24 volt or 750 mV systems.
It will NOT work on 120/240 Volt systems.
Series
Advertisement

Related Manuals for Honeywell RET97C Series


Summary of Contents for Honeywell RET97C Series
- Page 1 Owner’s Manual Read and save these instructions. For help please visit yourhome.honeywell.com Installation is Easy 1. Label wires and remove your old thermostat 2. Install and wire your new thermostat 3. Set your new thermostat to match your heating/cooling system This thermostat works with virtually all System Types •...
- Page 2 50°F (10°C). Customer assistance For assistance with this product, please visit http://yourhome.honeywell.com. Or call Honeywell Customer Care toll-free at 1-800-468-1502. To save time, please note your model number and date code before calling.
- Page 3 Table of contents Installation Programming and operation Setting the clock .........14 Installation ..........3 Adjusting program schedules .....15 Advanced Installation ......10 Overriding schedules temporarily ..15 Overriding schedules permanently ..16 About your new thermostat Auto Changeover .......16 Controls and Home screen Change filter ........17 quick reference ........13 Replace batteries .......18 Preset energy-saving schedules ..14...
- Page 4 2 Remove Old Thermostat Remove old thermostat but leave wallplate with wires attached. If you have an older thermostat with a sealed mercury tube, turn to page 2 Do not remove wallplate yet for proper disposal instructions. Terminal designation MCR33823 3 Label Wires with Tags Label the wires using the supplied wire labels as you disconnect them, then remove the old wallplate.
- Page 5 5 Mount Wallplate Mount the new wallplate using the included screws and anchors. MCR28094 Drill 3/16-in. holes for drywall Drill 3/32-in. holes for plaster 6 Connect Wires Simply match wire labels. If labels do not match letters on the thermostat, check “Alternate Wiring (Conventional Systems)”...
- Page 6 Alternate Wiring (Conventional Systems) If labels do not match terminals, connect wires as shown here (see notes, below). MCR28076 Remove metal jumper connecting only if you must connect both wires. If your old thermostat had both wires, remove metal jumper. Connect the wire to the terminal, and the...
- Page 7 Alternate Wiring (For Heat Pumps Only) MCR28077 Leave metal jumper in place, connecting & terminals. If your old thermostat had both wires, stop now and contact a qualified contractor for help. If your old thermostat had separate wires, attach the wire to terminal.
- Page 8 7 Install Batteries Install two AA alkaline batteries and remove tab. Remove tab MCR28101 Back of thermostat MCR27518 8 Install Thermostat onto Wallplate Install thermostat onto the wallplate on the wall. M28419 9 Turn Power Back On Turn the power back on to the heating/cooling system. Circuit breaker box Heating/cooling system M31544...
- Page 9 10 Set Time and Date to set month, then press NEXT. 1. Press 2. Press to set day, then press NEXT. to set year, then press DONE. 3. Press 4. Press to set time, then press DONE to save and exit. 10:10 2012 Go Back...
- Page 10 Advanced Installation Enter System Setup 1. Press and release the left button. 2. Press and hold the center button until the screen changes (approximately 5 seconds). Set To 6 : 30 System Fan Auto System Fan Auto Heat Off Cool Cool System System &...
- Page 11 Function Description Setting Press the s or t button to change the setting. 0170 Select System Type Heat/cool: Gas, oil or electric heating with central air conditioning. Heat pump: Heat pump without backup or auxiliary heat. Heat only: Gas, oil or electric heat without central air conditioning.
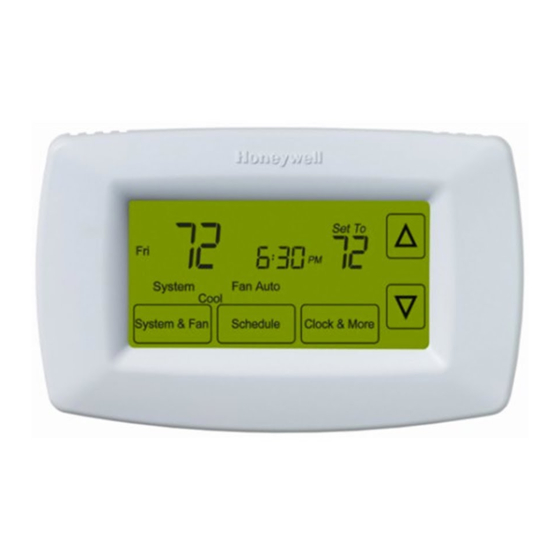
- Page 12 24-hour clock (i.e., “15:30”) About your new thermostat Your new Honeywell thermostat has been designed to give you many years of reliable service and easy-to-use, push-button climate control. Large touchscreen display with backlight is easy to read—even in the dark.
- Page 13 Thermostat controls Arrow keys Press to adjust temperature or to make selections from screen Set To menus. 6 : 01 Heat On Recovery System Fan Auto Cool System & Fan Schedule Clock & Mode Clock & More Press to set clock or furnace filter M27525 reminder.
- Page 14 Clock setting 1. To set the current time display, System & Fan Schedule Clock & Mode press CLOCK & MORE, then press to adjust the time. s or M27527 Press and hold s or to advance the time more quickly. 2. Press DONE to save & exit (or press GO BACK to exit without changing 6:01 the time).
- Page 15 To adjust program schedules 1. Press SCHEDULE, then EDIT to see weekdays. System & Fan Schedule Clock & Mode 2. Press SELECT DAY to highlight Mon-Fri M27527 (they will share the same settings). 3. Press NEXT STEP twice, then press View Go Back Edit...
- Page 16 Program schedule override (permanent) Press to adjust temperature, then press HOLD. This will turn off the Temporary Set To program schedule. 6 : 08 Whatever temperature you set will be maintained 24 hours a day, until System Fan Auto Heat Permanent Hold you manually change it, or press Hold...
- Page 17 Filter reminder If activated during installation, the furnace filter reminder alerts you Change Filter Set To when it is time to replace your 6 : 01 filter. Heat On Press RESET after changing the System Fan Auto Heat filter, to restart the timer. Reset Schedule Clock &...
- Page 18 Battery replacement Batteries are optional (to provide Grasp thermostat and pull to backup power) if your thermostat remove from wallplate was wired to run on AC power when installed. Install fresh batteries immediately when the LO BATT warning begins flashing. The warning flashes about 30 days before batteries are depleted.
- Page 19 Check Function 0190: Heat Pump Changeover Valve to make • issues cool air sure it is properly configured for your system. in heat mode, or warm air in cool mode For assistance with this product, please visit http://yourhome.honeywell.com or call Honeywell Customer Care toll-free at 1-800-468-1502.
- Page 20 This warranty does not cover removal or reinstallation costs. This warranty shall not apply if it is shown by Honeywell that the defect or malfunction was caused by damage which occurred while the product was in the possession of a consumer.
- Page 21 Veuillez lire le mode d’emploi et le conserver en lieu sûr. Pour obtenir de l’aide veuillez visiter yourhome.honeywell.com L’installation est facile 1. Étiquetage des fils et retrait de l’ancien thermostat 2. Installation et raccordement du nouveau thermostat 3. Configuration du nouveau thermostat pour correspondre à votre système de chauffage/climatisation Ce thermostat fonctionne avec pratiquement tous les types de systèmes...
- Page 22 Pour obtenir de l’aide avec ce produit, veuillez consulter le site http://yourhome.honeywell.com. ou vous adresser aux Services à la clientèle de Honeywell en composant le 1-800-468-1502. Pour gagner du temps, veuillez prendre en note le numéro de modèle et de code de date du thermostat avant d’appeler.
-
Page 23: Table Of Contents
Table des matières Installation Programmation et fonctionnement Réglage de l’horloge ......14 Installation ..........3 Réglage des programmes ....15 Guide d’installation avancé ....10 Dérogation temporaire de la programmation ......15 À propos du thermostat Dérogation permanente Aide-mémoire sur les commandes de la programmation ......16 et l’écran d’accueil ......13 Commutation chaud-froid Programmes d’économie... - Page 24 2 Retirer l’ancien thermostat Retirer l’ancien thermostat, mais laisser en place la plaque murale et les fils sans les détacher. Si vous possédez un thermostat plus ancien à tube Laisser la plaque de mercure scellé, allez à la page 2 pour les de montage en instructions de mise au rebut correctes.
- Page 25 5 Installer la plaque Installer la nouvelle plaque murale à l’aide des vis et des chevilles d’ancrage fournies. MCR28094 Percer des trous de 3/16 po si le mur est en placoplâtre Percer des trous de 3/32 po si le mur est en plâtre 6 Raccorder les fils Il suffit ensuite de faire correspondre les fils avec les étiquettes.
- Page 26 Câblage alternatif (systèmes classiques) Si les étiquettes ne correspondent pas aux bornes, les raccorder comme l’indique l’explication ci-dessous (voir les notes ci-dessous). ou ou ou ou MFCR28076 Enlever le cavalier en métal en métal entre R et Rc seulement si les fils R et Rc doivent être raccordés.
- Page 27 Autre option de câblage (pour thermopompes seulement) ou ou ou ou ou ou MFCR28077 Laisser le cavalier en place, en reliant les bornes Si l’ancien thermostat avait des fils de et de , arrêter maintenant et communiquer avec un entrepreneur pour l’aide. Si l’ancien thermostat avait les fils , raccorder le fil à...
- Page 28 7 Installer les piles Installer 2 piles alcalines AA à l’arrière du thermostat et retirer l’onglet. Retirer l’onglet. MCR28101 Dos du thermostat MCR27518 8 Fixer le thermostat à la plaque murale Installer le thermostat sur la plaque murale fixée au mur. M28419 9 Rétablir l’alimentation électrique Rétablir l’alimentation électrique du système de chauffage-refroidissement.
- Page 29 10 Régler l’heure et date pour régler le mois, puis appuyer sur NEXT. 1. Appuyer sur 2. Appuyer sur pour régler la date, puis appuyer sur NEXT. pour régler l’année, puis appuyer sur DONE. 3. Appuyer sur 4. Appuyer sur pour régler l’heure puis appuyer sur DONE pour sauvegarder et quitter.
-
Page 30: Guide D'installation Avancé
Guide d’installation avancé Entrer les réglages du système 1. Appuyer sur le bouton de gauche puis le relâcher. 2. Appuyer sur le bouton du centre jusqu’à ce que l’affichage change (environ 5 secondes). Set To 6 : 30 System Fan Auto System Fan Auto Heat Off Cool... - Page 31 Fonction Description Réglage Appuyer sur s t pour modifier les paramètres. 0170 Type de système Chauff./Clim. : Gaz, mazout ou chauffage électrique avec climatisation. Thermopompe : 1 chauffage (sans de chauffage aux.). Chauff. seulement : Gaz, mazout ou chauffage électrique sans climatisation.
-
Page 32: À Propos Du Thermostat
Horloge 12 heures (3:30 pm) Horloge 24 heures (15:30) À propos du thermostat Votre nouveau thermostat Honeywell a été conçu pour vous procurer de nombreuses années de service fiable et assurer la régulation de la température ambiante avec facilité, par simple bouton-poussoir. - Page 33 Commandes de thermostat Boutons de température Appuyer sur ces touches pour régler la température, ou pour Set To faire des choix à partir des menus 6 : 01 Heat On Recovery affichés à l’écran. System Fan Auto Cool System & Fan Schedule Clock &...
-
Page 34: Réglage De L'horloge
Réglage de l’horloge 1. Pour régler l’affichage de l’heure, appuyer sur CLOCK, puis sur System & Fan Schedule Clock & Mode pour régler l’heure. Appuyer M27527 sur les touches et les maintenir enfoncées pour faire avancer l’heure plus rapidement. 2. Appuyer sur DONE pour enregistrer 6:01 les données et quitter le mode de réglage (ou appuyer sur GO BACK). - Page 35 Pour modifier l’horaire programmé 1. Appuyer sur SCHEDULE, puis sur EDIT pour voir les jours de la semaine. System & Fan Schedule Clock & Mode 2. Appuyer sur SELECT DAY pour accentuer M27527 Lun-Ven (ils partageront les mêmes arrangements). Go Back Edit View 3.
-
Page 36: Commutation Chaud-Froid Automatique
Dérogation au programme (permanente) Appuyer sur pour régler la le point de consigne, puis appuyer Temporary Set To sur HOLD. Cela aura pour effet de 6 : 08 déroger à l’horaire programmé. Peu importe la température réglée, System Fan Auto Heat Permanent Hold celle-ci sera maintenue 24 heures... - Page 37 Rappel de remplacement du filtre Si elle est mise en marche à l’installation, la fonction de rappel de Change Filter Set To remplacement du filtre de l’appareil 6 : 01 de chauffage sera activée lorsque le Heat On temps sera venu de remplacer le filtre. System Fan Auto Heat...
-
Page 38: Remplacement Des Piles
Remplacement des piles Saisir le thermostat et tirer pour le Les piles sont facultatives (et servent détacher de la plaque murale. d’alimentation de secours en cas de panne de courant) lorsque le thermostat a été raccordé au courant alternatif à l’installation. Installer immédiatement des piles neuves lorsque l’avertissement de remplacement des piles LO BATT... -
Page 39: Dépannage
Pour obtenir de l’aide avec ce produit, veuillez consulter le site http://yourhome.honeywell.com ou vous adresser aux Services à la clientèle de Honeywell en composant le 1-800-468-1502. -
Page 40: Garantie Limitée
Garantie limitée d’un an Honeywell garantit ce produit, à l’exception des piles, contre tout vice de fabrication ou de matière dans la mesure où il en est fait une utilisation et un entretien convenables, et ce, pour un (1) an à partir de la date d’achat par le consommateur. En cas de défectuosité...
Need help?
Do you have a question about the RET97C Series and is the answer not in the manual?
Questions and answers