Table of Contents
Advertisement
Quick Links
Contents
Introduction........................................................................................................................................... 1
Notational conventions ................................................................................................................. 2
Important notes..................................................................................................................................... 2
Safety notes.................................................................................................................................. 2
Cleaning ....................................................................................................................................... 4
Transport ...................................................................................................................................... 4
Power cable.................................................................................................................................. 4
CE marking................................................................................................................................... 4
Disposal and recycling ................................................................................................................. 5
Preparing for use .................................................................................................................................. 5
Unpacking and checking the delivery........................................................................................... 5
Preparing remove control ............................................................................................................. 6
Inserting batteries................................................................................................................. 6
Replacing batteries............................................................................................................... 6
Installing plasma TV ..................................................................................................................... 7
Connections on plasma TV ........................................................................................................ 10
Connecting plasma TV ............................................................................................................... 13
Switching plasma TV on/off........................................................................................................ 14
Switching plasma TV on/into standby mode .............................................................................. 14
Setting language of the OSD menu............................................................................................ 15
Carrying out programme search................................................................................................. 15
Adjusting programme settings.................................................................................................... 16
Arranging programmes....................................................................................................... 17
Changing programme properties........................................................................................ 17
Deleting program................................................................................................................ 19
Selecting signal source .............................................................................................................. 19
Changing programme................................................................................................................. 19
Operation............................................................................................................................................ 20
Operating elements on the device.............................................................................................. 20
Changing the device settings with the buttons of the control panel ........................................... 21
Remote control ........................................................................................................................... 22
Teletext............................................................................................................................... 23
Buttons for editing programme list...................................................................................... 23
PIP (Picture in Picture) ....................................................................................................... 23
Changing device settings with remote control............................................................................ 24
Description of menus.................................................................................................................. 24
PICTURE menu - picture settings ...................................................................................... 25
SOUND menu - sound settings .......................................................................................... 26
SETUP menu - advanced settings ..................................................................................... 27
TIME menu - time settings ................................................................................................. 29
TV menu - programme settings.......................................................................................... 30
Display modes .................................................................................................................................... 31
Main display mode ..................................................................................................................... 31
PIP mode (Picture in Picture) ..................................................................................................... 32
A26361-K1040-Z120-1-M119, edition 3
English
Advertisement
Table of Contents

Summary of Contents for Fujitsu Siemens Computers MYRICA P42-1A
-
Page 1: Table Of Contents
Contents Introduction............................1 Notational conventions ......................... 2 Important notes............................. 2 Safety notes..........................2 Cleaning ............................4 Transport ............................4 Power cable..........................4 CE marking........................... 4 Disposal and recycling ......................... 5 Preparing for use ..........................5 Unpacking and checking the delivery................... 5 Preparing remove control ...................... - Page 2 Contents Technical data.............................33 VESA-DDC-compatible VGA interface ..................35 Preset operating modes (PC) .....................35 Power consumption ........................35 PC Analogue (D-SUB) ........................36 PC Digital (DVI-D)........................36 SCART (Half/Full) ........................37 S-Video ............................37 Colour and transmission system by country ................38 Troubleshooting ..........................40 English A26361-K1040-Z120-1-M119, edition 3...
-
Page 3: Introduction
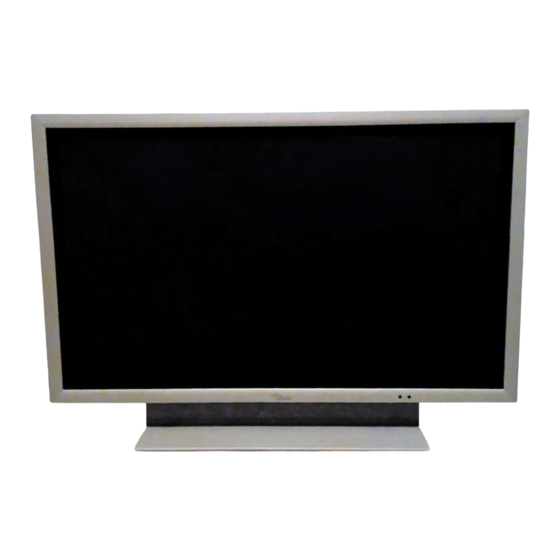
Introduction Your new plasma TV MYRICA P42-1A / P42-2 / P50-2possesses a whole range of useful features and functions, e.g.: ● TFT monitor (Thin Film Transistor; active matrix) ● analogue tuner for VHF, UHF and cable programmes ● connections for SCART (video and RGB), video and S-Video ●... -
Page 4: Notational Conventions
This pictures may remain visible! Also avoid longer operation in a picture mode in which black bars are visible. These black bars can also remain visible. This product from Fujitsu Siemens Computers contains intellectual property of third parties. Any tampering with or modification of the product will void the warranty and may lead to legal prosecution to the full extent of the law. - Page 5 MYRICA P42-1A / P42-2 / P50-2 ● The device may not be placed on the floor. ● he device automatically sets itself to the correct voltage within the range from 100 V to 240 V. Ensure that the local mains voltage lies within these limits.
-
Page 6: Cleaning
MYRICA P42-1A / P42-2 / P50-2 Cleaning ● Remove the power plug before cleaning the device. ● Do not clean any interior parts yourself, leave this job to a service technician. ● Do not use any cleaning agents that contain abrasives or may corrode plastic. -
Page 7: Disposal And Recycling
MYRICA P42-1A / P42-2 / P50-2 Disposal and recycling This device has been manufactured to the highest possible degree from materials which can be recycled or disposed of in a manner that is not environmentally damaging. The device may be taken back after use to be recycled, provided that it is returned in a condition that is the result of normal use. -
Page 8: Preparing Remove Control
MYRICA P42-1A / P42-2 / P50-2 Preparing remove control Inserting batteries ► Open the back cover of the remote control by sliding it in the direction of the arrow. ► Place the batteries supplied in the battery compartment. Ensure correct polarity. -
Page 9: Installing Plasma Tv
MYRICA P42-1A / P42-2 / P50-2 Installing plasma TV Before you install your plasma TV, you must mount the foot on the device. The foot is shown as an example in the following illustrations. The delivered foot may differ from the illustration. - Page 10 MYRICA P42-1A / P42-2 / P50-2 ► Screw on the shafts of the foot through the holes on the device. Use the screws provided for this purpose. You can now place the plasma TV in the upright position. The device may not be placed on the floor.
- Page 11 MYRICA P42-1A / P42-2 / P50-2 Ventilation To ensure sufficient ventilation, the intake and exhaust air openings of the device must never be blocked. >10 cm >20 cm >20 cm >10 cm >10 cm >10 cm When installing the TV in niches, maintain the minimum distance for sufficient ventilation of the device: 10 cm from the side and back, 20 cm from the top.
-
Page 12: Connections On Plasma Tv
MYRICA P42-1A / P42-2 / P50-2 Connections on plasma TV Observe the safety precautions in the "Important notes" chapter in this operating manual. Do not cover the ventilation openings of the monitor. Never open the housing of the power supply unit. There is extreme danger from an electrical shock with the housing open. - Page 13 MYRICA P42-1A / P42-2 / P50-2 PC IN Connection for analogue VGA input signals (blue) e.g. for a PC with an analogue output (D-SUB) COMPONENT 1 Connections for component video and audio input signals COMPONENT 2 e.g. for HDTV decoder, HDTV video recorder or HDTV player...
- Page 14 MYRICA P42-1A / P42-2 / P50-2 S-VIDEO IN Connection for S-VIDEO input signals e.g. for DVD player, video recorder or film camera with S- Video connection Connections for video and audio input signals VIDEO e.g. for DVD player, video recorder, film camera with S-Video...
-
Page 15: Connecting Plasma Tv
MYRICA P42-1A / P42-2 / P50-2 Connecting plasma TV Connecting antenna ► Connect an antenna cable to the antenna connection of the plasma TV and to the TV antenna socket. Connecting the power supply ► Plug the power cable supplied into the power connector of the LCD TV. -
Page 16: Switching Plasma Tv On/Off
MYRICA P42-1A / P42-2 / P50-2 Switching plasma TV on/off ► Press the ON/OFF switch at the left on the back of the plasma TV. Switching plasma TV on/into standby mode ► Press the Standby button at the right on the underside of the plasma TV. -
Page 17: Setting Language Of The Osd Menu
MYRICA P42-1A / P42-2 / P50-2 Setting language of the OSD menu After switching on the device, set the language of the OSD (On Screen Display) menu according to your needs. English is the set as the default setting. If you want to use a different language, change this setting with the OSD menu. -
Page 18: Adjusting Programme Settings
MYRICA P42-1A / P42-2 / P50-2 ► Press the MENU button to activate the menu item. ► Select the Auto Scan menu item using the button. ► Press the MENU button to activate the menu item. ► Select your country with the button. -
Page 19: Arranging Programmes
MYRICA P42-1A / P42-2 / P50-2 Arranging programmes With the OSD menu you can rearrange the order of the programmes according to your personal preferences. Moving programme ► Select the programme you want to move with the buttons ► Press the INSERT button (yellow) to mark the programme to be moved. - Page 20 MYRICA P42-1A / P42-2 / P50-2 Setting channel of a programme This function is used when a programme is transmitted on a new station frequency. ► Select the programme for which you want to set another channel with the buttons ►...
-
Page 21: Deleting Program
MYRICA P42-1A / P42-2 / P50-2 Deleting program ► Select the programme you want to delete with the buttons ► Press the ERASE button (red). The selected programme is deleted from the programme list. Selecting signal source Selecting signal source for main display ►... -
Page 22: Operation
MYRICA P42-1A / P42-2 / P50-2 Operation Controls are provided on the device and the remote control for operating the plasma TV. Operating elements on the device The operating controls of the plasma TV are located in the underside of the device. With these buttons you can operate the basic functions of the plasma TV. -
Page 23: Changing The Device Settings With The Buttons Of The Control Panel
MYRICA P42-1A / P42-2 / P50-2 Changing the device settings with the buttons of the control panel With the buttons on the control panel, you can make the following settings directly: Selecting picture signal source ► Press the INPUT SELECT button. A list of the signal sources is displayed. -
Page 24: Remote Control
MYRICA P42-1A / P42-2 / P50-2 Remote control 1 = POWER - switches the device on or into the standby mode. 2 = INFO - information You display the current settings with this button. 3 = MUTE - switches the sound on and off. -
Page 25: Teletext
MYRICA P42-1A / P42-2 / P50-2 Teletext With button 13 you switch Teletext on or off. With the buttons 21, 23, 24 and 25 you navigate in the Teletext function. Buttons for editing programme list The detailed description of editing the programme list is provided under "Adjusting... -
Page 26: Changing Device Settings With Remote Control
MYRICA P42-1A / P42-2 / P50-2 Changing device settings with remote control You can open and operate the integrated OSD (On Screen Display) menu with the remote control. To set the OSD menu, perform the following steps: ► Press the MENU button to open the OSD menu. -
Page 27: Picture Menu - Picture Settings
MYRICA P42-1A / P42-2 / P50-2 PICTURE menu - picture settings ► Press the MENU button to open the OSD menu. ► Mark the PICTURE menu item with the buttons. ► Press the MENU button to activate the menu item. -
Page 28: Sound Menu - Sound Settings
MYRICA P42-1A / P42-2 / P50-2 SOUND menu - sound settings ► Press the MENU button to open the OSD menu. ► Mark the SOUND menu item with the buttons. ► Press the MENU button to activate the menu item. -
Page 29: Setup Menu - Advanced Settings
MYRICA P42-1A / P42-2 / P50-2 SETUP menu - advanced settings ► Press the MENU button to open the OSD menu. ► Mark the SETUP menu item with the buttons. ► Press the MENU button to activate the menu item. - Page 30 MYRICA P42-1A / P42-2 / P50-2 Advanced Here you configure the advanced settings. Here you set an ID number for service purposes. Possible values: 0 - 99 Burn Protect With this function you can partially prevent still images from burning in.
-
Page 31: Time Menu - Time Settings
Time Set With this button you set the current time. Format: Hour:Minute With MYRICA P42-1A: AM (before 12:00 noon); PM (after 12:00 noon) On Time With this function you set the time at which the device is to be automatically switched on. -
Page 32: Tv Menu - Programme Settings
MYRICA P42-1A / P42-2 / P50-2 TV menu - programme settings ► Press the MENU button to open the OSD menu. ► Mark the TV menu item with the buttons. ► Press the MENU button to activate the menu item. -
Page 33: Display Modes
MYRICA P42-1A / P42-2 / P50-2 Display modes Main display mode ► Press the SOURCE button on the remote control or the INPUT SELECT button on the underside of the plasma TV to select the source from which the signal for the main display is to come. -
Page 34: Pip Mode (Picture In Picture)
MYRICA P42-1A / P42-2 / P50-2 PIP mode (Picture in Picture) The plasma TV can also display a sub-video signal in addition to the main video signal. The sub- video signal is shown as a "PIP display" in a window on the main display. -
Page 35: Technical Data
MYRICA P42-1A / P42-2 / P50-2 Technical data MYRICA P42-1A MYRICA P42-2 MYRICA P50-2 Screen: Size (diagonal) 42'' (107 cm) 42'' (107 cm) 50'' (126.9 cm) Visible picture (HxV): 934 mm x 532.2 mm 934 mm x 532.2 mm 1,107 mm x 622 mm... - Page 36 MYRICA P42-1A / P42-2 / P50-2 MYRICA P42-1A MYRICA P42-2 MYRICA P50-2 DVI: TMDS ( DVI-D) Power supply (AC): 100 - 240 V (50/60 Hz) 100 - 240 V (50/60 Hz) 100 - 240 V (50/60 Hz) 2 A / 240 V...
-
Page 37: Vesa-Ddc-Compatible Vga Interface
MYRICA P42-1A / P42-2 / P50-2 VESA-DDC-compatible VGA interface Your plasma TV is equipped with a VESA-DDC-compatible VGA interface and a DVI-D interface. VESA-DDC (Video Electronics Standard Association, Display Data Channel) is used as the communications interface between the plasma TV and the computer. If your computer is equipped with a VESA-DDC-compatible VGA interface, it can automatically read the data for ensuring optimum operation from your plasma TV and select the appropriate settings. -
Page 38: Pc Analogue (D-Sub)
MYRICA P42-1A / P42-2 / P50-2 PC Analogue (D-SUB) Meaning Meaning Video input red +5 V (DDC) Video input green Sync. earth Video input blue Earth Earth DDC-Data Earth H. sync Red video earth V. sync Green video earth DDC Clock... -
Page 39: Scart (Half/Full)
MYRICA P42-1A / P42-2 / P50-2 SCART (Half/Full) Meaning Meaning Meaning Sound (R) output Changeover voltage Red *) Sound (R) input Green earth *) Blanking *) Sound (L) output Not assigned Video output earth Sound signal earth Green *) Video input earth... -
Page 40: Colour And Transmission System By Country
MYRICA P42-1A / P42-2 / P50-2 Colour and transmission system by country Country Colour Stereo Subtitles Albania Austria FM-FM Teletext Azores Bahrain Belgium Nicam Teletext Bulgaria SECAM Canary Islands Croatia Cyprus Czech Republic SECAM / PAL Denmark Nicam Teletext Egypt... - Page 41 MYRICA P42-1A / P42-2 / P50-2 Norway Nicam Country Colour Stereo Subtitles Poland Teletext Portugal Teletext Rumania Russia SECAM Saudi Arabia SECAM Slovakia SECAM / PAL Slovenia South Africa Spain Nicam Teletext Sweden Nicam Teletext Switzerland FM-FM Teletext Tunesia SECAM...
-
Page 42: Troubleshooting
The maximum permissible number of this kind of defective pixels is dependent on the resolution: MYRICA P42-1A/P42-2: 6L / 10D / 10T MYRICA P50-2: 8L / 14D / 14T L = light, D = dark, T = total No picture (power indicator glows orange) ►... - Page 43 MYRICA P42-1A / P42-2 / P50-2 Troubleshooting in TV mode Having this problem? Check the following points: No sound ► Check the volume setting. ► Check whether the device is muted. No picture, only static ► Check that the antenna cable is correctly connected.
- Page 44 MYRICA P42-1A / P42-2 / P50-2 Troubleshooting in PC mode Having this problem? Check the following points: Message: ► Check the setting of the picture signal source. No Signal / Keine Eingabe ► Check whether the antenna or data cable is correctly connected.
Need help?
Do you have a question about the MYRICA P42-1A and is the answer not in the manual?
Questions and answers