Table of Contents
Advertisement
Quick Links
Advertisement
Table of Contents

Related Manuals for Waycon LLD-150-PROF2

Summary of Contents for Waycon LLD-150-PROF2
- Page 1 Manual LLD-150-PROF2 Version 3.6...
- Page 2 Dear User, You are advised to carefully read this User Manual before powering on the LLD-150-PROF2 Laser distance measuring sensor for the first time. This is necessary to ensure that you will be able to utilize all the capabilities and features which your new acquisition provides.
-
Page 3: Table Of Contents
LLD-150-PROF2 Manual Content Phone: +49 (0)381 / 44073-0 Fax: +49 (0)381 / 44073-20 Content General ....................... 6 Safety Instructions ..................8 General Safety Instructions ............... 8 Intended & Conforming Use ............. 8 Nonconforming use ................8 Laser Classification ................9 Electric Supply ................. - Page 4 LLD-150-PROF2 Manual Content 8.11 ST – display/set measure time [0..25] ..........27 8.12 SF – display/set scale factor ............28 8.13 SE – display/set error mode [0/1/2] ..........29 8.14 AC – display set ALARM center ............29 8.15 AH – display/set ALARM hysterese ..........30 8.16...
-
Page 5: Content
Table 6 : Pin assignment programming cable ........... 18 Table 7 : Input voltages..................19 Table 8 : Output voltages .................. 19 Table 9 : Command list LLD-150-PROF2 ............23 Table 10 : Output format .................. 26 Table 11 : Examples of scale factor ..............29 Table 12 : Meaning of SE .................. -
Page 6: General
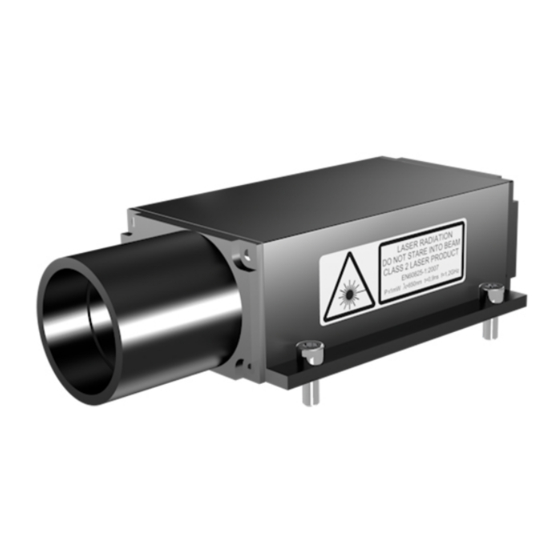
LLD-150-PROF2 Manual General General The LLD-150-PROF2 are Laser sensors to measure distances from 0.1 m to more than 100 m with pinpoint accuracy. A given target can be clearly identified with the help of a red Laser sighting LLD-150-PROF2 point. - Page 7 Option for remote triggering of a measurement from an external trigger device. Large range of accessories available inactive internal heating for devices with internal heating (LLD-150-PROF2-h) e.g. 3M, foil white non glossy or foil for longer distances...
-
Page 8: Safety Instructions
Compliance with all specified operating conditions is necessary. Failure to observe advisory notes or nonconforming product usage may cause physical injury to the user or material damage to the LLD-150-PROF2. Cable connectors must not be plugged or unplugged under voltage. -
Page 9: Laser Classification
Refrain from using the LLD-150-PROF2 without certified protection in an explosive environment Measurement with the LLD-150-PROF2 pointed at the sun or other strong light sources may produce faulty results Measurement of targets with poor surface reflectance in a strongly ... -
Page 10: Electric Supply
The sensor can use without any additional safety protection. Electric Supply Use only 10 V to 30 V DC (direct voltage) for LLD-150-PROF2 operation. Use only the specially designated connector terminal for voltage supply. Specified signal levels must not be exceeded, in order to guarantee correct data communication. -
Page 11: Technical Data
+15 up to +30 °C dependent on target reflectance, stray light influences and atmospheric conditions Please use only 24V DC For devices with heating (LLD-150-PROF2-x-H) The heater is connected directly to the power supply. Page 9... - Page 12 IP 65 (spatter water and dust protection) trigger function is not available for devices with internal heating (LLD-150-PROF2-X-H) at 10 m distance the beam diameter is 6 mm, at a distance of 50 m it is 3 cm and at a distance of...
-
Page 13: Mounting
LLD-150-PROF2 Manual Mounting Mounting The casing consists of a rugged, corrosion-resistant extruded aluminum profile with front-side and rear-side covers also of corrosion-resistant design. Four mounting holes are provided in the base plate for mounting the LLD-150-PROF2. Figure 3 : Mounting drawing To protect the range finder’s optical surfaces from dust, physical contact and... - Page 14 (standard 2 m, optionally 5 or 10 m). Figure 4 : Offset against zero-edge The LLD-150-PROF2’s zero-point is located 7 mm behind the outer surface of the front cover or 137 mm before the back cover outside face respectively.
-
Page 15: Electrical Connection
*) until Dec. 2006 4-pin male cable connector Note: Various connectors and cables are available. Please ensure that only shielded connectors and shielded cables are used. Profibus DP RS232 Output Power supply, trigger input Profibus DP and digital Input output Figure 5 : LLD-150-PROF2 terminals Page 15... -
Page 16: Assignment Of Terminals
Trigger input 3 to 20 V (ground potential GND) Profibus DP The LLD-150-PROF2 has two terminals (input and output) for circular plug- in connectors (series 715 B for Profibus DP from Binder) conforming to the relevant standards. Table 4 : Pin assignment Profibus DP... -
Page 17: Programming Cable
(see diagram on the left). Programming Cable Connection to a PC requires the following cable with SUB-D 9 F connectors. The TxD and RxD signals of the LLD-150-PROF2 and the PC connection are crossed. The colours apply to the optional programming cable. Page 17... -
Page 18: Shield And Grounding
If no potential equalization is possible, then mount the LLD-150- PROF2 isolated from the carrier base (use nylon screws and washers). Connect the screen with mass to the cable end. This way of assembly should also be used when installing the LLD-150-PROF2 inside vehicles. Page 18... -
Page 19: Limiting Values For Voltages
± 5 V at 3 k load VCC – 2 V Alarm Level depending on VCC Limiting values of voltages, loads and logical levels comply with relevant RS232 and Profibus standards. Trigger function is not available for devices with internal heating (LLD-150-PROF2-x-H) Page 19... -
Page 20: Start Up
We recommend the use of the following programme: LDMTOOL (Version 4.5 or higher). When turning on the LLD-150-PROF2, it must be properly installed at the designated operation site, aimed at the target, and kept in a stable position. Targets to be measured (e.g. machine or system components) should preferably have a light and homogeneous surface. -
Page 21: Parameters And Control Via Rs232
Parameters and Control via RS232 Parameters and Control via RS232 General It is easy to configure the LLD-150-PROF2 by using a PC, as it provides a wide range of operating functions. Configuration should take place prior to connecting to the Profibus. - Page 22 LLD-150-PROF2 in an optimal manner to specific environments and measuring tasks. Such settings will be stored when turning off the LLD-150-PROF2. They can only be changed by entering new values or by reinstalling the standard parameter settings.
- Page 23 Sets current distance as offset Turns Laser on Turns Laser off Displays all parameter values Resets all parameters to standard values (don't use) Trigger function is not available for devices with internal heating (LLD-150-PROF2-X-H) Only for devices with internal heating (LLD-150-PROF2-X-H) Page 23...
-
Page 24: Dt - Distance Tracking
DT mode can be chosen for distance measurement of different kinds of surfaces (varying reflectance). In this type of distance tracking mode, the LLD-150-PROF2 uses internal algorithms to continuously evaluate the quality of the Laser radiation signal that is coming back. This may cause longer measuring times in the case of poor reflectance or sudden jumps in distance. -
Page 25: Dx - Distance Tracking With Target Board (50 Hz)
DF mode allows a measurement that is triggered by an external trigger pulse. Initially, after selecting this mode, the operator does not receive any response. As soon as the trigger pulse has been detected, the LLD-150-PROF2 will send data and switches to digital and/or analog output. -
Page 26: Dm - Distance Measurement
LLD-150-PROF2 Manual Parameters and Control via RS232 DM – distance measurement Input parameter SD, SE, SF, ST, OF Output RS232/RS232, digital switching output, analog output DM mode triggers a single measurement (single shot) TP – internal temperature [°C] TP queries the value of the inner LLD temperature. -
Page 27: St - Display/Set Measure Time [0
Measuring time is directly conditional on the selected measuring mode. As a general rule, one may say: the poorer the reflectance of the surface of a LLD-150-PROF2 will require particular target, the more time the to determine the distance with specified accuracy. For example, if error message E15 is output because of poor reflectance and insufficient time to measure, this latter setting must be increased. -
Page 28: Sf - Display/Set Scale Factor
An exception there from is zero-value. In this case, the LLD-150-PROF2 automatically picks the smallest possible time value for measurement! LLD-150-PROF2 comes factory-set with ST = 0. -
Page 29: Se - Display/Set Error Mode [0/1/2]
LLD-150-PROF2 Manual Parameters and Control via RS232 Table 11 : Examples of scale factor Scale factor Resolution Output Output Unit 1 mm 012.345 SF10 0.1 mm 123.450 SF1.0936 0.01 yard 013.500 yard SF3.28084 0.01 feet 040.501 feet SF0.3937 1 inch 004.860... -
Page 30: Ah - Display/Set Alarm Hysterese
8.17 HO – display/set Temperature for heating on HO displays/sets the temperature value at which the internal heating is switched on. The values can be varied between -40°C and 70°C. Standard setting is 3°C. Only for devices with internal heating (LLD-150-PROF2-x-H) Page 30... -
Page 31: Hf - Display/Set Temperature For Heating Off
8.20 BR – display/set baud rate [2400..38400] Available baud rate settings are: 2400, 4800, 9600, 19200, 38400. Faulty entries will be rounded to the nearest baud rate. A fixed data format of eight Trigger function is not available for devices with internal heating (LLD-150-PROF2-X-H) Page 31... -
Page 32: As - Display/Set Autostart Command
Possible entries are those delivering a measured value on the output side, an ID command or the command for turning the Laser on (LO). For example, if ASDT has been parameterized, the LLD-150-PROF2 will begin with distance tracking on turning on power. -
Page 33: Pa - Display Settings
8.26 PA – display settings PA lists all parameters in a table. 8.27 PR – reset settings PR resets all parameters (except baud rate). After this a new configuration of the LLD-150-PROF2 is necessary average value[SA]....1 display format[SD]....d measure time[ST]....0 scale factor[SF]....1... -
Page 34: Interface Connection
Interface Connection Profibus DP General The LLD-150-PROF2 is operated as a standard Profibus slave. It becomes operational with master 13 byte entry data: 2x 8 bit error information, 16 bit measurement value counter, 32 bit time stamp, 32 bit distance and 8 bit internal temperature are available. - Page 35 Number of errors after last valid measurement value Counter Increased for each new valid measurement value Scaling depends on LLD-150-PROF2 parameter settings Displays the internal temperature in °C, if the control byte has been set on the TP mode, activation HI/LO slope bit 6 E.g.
-
Page 36: Serial Interface Rs232
To turn off the Laser and switch the LLD-150-PROF2 to standby operation, Bit 7 should be set at 1. The remaining bits have no meaning. If all bits are set at 0, then the LLD-150-PROF2 will operate in the DT mode (Distance Tracking, continuous measurement). -
Page 37: Output Format Ethernet And Rs232
LLD-150-PROF2 Manual Interface Connection The commands of the serial interface are described in chapter 8 starting page 21. The data output format is determined by parameter SD (display format), see page 26. Output Format Ethernet and RS232 The output format on the serial interface is selected by the command SD. -
Page 38: Digital Switching Output (Alarm)
LLD-150-PROF2 Manual Interface Connection dec+sig: 049.960_000005<CR><LF> Error case dec/hex: E15<CR><LF> (see page 42, chapter 11, Error Codes RS232 and Profibus) Digital Switching Output (Alarm) With the help of a user-selectable distance threshold, the switching output can be set to monitor objects or conditions for positive or negative overstep. - Page 39 LLD-150-PROF2 Manual Interface Connection In the case of a negative AH, the output switching pattern will be inverse. Figure 8 : Digital switching output behavior with positive and negative hysteresis Example: A moving object is assumed to be monitored within a window of 10 m to 11 m with a hysteresis of 0.2 m.
-
Page 40: Trigger Input
The distance measurement will always be started with a delay of 5 ms in addition with the programmed trigger delay time. Having done this, the LLD-150-PROF2 has to be switched to trigger mode (see 8.6, DF – distance measurement with external trigger). -
Page 41: List Of Commands
Queries / sets offset Sets current distance as offset Turns Laser on (do not use, please use DT) Turns Laser off Displays all parameter values Resets all parameters to standard values (don’t use) Only for devices with internal heating (LLD-150-PROF2-H) Page 41... -
Page 42: Error Codes Rs232 And Profibus
LLD-150-PROF2 Manual Error Codes RS232 and Profibus Error Codes RS232 and Profibus Table 16 : Error codes Code Description Action Reflexes are too weak, or distance Use white target board from LDM (front edge) to target is increase distance to target less than 0.1 m... -
Page 43: Gsd Data
LLD-150-PROF2 Manual GSD Data GSD Data ;========================================================== ; Profibus Device ASTECH Unigate for LDM4xA and LDM4xP ; Model : LDM 4x Series ; Description : LDM 4x Series with Profibus-DP ; Language : English ; Date : 6 September 2005 ;... - Page 44 LLD-150-PROF2 Manual GSD Data Bitmap_Device "LDM4xP_" ; Supported DP features Freeze_Mode_supp Sync_Mode_supp Auto_Baud_supp Set_Slave_Add_supp ; Maximum polling frequency Min_Slave_Intervall ; 100 us ; Maximum supported sizes Modular_Station ; modular Max_Module Max_Input_Len = 244 Max_Output_Len = 244 Max_Data_Len = 432 Modul_Offset Fail_Safe ;...
-
Page 45: Contact Assignment For Cable Connectors
LLD-150-PROF2 Manual Contact Assignment for Cable Connectors Contact Assignment for Cable Connectors Numbers are displayed when looking at the terminal side. RS232 Power supply and Trigger 5-pin male cable connector 5-pin female cable connector Profibus Output Profibus Input 4-pin male cable connector... -
Page 46: Eg Declaration Of Conformity
EG Declaration of Conformity EG Declaration of Conformity In accordance with the Directive of Electromagnetic Compatibility 2004/108/EG The company WayCon Positionsmesstechnik GmbH in Mehlbeerenstr. 4, 82024 Taufkirchen / Germany herewith declare, represented by the signatory, that the following designated product...
Need help?
Do you have a question about the LLD-150-PROF2 and is the answer not in the manual?
Questions and answers