
Related Manuals for Denon Professional DN-500BD MKII

Summary of Contents for Denon Professional DN-500BD MKII
- Page 1 User Guide English ( 3 – 30 ) Guía del usuario Español ( 31 – 59 ) Guide d’utilisation Français ( 60 – 87 ) Guida per l’uso Italiano ( 88 – 115 ) Benutzerhandbuch Deutsch ( 116 – 144 ) Appendix English ( 145 –...
-
Page 2: Box Contents
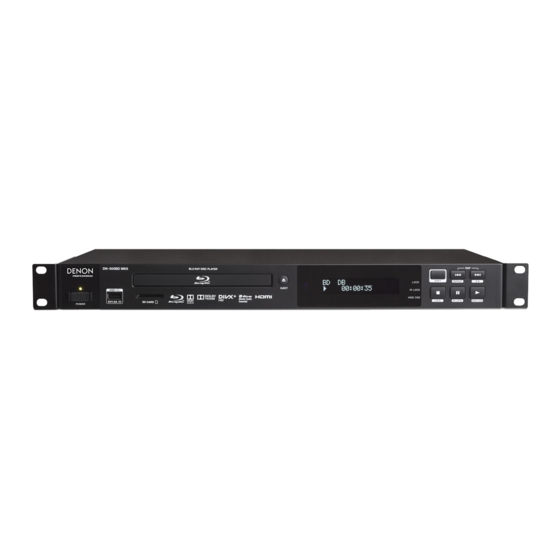
User Guide (English) Introduction Box Contents Support DN-500BD MKII Rack Ears & Screws For the latest information about this product (system requirements, compatibility information, etc.) and Power Cable User Guide product registration, visit denonpro.com. Remote Control Safety & Warranty Manual Safety Instructions Please also see the included Safety &... - Page 3 12 13 1. Power: Press this button to turn DN-500BD MKII on/off. The light above the button will be red when it is off or green when it is on. Make sure the AC In is properly connected to a power outlet. Do not turn the unit off during media playback—doing so could damage your media.
-
Page 4: Rear Panel
HDMI cable to make this connection. 6. LAN Port: This input lets you connect a host device (usually a computer) to DN-500BD MKII. You can use the host device to control DN-500BD MKII via commands sent from it. Alternatively, use this connection to access the internet. -
Page 5: Remote Control
1. Power ( ): Press this button to turn DN-500BD MKII on/off. The light above the button on DN-500BD MKII will be red when it is off or green when it is on. Make sure the AC In is properly connected to a power outlet. Do not turn the unit off during media playback—doing so could damage your media. -
Page 6: Battery Usage
22. Audio: Press this button during video playback to show current audio setting in the upper-left corner of the screen. Each press after that will select the next available setting. The available settings depend on the supported audio configurations of your video. For example, a video file may let you select Stereo, Mono, Left, or Right, while a Blu-ray Disc may let you select DTS-HD MA (Master Audio) or Dolby Digital in various languages. - Page 7 1. Connect DN-500BD MKII to your TV monitor or display by doing one of the following: • Use an HDMI cable to connect the HDMI Output to the HDMI input of your TV monitor or display.
-
Page 8: Initial Wizard
Page 5. If you do not want to use that aspect ratio, press Skip Back ( ) to return to the previous page and select a different one. 8. On Page 6, press OK to view the Home screen and start using DN-500BD MKII, or press Skip Back ) to return to the previous page. -
Page 9: Operation
1. Press Eject ( ) on DN-500BD MKII or the remote control to open the disc tray. 2. Insert a disc into the disc tray, and press Eject ( ) on DN-500BD MKII or the remote control again to close it. The display will show LoAd when the disc is loading and then bdnU when the disc is loaded. -
Page 10: Additional Functions
You can do this up to 5 times before it returns to normal playback speed. To resume playback, press Play ( ) on DN-500BD MKII or the remote control. To skip to the next chapter, press Skip Forward ( ) on DN-500BD MKII or the remote control. - Page 11 To close the Information panel, press Info. (If the panel does not close, press OK once and then press Info.) A bookmark is a specific location in a video that is stored in DN-500BD MKII’s memory. You can set up to 12 bookmarks and then jump to those locations directly, saving you the time of scanning through the video later.
-
Page 12: Playing Audio Discs
1. Press Eject ( ) on DN-500BD MKII or the remote control to open the disc tray. 2. Insert an audio CD into the disc tray, and press Eject ( ) on DN-500BD MKII or the remote control again to close it. (The CD must be properly finalized.) The display will show LoAd when the disc is loading and then Cd when the CD is loaded. - Page 13 2. Set the desired ending point by pressing A-B on the remote control again, or press Shift and Skip Forward ( ) on DN-500BD MKII again. A-B will appear on the screen, and the loop will start and repeat continuously.
-
Page 14: Playing Files (Video, Audio, Or Picture)
2. Do any of the following in the Program page: • At any time, press Play ( ) on DN-500BD MKII or the remote control to start playing the Program. • At any time, press Return on the remote control to exit the Program page. This will clear all slots of the Program. - Page 15 • Press Home to return to the Home screen. While using the Media Center, you cannot use any buttons (on DN-500BD MKII or the remote control) other than the ones described above. To stop playback, press Stop () on DN-500BD MKII or the remote control.
- Page 16 • Press Home to return to the Home screen. While using the Media Center, you cannot use any buttons (on DN-500BD MKII or the remote control) other than the ones described above. To stop playback, press Stop () on DN-500BD MKII or the remote control.
- Page 17 ) on DN-500BD MKII or the remote control. To skip to the previous file, press Skip Back ( ) twice on DN-500BD MKII or the remote control (though if you are within the first few seconds of the current file, you can press it just once.) While viewing pictures, press this button only once instead of twice.
- Page 18 3. Select the folder for the desired file type: Photo, Music, or Video. 4. Select the file from which you want to start playback, and then press Play ( ) on DN-500BD MKII or the remote control, or press OK on the remote control. The playlist will start playing.
-
Page 19: Adjusting The Sound
Adjusting the Picture To change the picture resolution, press HDMI on the remote control. Each press will select the next available resolution: Auto (DN-500BD MKII will detect the optimal resolution automatically), 480i/576i, 480p/576p, 720p, 1080i, or 1080p. Alternatively, change the resolution in the Setting menu. See Adjusting the Settings to learn how to do this. -
Page 20: Other Features
Other Features Lock The Lock feature disables almost all of the buttons on DN-500BD MKII’s front panel. This helps prevent accidental changes to playback. To enable/disable the Lock feature, press and hold Shift and then press Stop on DN-500BD MKII’s front panel. -
Page 21: Adjusting The Settings
Adjusting the Settings Setting The Setting menu lets you change settings that affect DN-500BD MKII’s overall operation. There are several different types of settings you can configure: playback (see Playback Setup below), video (see Video Setup below), sound (see Audio Setup... - Page 22 When you start playing that disc again, you can choose to start from that point or from the beginning of the disc. DN-500BD MKII can do this for up to 5 discs, replacing the oldest one if it needs to remember a new one. When set to Off, this feature is disabled.
- Page 23 Important: This option applies only to the HDMI output at a 1080p resolution. o DVD 24p Conversion: When set to On, DN-500BD MKII will convert the frame rate of a 1080p DVD video playing at 24 Hz to 60 Hz (for locations using the NTSC standard) or 50 Hz (for locations using the PAL standard).
- Page 24 • Close Caption o CC Attribute: When set to Auto, the closed captioning feature will use the default font, size, colors, opacity, etc. When set to Custom, you can select these attributes to your preference (described below). o Font Color: The color of the text: Default, White, Black, Red, Green, Blue, Yellow, Magenta, or Cyan.
- Page 25 Dynamic Range: When set to On, DN-500BD MKII will apply some compression to smooth out the high and low volume levels of the audio. When set to Off, DN-500BD MKII will not use any compression. When set to Auto, DN-500BD MKII will use the compression specified by the Blu-ray Disc being played (for other discs, there will be no compression).
- Page 26 PIN shown on the screen into the software control panel for your wireless router or access point). o Proxy Setting: When set to Disable, DN-500BD MKII will not use a proxy server. When set to Enable, DN-500BD MKII will use a proxy server with the information in the Proxy Host and Proxy Port windows.
- Page 27 Code 1, Code 2, or Code 3. o HDMI CEC: When set to On, DN-500BD MKII’s remote control can send commands to DN- 500BD MKII as well as a TV connected to the HDMI output (your TV must support HDMI CEC).
- Page 28 BDMV Options • Title: The number on the left is the currently playing title, which you can change. The number on the right is the total number of titles. • Chapter: The number on the left is the currently playing chapter, which you can change. The number on the right is the total number of chapters.
- Page 29 Audio CD Options • Track: The number on the left is the currently playing track, which you can change. The number on the right is the total number of tracks on the disc or in the program. • Time: Use this to show the time as the elapsed time for the track (Track), remaining time for the track (–Track), elapsed time for the disc (Disc), or remaining time for the disc (–Disc).
Need help?
Do you have a question about the DN-500BD MKII and is the answer not in the manual?
Questions and answers