
Summary of Contents for Visionary MV4
- Page 1 MV4 • User Manual IP MultiViewer Visionary Solutions, Inc. 2060 Alameda Padre Serra, Suite 100 • Santa Barbara, CA 93103 • 805-845-8900 WWW.VISIONARYAV.COM...
-
Page 2: Table Of Contents
IMENSIONS ©2022 Visionary Solutions, Inc. All rights reserved. PackeTV® and PacketAV® are trademarks of Visionary Solutions, Inc. in the United States and other countries. All other brand names, product names and trademarks are the property of their respective owners. Certain trademarks, registered trademarks, and trade names may be used to refer to either the entities claiming the marks and names or their products. -
Page 3: Introduction
Gigabit Ethernet (GbE) switches (Jumbo Frames enabled). Using an existing CAT 5/6 infrastructure, users can connect CAT 5/6 to any MV4 IP Multiviewer anywhere on the same GbE network. The MV4 decoders take the IP packets received over CAT 5/6 cables, same as other Visionary Packet AV decoders, and sends them to the MV4 encoder to be converted into a packetized network stream that is received by a Packet AV decoder. -
Page 4: Network Av Infrastructure Prerequisites
The MV4 will work with most non-blocking, IGMP with IGMP Snooping, 8K or better Jumbo Packet 1GbE network switches. At least one layer-3 switch with IGMP-query capability is required. For PIM (multicast routing) of MV4 video streams, the network switches would need to be capable of PIM (Sparse, Dense, or Sparse-Dense). -
Page 5: Switch Guidlines
1. Enable IGMP querying and snooping (set IGMP Version to IGMP V2 if the switch is capable). To enable the transmission of a source to multiple destinations, MV4 devices make use of multicast. The default behavior of a layer-2 switch is to broadcast those packets, which means that every packet will be transmitted to all possible destinations. -
Page 6: Implementation Considerations
ONSIDERATIONS MV4 devices can be installed on a physically separate network or converged onto an existing GbE network. When implementing, it is important to decide at the earliest stages of planning if the system will be integrated into the rest of the network or if it will reside on a dedicated AV network. -
Page 7: Netwrok Discovery
ISCOVERY Discover your MV4 IP Multiviewer on the network. By default, the encoders and decoders are shipped from the factory in DHCP mode with Auto IP Failover. In DHCP mode, each encoder and decoder unit are automatically assigned a unique IP address by the DHCP server. - Page 8 IP addresses. On a Windows OS, the ping command only displays the first responding address. 5. Use nmap to scan for Visionary Solutions MAC Addresses. 6. For decoders only: Connect to the network via HDMI to a display. The IP address displays on the bottom right of the Boot up screen image on the display device when there is no source connected.
-
Page 9: Configuration
Configuration ONFIGURATION MV4 E IP A ONFIGURING NCODER AND ECODER DDRESSES As previously mentioned, by default, the encoders and decoders are shipped from the factory in DHCP mode with Auto IP Failover. For a permanent installation, and to ensure system consistency, it is recommended to configure all of the encoders and decoders with static IP addresses. -
Page 10: Configuring Stream Settings (Manually)
Note: Visionary’s MV4E encoder defaults to a multicast stream based on their serial numbers. We recommend that you leave this as the stream address unless the range (225.168.0.0– 225.169.255.255) conflicts with other multicast streams on your network. If for assistance. -
Page 11: Video Format Setting (Decoder Only)
The OSD (On Screed Display) is used to put user text onto the screen as an overlay. Once text is entered, the text will appear in the upper left corner of the display. The default text color is blue. To obtain a key to unlock advanced OSD features (font, font size, position, and color) contact sales@visionary-av.com. -
Page 12: Mv4 Configuration
ISPLAY ODES MV4 IP Multiviewer supports Quad (2x2), Picture In Picture (PIP), Picture Aside Picture (PAP), Full Screen, and Custom Multiview layout configurations In Quad Mode, the screen is split into four fields of equal size each displaying the entire contents of four different video sources. - Page 13 MV4 Configuration (PAP/POP) M ICTURE SIDE ICTURE In PAP Mode, the screen is split in two fields of equal size displaying dual window side-by-side (portrait). • Supports 1080P & 4K30 output CREEN In Full Screen Mode, one of the four video sources is displayed in full screen size and maximum resolution.
-
Page 14: Front Panel Control
ANEL ONTROL Note: Press and hold the UP/DOWN buttons can increase/decrease the value continuously. MODE Press MODE button to cycle the following MV4 multiviewer modes. 4K30 Output 1080P Output Used to switch the output resolution between 1080P and 4K30 INFO Used to display the OSD information as the below format. -
Page 15: Osd Menus
MV4 Configuration OSD M ENUS Note: OSD functions will automatically save the last value setting. Press ENTER to call out: Use UP/DOWN front panel buttons to select a menu option, and then press ENTER button. MAGE UALITY DJUST Image Quality Adjust is available for all the modes. - Page 16 MV4 Configuration Image Channel Set Up for Picture Aside Picture (PAP) Mode: (4K30 Only) 1. Use the UP/DOWN front panel buttons to select Channel L or Channel R. 2. Use the ENTER front panel button to select the input source for selected channel.
- Page 17 MV4 Configuration 7. Hor Width: Press ENTER to adjust the image’s width by UP/DOWN button press. 8. Ver Start: Press ENTER to adjust the image’s vertical start position by UP/DOWN button press. 9. Ver Height: Press ENTER to adjust the image’s height by UP/DOWN button press.
- Page 18 MV4 Configuration 10. Img L Hor Start: use to adjust image’s left Horizontal position to match the above Hor Start. 11. Img R Hor Start: use to adjust image’s right Horizontal position to match the above Hor Start. 12. Img L Ver Start: use to adjust image’s left Vertical position to match the above Ver Start.
- Page 19 MV4 Configuration Image Convert for Custom Mode: (1080P Only) 1. Use the UP/DOWN front panel buttons to select the channel and option to adjust. 2. Use the ENTER button to set Mirror OFF/ON for selected channel. 3. Use the ENTER button to select alpha blending (image transparency), then adjust using UP/DOWN buttons. The overlay sequence is Ch1/2/3/4(top).
-
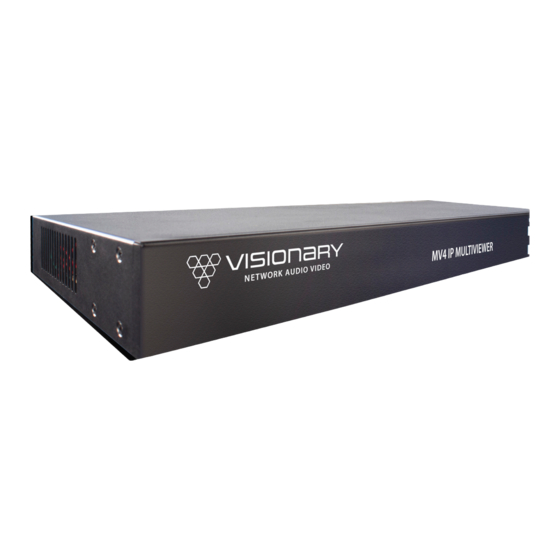
Page 20: Front & Rear Hardware Images
MV4 Configuration Image Convert for Full Screen Mode: (1080p & 4K30) 1. Use the UP/DOWN front panel buttons to select the option to adjust. 2. Mirror: Press ENTER to switch between OFF/ON. 3. Rotation: Press ENTER to switch between OFF/R90/180/L90 Note: Rotation is only available for single-viewing mode and when the input/output resolutions are the same. -
Page 21: Encoder Options
Encoder Options NCODER PTIONS MV4 E NCODER EVICE e.g., UNIT.ID – By default, the UNIT.ID of the encoder is the Model Number and the serial number ( MV4E-000101, serial . The UNIT.ID can be changed by the user on the Network tab. -
Page 22: Mv4 Enocder Network Tab
In DHCP mode, shows if the values are valid. If DHCP is failed, the mode shows as Auto IP (even though you cannot select this mode directly), and the Auto IP values display in the IP.xxxxxx fields. See section Configuring MV4 Encoder and Decoder IP... -
Page 23: Mv4 Encoder Configuration Tab
Encoder Options MV4 E NCODER ONFIGURATION STREAM.MODE – Unicast or multicast. See section Configuring Stream Settings (Manually). STREAM.AUDIO – Select the source of audio for the AV over IP stream - DECODER_1, DECODER_2, DECODER_3, DECODER_4. STREAM.VIDEO – Used to set encoder input source select – DECODER_1, DECODER_2, DECODER_3, DECODER_4, QUAD, POP, PIP VIDEO.HDCP_FORCE_ON –... -
Page 24: Decoder Options
• Reenter Password – reenter new password Important: Make sure you write the new password down. If it is lost or forgotten, you will need to call Visionary Solutions support to assist in a console factory default of the unit. -
Page 25: Mv4 Decoder Network Tab
If DHCP is failed, the mode shows as Auto IP (even though you cannot select this mode directly), and the Auto IP values display in the IP.xxxxxx fields. See section Configuring MV4 Encoder and Decoder IP Addresses. -
Page 26: Mv4 Decoder Configuration Tab
ONFIGURATION STREAM.HOST – See section Configuring Stream Settings (Manually). STREAM.MODE – Unicast or multicast. See section Configuring MV4 Encoder and Decoder IP Addresses. STREAM.AUDIO – Displays the decoder audio source for the AV over IP stream. AUDIO.VOLUME – See section Configuring Stream Settings (Manually). -
Page 27: Mv4 Decoder System Tab
• Reenter Password – reenter new password Important: Make sure you write the new password down. If it is lost or forgotten, you will need to call Visionary Solutions support to assist in a console factory default of the unit. -
Page 28: Control
1. The latest Java JRE runtime is a prerequisite on the machine running VLite. The JRE can be found here: http://www.oracle.com/technetwork/java/javase/downloads/jre8-downloads-2133155.html. 2. Download the latest Vision Lite software from visionary-av.com. 3. Manually create a read/write-able folder/directory C:\VLite at the root of your C:\ drive. This is the recommended directory to place the downloaded VLite.jar file, but you can place the file anywhere on your computer. - Page 29 Control 5. Launch the Vision Lite Server application by double clicking the VLite.jar file, OR from a command line interface using the following command: java -jar VLite.jar. 6. The Vision Lite Server window opens. 7. Go to the Network Interface menu and select the appropriate network interface.
- Page 30 Control Select the network interface that the Vision Lite Server will be “listening” on. If your machine has more than one network interface, you will need to select the interface that is connected to the same network as the units. Important: The Vision Lite Server window can be minimized in the background;...
- Page 31 Control 9. Copy the Vision Lite Server IP Address from the Vision Lite Server window to your clipboard. To launch the Vision Lite User Interface, open a browser page and copy the Vision Lite Server IP Address IP Address to the URL.
- Page 32 Control The Configuration page opens. You now have access to configure each unit. • On the Configuration page, you can click on the IP Address (hyperlink) of any endpoint to open the embedded web interface for each unit. On the unit’s web interface, you can rename the units and/or set a user defined location. Important: SPECIAL CHARACTERS ARE NOT ALLOWED FOR UNIT ID AND LOCATION.
-
Page 33: Third-Party Control Drivers And Plugins
ONTROL The MV4 IP Multiviewer is capable of being controlled from a variety of third-party manufacturers, supported systems include Crestron, Extron, AMX, RTI, QSC and Symterix. The API is a human readable key value pair accessible via, HTTP GET/POST, UDP unicast, and UDP multicast. - Page 34 POP, PIP, ALL} MV.BUTTON None UP, DOWN, ENTER, BACK, ENCODER Used to emulate the front RES, INFO, AUDIO, MODE panel buttons of the MV4. MV.CUSTOM_MOV None {RES|CHX|HS|VS} ENCODER Only available in Custom Mode. Used to set the custom position of a channel.
- Page 35 RES={4k,1080p} CHX={4k:1,2 or 1080p:1,2,3,4} HS=Horz start, VS=Vert start, HW=Horz Size, VW=Vert Size MV.RESOLUTION 1080 4K, 1080 ENCODER Used to set the MV4 encoder/HDMI output resolution. MV.FDEFAULT None TRUE ENCODER Used to perform factory default. MV.HRESET None TRUE...
- Page 36 Control not be genlocked to the source encoder. Useful for some projectors that cannot accommodate wide clock range. Should be set to TRUE for video wall setups. VIDEO.HDCP_FORCE_ON TRUE for TRUE, FALSE DECODER This determines whether D4X00 a unit forces HDCP for all FALSE for sources or sinks (TRUE) or E4X00...
- Page 37 VIDEO.POWER_SAVE when there is no IP Video Stream detected Example: Set MV4 to quad mode, displaying all 4 sources simultaneously GET: http://admin:admin@192.168.8.101/cgi- bin/wapi.cgi?CMD=START&UNIT.ID=ALL&STREAM.VIDEO=QUAD&CMD=END POST: 1. http://192.168.8.101/cgi-bin/wapi.cgi 2. Request Header: "Content-type", "application/x-www-form-urlencoded"...
- Page 38 Control 4. POST Data: “CMD=START&UNIT.ID=ALL& STREAM.VIDEO=DECODER_1&CMD=END” Example: Emulate pressing the MV4 front panel Mode button to change the MV4 output mode GET: http://admin:admin@192.168.8.101/cgi- bin/wapi.cgi?CMD=START&UNIT.ID=ALL&MV.BUTTON=MODE&CMD=END POST: 1. http://192.168.8.101/cgi-bin/wapi.cgi 2. Request Header: "Content-type", "application/x-www-form-urlencoded" 3. Request Header: “Authorization”, “Basic “ + Base64EncodedString(“admin:admin”) this evaluates to Basic YWRtaW46YWRtaW4= 4.
- Page 39 3. Request Header: “Authorization”, “Basic “ + Base64EncodedString(“admin:admin”) this evaluates to Basic YWRtaW46YWRtaW4= 4. POST Data: “CMD=START&UNIT.ID=ALL&MV.CUSTOM_MOV=1080p|1|300|100&CMD=END” Example: Put MV4 into a custom layout (1080P) that show channel 1 full screen, and channels 2, 3, and 4 displayed in the lower 3 of display.
-
Page 40: Troubleshooting
IRMWARE It is important to know the version of the MV4 firmware in order to troubleshoot the unit. To find the firmware version of your MV4 from the embedded device web Interface, navigate to the Device tab and the firmware version is shown. -
Page 41: Factory Default Settings
2. Use a paperclip or similar device to press physical reset button. 3. Press and hold the reset button until the LED on the front of the MV4 indicate the unit has been reset (Fast Link LED). 4. The unit will reset to its factory default settings. -
Page 42: Product Specifications
Product Specifications RODUCT PECIFICATIONS... -
Page 43: Dimensions
Dimensions IMENSIONS...
Need help?
Do you have a question about the MV4 and is the answer not in the manual?
Questions and answers