Table of Contents
Advertisement
Quick Links
Advertisement
Table of Contents

Related Manuals for Acer B7 B247YU bmiipprx


Summary of Contents for Acer B7 B247YU bmiipprx
- Page 1 Acer LCD Monitor User Guide...
- Page 2 Serial number: ___________________________________ Date of purchase: ________________________________ Place of purchase: ________________________________ Acer and the Acer logo are registered trademarks of Acer Incorporated. Other companies’ product names or trademarks are used herein for identification purposes only and belong to their respective companies.
-
Page 3: Information For Your Safety And Comfort
Information for your safety and comfort Safety instructions Read these instructions carefully. Keep this document for future reference. Follow all warnings and instructions marked on the product. Special notes on LCD monitors The following are normal with the LCD monitor and do not indicate a problem. •... -
Page 4: Safe Listening
Accessibility Be sure that the power outlet you plug the power cord into is easily accessible and located as close to the equipment operator as possible. When you need to disconnect power from the equipment, be sure to unplug the power cord from the electrical outlet. Safe listening To protect your hearing, follow these instructions. -
Page 5: Product Servicing
• If an extension cord is used with this product, make sure that the total ampere rating of the equipment plugged into the extension cord does not exceed the extension cord ampere rating. Also, make sure that the total rating of all products plugged into the wall outlet does not exceed the fuse rating. -
Page 6: Potentially Explosive Environments
We at Acer are very conscious of the environmental effects of our business and strive to identify and provide the best working procedures to reduce the environmental impact of our products. -
Page 7: Lcd Pixel Statement
LCD pixel statement The LCD unit is produced with high-precision manufacturing techniques. Nevertheless, some pixels may occasionally misfire or appear as black or red dots. This has no effect on the recorded image and does not constitute a malfunction. This product has been shipped enabled for power management: •... -
Page 8: Taking Care Of Your Vision
Taking care of your vision Long viewing hours, wearing incorrect glasses or contact lenses, glare, excessive room lighting, poorly focused screens, very small typefaces and low-contrast displays could stress your eyes. The following sections provide suggestions on how to reduce eyestrain. Eyes •... -
Page 9: Declaration Of Conformity
(“x” = 0~9, a ~ z, A ~ Z, or blank) We, Acer Incorporated, hereby declare under our sole responsibility that the product described above is in conformity with the relevant Union harmonization legislations as below Directive and following harmonized... -
Page 10: Federal Communications Commission Declaration Of Conformity
Acer America Corporation 333 West San Carlos St., San Jose Suite 1500 CA 95110, U. S. A. Tel : 254-298-4000 Fax : 254-298-4147 www.acer.com Federal Communications Commission Declaration of Conformity This device complies with Part 15 of the FCC Rules. Operation is subject to the following... - Page 11 Information for your safety and comfort Safety instructions Special notes on LCD monitors Cleaning your monitors Accessibility Safe listening Warnings Using electrical power Product servicing Potentially explosive environments Additional safety information IT Equipment Recycling Information Disposal instructions LCD pixel statement Tips and information for comfortable use Finding your comfort zone Taking care of your vision...
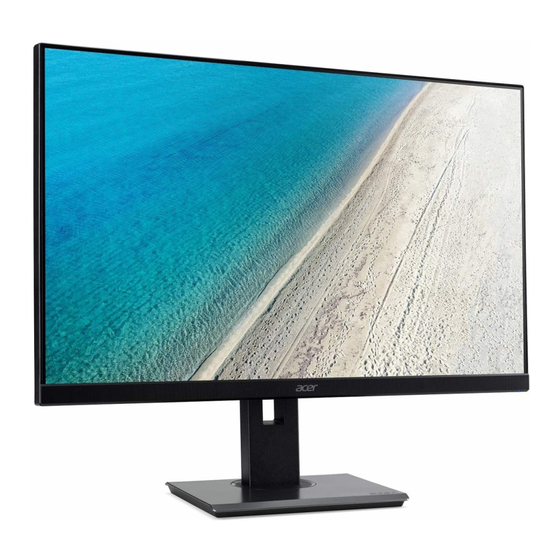
- Page 12 Unpacking Please check that the following items are present when you unpack the box, and save the packing materials in case you need to ship or transport the monitor in the future. Mini DP Cable LCD monitor Quick start guide (Optional) LCD Monitor B7 series-B247YU USER GUIDE...
-
Page 13: Screen Position Adjustment
SCREEN POSITION ADJUSTMENT In oder to optimize the best viewing position, you can adjust the height/tilt of the monitor. • Height Adjustment After pressing the top of the monitor then you can adjust the height of the monitor. 120mm • Tilt Please see the illustration below for an example of the tilt range. -
Page 14: Monitor Pivot
• Swivel With the built-in pedestal, you can swivel the monitor for the most comfortable viewing angle. 45° 45° • Monitor Pivot Before rotating the display,lift it to the top position and then push it back to the utmost degree. Rotate clockwise or counter-clockwise until the monitor stops at ±90°. -
Page 15: Connecting The Adapter And Ac Power Cord
Connecting the adapter and AC Power cord • Check first to make sure that the power cord you use is the correct type required for your area. • The monitor has a universal power supply that allows operation in either 100/120 V AC or 220/240 V AC voltage area. -
Page 16: Display Data Channel (Ddc)
Display Data Channel (DDC) To make installation easier, so long as your system supports the DDC protocol, the monitor is able to plug-and-play. The DDC is a communication protocol through which the monitor automatically informs the host system about its capabilities; for example, supported resolutions and corresponding timing. - Page 17 19-pin color display signal cable PIN No. Description PIN No. Description TMDS Data2+ TMDS Data2 Shield TMDS Data2- TMDS Data1+ TMDS Data1 Shield TMDS Data1- TMDS Data0+ TMDS Data0 Shield TMDS Data0- TMDS Clock+ TMDS Clock Shield TMDS Clock- Reserved (N.C. on device) DDC/CEC Ground +5V Power Hot Plug Detect...
-
Page 18: Standard Timing Table
Standard timing table VESA MODE MODE Resolution 640x480 60Hz 640x480 66.66Hz VESA 720x400 70Hz SVGA 800x600 56Hz SVGA 800x600 60Hz 1024x768 60Hz 1024x768 70Hz VESA 1152x864 75Hz SXGA 1280x1024 60Hz 1280x720 60Hz VESA 1280x800 60Hz WXGA 1440x900 60Hz WXGA+ 1680x1050 60Hz WSXGA+ 1920x1080... -
Page 19: Installation
Installation Turn off your computer and unplug your computer's power cord. Connect the signal cable to the Mini DP and /or HDMI (optional) and /or DP (optional) input socket of the monitor, and the Mini DP and /or HDMI (optional) and /or DP (optional) output socket of the graphics card on the computer. Then tighten the thumbscrews on the signal cable connector. -
Page 20: User Controls
User Controls External controls Power button Turns the monitor on/off.Blue indicates power on. Amber indicates standby/ power saving mode. Function key Press to view Main page. Press again to enter hotkey1 function. When the Function Menu is active, press this key to view the basic information for your monitor and current input or reset the custom color settings to the factory defaults. -
Page 21: Using The Shortcut Menu
Using the Shortcut Menu ------------------------------------------------------------------------------------------------------------- Note: The following content is for general reference only. Actual product specifications may vary. The OSD (onscreen display) can be used to adjust the settings of your LCD monitor. Press the MENU key to open the OSD. You can use the OSD to adjust the picture quality, OSD position and general settings. - Page 22 Selecting the input Open the Input control and select HDMI1, HDMI2, Mini DP ,DP or Auto Source. When you are done, press the joystick to exit current page and store. Input Input HDMI Auto Source Move Exit Main menu Press the MENU key to open the OSD. Toggle the joystick to select Picture from the OSD.
- Page 23 Contrast: Adjust the contrast from 0 to 100. ----------------------------------------------------------------------------------------------------------- Note: Sets the degree of difference between light and dark areas. Black Boost: Adjust the black level from 0 to 10. Enhances shadows by increasing the brightness without changing lighter shades. Blue Light: Filters out blue light to protect your eyes by adjusting how much blue light is shown -- 80%, 70%, 60%, or 50%.
- Page 24 Color temperature: Default is warm. You can choose Cool, Normal, Warm, Bluelight or User. Modes:To choose scenario mode. Color Space: You can choose sRGB, EBU, DCI, SMPTE-C and Standard. Grayscale Mode:To choose Grayscale mode. 6-axis Hue: Adjust the red, green, blue, yellow, magenta and cyan hue. 10.
- Page 25 Adaptive Sync:To choose Adaptive Sync on/off. Refresh rate num: Display the panel’s current refresh rate on the screen. ----------------------------------------------------------------------------------------------------------- Note: If Adaptive Sync set "On" you can see the V Frequency to changes in the OSD. Mode - Standard Picture Language English Color...
- Page 26 System Mode - Standard Picture HDMI1 Input Color Auto Source DP1.2 DP Format Audio Performance Wide Mode Full PIP/PBP Hot Key Assignment System DDC/CI HDMI Black Level Normal Move Enter Quick Start Mode Mode - Standard Picture Off Quick Start Mode Color Audio Performance...
- Page 27 11. HDMI Black level: Select to set HDMI black level. 12. Quick start mode: Select Off or On. Turn on to speed up boot speed. Save Setting to…(User mode only) Mode - User Picture Mode: Standard Color Mode: ECO Audio Mode: Graphic Performance Mode: Movie...
-
Page 28: Troubleshooting
Check if the computer system is switched on and in power saving/standby mode. If OSD Lock is On, the LED status set Amber. Note: Acer monitor is purposed for video and visual display of information obtained from electronic devices.
Need help?
Do you have a question about the B7 B247YU bmiipprx and is the answer not in the manual?
Questions and answers