Table of Contents
Advertisement
Advertisement
Table of Contents

Related Manuals for Nexxt Vector 2400AC


Summary of Contents for Nexxt Vector 2400AC
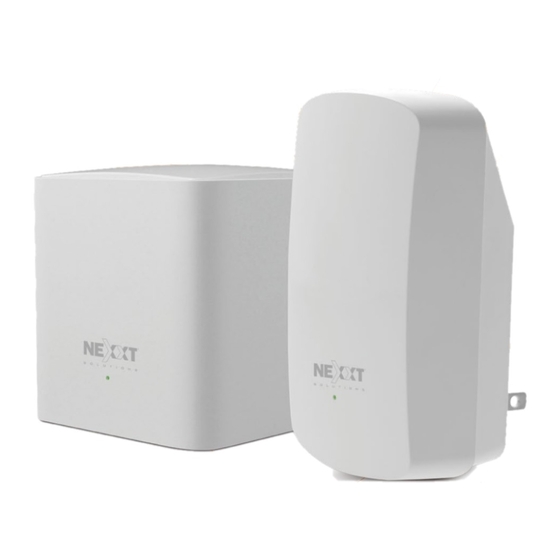
- Page 1 2 4 0 0 A C AEFME904U2 W H O L E - H O M E W i - F i S Y S T E M...
-
Page 2: Table Of Contents
• Guest network • UPnP Vektor System Settings • Parental control • DHCP server • Create or Log in into Nexxt Smart cloud account • Internet settings • DNS • Add Vektor to Nexxt Wireless Smart cloud Account. • QOS •... - Page 3 Introduction LED indicator Status Description This advanced network device works as a Mesh Wireless Router. Solid The system is working properly Before setting up the Vektor2400-AC, you must verify that you have No power is being supplied to therouter high-speed internet access available. or the switch is off Solid green Good connection...
-
Page 4: Setup
1. Reset button: Press and hold this button for 8-10 seconds to restore the router to its factory default settings. The router must be 1. Install the Nexxt Wireless App on your mobile device by searching for powered on for this function to work. -
Page 5: Vektor System Settings
Vektor System Settings 3. Tap on Login, then Register on the upper right-hand corner. • Create or Log in into Nexxt Smart cloud account 1. You will need to create an account if you want to be able to control the Vektor while you are away from your home. - Page 6 4. Enter in your email address and a password. Password must be at 5. You will receive a confirmation email, click on the link in the email to least 6 characters long. Then click on Register. activate your account. 6. You will get a confirmation that your account was registration was successful.
-
Page 7: Add Vektor To Nexxt Wireless Smart Cloud Account
Add Vektor to Nexxt Wireless smart cloud 7. Go back to the Login page and account enter your email and password you just created. Click Login. 1. You will need the default name and password of the Vektor, it should be on label on the bottom of the node. - Page 8 2. Choose the default SSID of the Vektor and type in the password from 3. You will now be in the Vektor setup screen. Tap on Setup. the bottom label. Tap on Connect. Once you are connected, go back to the app.
- Page 9 4. It will automatically determine what type of Internet you are using. 5. It will ask you to change the default Wi-Fi name and Password (at You may change it, if you like to set up something different. To do so, least 8 characters long).
- Page 10 6. It will ask you to connect to the Wi-Fi you just created. Tap on 7. To add additional nodes, you will need to go to Settings…Add Node. Connect. Tap on the Wi-Fi name you just created, enter the Tap on OK. It will take you to the main interface. password and once connected, go back to the app.
-
Page 11: Notifications
Notifications 1. Tap on My Profile icon on the upper right-hand corner. Then tap on Notifications. 3. Do not disturb: To use the Do not disturb feature, tap on the switch to turn it on. You can set the time to which you want the Do not disturb to turn on and off. -
Page 12: Help And Feedback
Help and feedback - Tap on My Profile icon on the upper right-hand About us -Tap on My Profile icon on the upper right-hand corner. Then corner. Then tap on Help and feedback. tap on About us. Current app version, Official website, and Facebook page. -
Page 13: Clear Cache
My Wi-Fi Clear cache – If you want to erase the history, tap on Clear cache. -
Page 14: Node Settings
Node settings – Tap on any node to get to Node settings 2. Open Nexxt Wireless app. You should be on the main My WiFi · Device location – Choose a preexisting location or go to Custom to page, tap on Connected Devices. - Page 15 3. Tap on the device, you wish to add to the Blacklist. For this example, 4. Tap on Add to blacklist, a confirmation popup will come up. If you are we will be blocking “CtK-Note9”. sure you do not want this device to access the Vektor Mesh. Then tap on Add to Blacklist.
- Page 16 5. To see all users/devices that are on the Blacklist, tap on the lower 6. On this screen, you can Remove the device, or Remove All Devices. right-hand corner Blacklist icon. Just tap on Remove, next to the device you wish to remove from the Blacklist or Remove All Devices to remove them all.
- Page 17 2. Tap on the switch to enable the Guest network. Guest network - Use Guest network to allow guests to get online and share a password via various options. How to enable Guest network. 1. Open Nexxt Wireless app. Tap on Settings. Then tap on Guest Network.
- Page 18 3. The default Guest Network WiFi Name is Vektor_Guest. You may 4. Validity period: this is how long you want the Guest network to be change it to anything you like. The default Guest Network WiFi available. Tap on Validity period, you can set 4, 8 hours, or Always Password is 12345678.
- Page 19 5. Tap on Save to enable the Guest network. Vektor_Guest should be 6. You can also share the Guest Network WiFi Name and Password available now for your guests to enjoy your Wi-Fi. information via a number of different ways. Tap on the Share icon on the upper right-hand corner.
- Page 20 Validity Period, go back and tap on the switch again to Disable. It will then turn off your Guest network. 1. Open Nexxt Wireless app. Tap on Settings. Then tap on Parental Control. This allows you to control when any device can use the Internet.
- Page 21 2. Tap on Add group. For this example, we will use a Kids group. Tap on Next. Apple Phone Apple Phone 4. On this screen you can tap on the Pause button to stop allowing everyone in that group the use of the Internet. Then tap on the Play button to allow them access to the Internet again.
- Page 22 5. If you tap on the Kids group, here you can add or remove devices. 6. Tap on Add period. Give the Period a name, here we will use the You can Enable/Disable the Internet. You can also set up a Period of default Bedtime.
- Page 23 7. Now every weekday the Kids group will not be allowed to use the 8. To delete the Period, tap on Bedtime. Then tap on the 3 dots on the Internet from 22:00 to 06:00. Under Period, it should now say upper right-hand corner.
-
Page 24: Internet Settings
Internet settings 9. To delete a Group, tap on Kids group. Then tap on the 3 dots on the upper right-hand corner. Tap on Delete. Select ISP connection type. - Page 25 Speedtest app. For this example, we will say determine your Internet speed. 100Mbps download and 100Mbps upload. How to use QoS - Quality of Service. 1. Open Nexxt Wireless app. Tap on Settings. Then tap on QoS. With QoS function enabled, the router prioritizes smooth game and web browsing.
- Page 26 3. If you only want to allocate 50% of the bandwidth for online gaming Add node – To add additional nodes, go to Settings. and web browsing. Change the values to 50 on both Download and Upload. Tap on Save. 4.
- Page 27 1. Place the node at the desired location in your house. They should be 2. Plug in the power adapter to the node and the wall outlet. Wait within 30 feet of each other. Tap on Next. about 60 seconds then tap on Next.
- Page 28 3. The QR Code scanner will come up, you will need to scan the QR 4. Once complete, it will say it has been Added. If you wish to add code on the bottom of the node. It will automatically add it to your another, tap on Add, otherwise tap on Complete to go back to the Vektor System.
-
Page 29: Port Forwarding
Settings Fast roaming – Allows one DHCP server – Configure the IP addresses node to hand over clients assigned to network devices. quickly to another. DNS - Configure the DNS addresses assigned to Smart assistant – Enables you network devices. to allow home automation connections. - Page 30 FCC statement This device complies with the FCC radiation exposure limits set forth for an This equipment has been tested and found to comply with the limits for a Class B uncontrolled environment and it also complies with Part 15 of the FCC RF Rules. digital device pursuant to Part 15 of the FCC Rules.
Need help?
Do you have a question about the Vector 2400AC and is the answer not in the manual?
Questions and answers