
Related Manuals for Crosley CAMHE18B2


Summary of Contents for Crosley CAMHE18B2
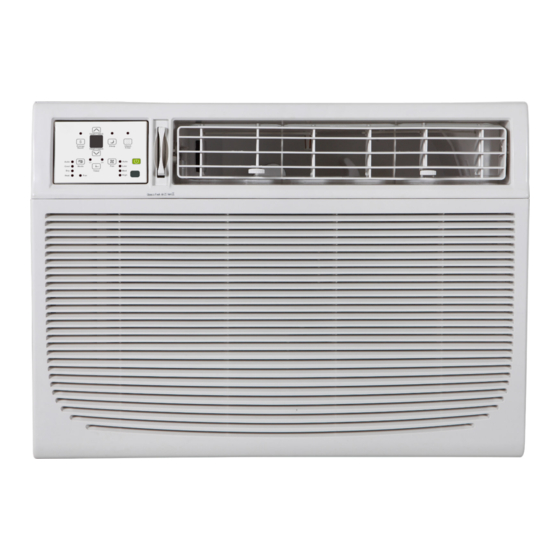
- Page 1 USE & CARE GUIDE 618,500 -25,000 BTU Window Heat / Cooling Unit CAMHE18 B2 | CAMHE25B2 Customer Focused. Quality Driven. www.crosley.com...
-
Page 2: Table Of Contents
T A B L E O F C O N T E N T S Important Safety Instructions ......1-3 Normal Sounds ..........12 Air Conditioner Features ......12-14 Installation Instructions ........4-11 Care and Cleaning ........14-15 Troubleshooting .........15-16 Before using your air conditioner, please read this manual carefully and keep it for future reference. -
Page 3: Important Safety Instructions
IMPORTANT SAFETY INSTRUCTIONS READ THIS MANUAL Inside you will find many helpful hints on how to use and maintain your air conditioner properly. Just a little preventive care on your part can save you a great deal of time and money over the life of your air conditioner. You'll find many answers to common problems in the chart of troubleshooting tips. - Page 4 IMPORTANT SAFETY INSTRUCTIONS CAUTION Do not put a pet or house plant Ventilate the room well when When the air filter is to be removed, do not touch the metal where it will be exposed to direct used together with a stove, etc. parts of the unit.
- Page 5 IMPORTANT SAFETY INSTRUCTIONS WARNING NOTE: The power supply cord with this air For Your Safety Do not store or use gasoline or other flammable vapors and liquids in the vicinity conditioner contains a current detection of this or any other appliance. device designed to reduce the risk of fire.
-
Page 6: Installation Instructions
INSTALLATION INSTRUCTIONS Preliminary Instructions BEFORE YOU BEGIN Read these instructions completely Window Sash Seal and carefully. IMPORTANT- Save these Safety Lock and 3 /4 (or1 ) Long instructions for local inspector s use. Hex Head Screw IMPORTANT- Observe all governing codes and ordianaces. Top Angle Foam Gasket Note to Installer... - Page 7 INSTALLATION INSTRUCTIONS A.Window Mounting Preliminary Instructions 3. Check your storm windows-- if your storm Remove Chassis window frame does not allow the clearance 1. Pull down front grille and remove filter. required, correct by adding a piece of wood as (See Fig.1).
- Page 8 INSTALLATION INSTRUCTIONS 10. Your unit may come with internal packaging. Air Conditioner This packaging must be removed prior to Plastic Cabinet Frame installing the air conditioner back into the View cabinet.(see Fig.7). Shipping Packaging Locking Screw " " Section Hole Window Filler Panel...
- Page 9 INSTALLATION INSTRUCTIONS 1 2 Long Screws Left And Locknuts Bottom Rail Seal Locknut Sill Angle Right Bracket 3 4 (or1 )Long Flat Head Hex-head Screw Bolt 2 Each Required For Fig.13 Each Support Bracket Install Support Bracket Fig.15B 1. Hold each support bracket flush against outside of sill, and tight to bottom of cabinet 3.
- Page 10 INSTALLATION INSTRUCTIONS 4. Attach the top angle to window frame: Use a 3/32 Install Window Sash Seal and drill bit to drill one hole through the hole in the Safety Lock middle of top angle into the window frame, and drive one 3/ 4 (or 1/ 2 ) HEX-HEAD locking screw 1.
- Page 11 INSTALLATION INSTRUCTIONS INSTALL WEATHER STRIPPING (only be applicable to Energy star models ) In order to minimize air leaks between the room air conditoner and the window opening, trim the weather sttipping with a proper length, peel off the protective backing and plug any gaps if needed (Fig.23).
- Page 12 INSTALLATION INSTRUCTIONS B.Thru-The-Wall Installation Inside Frame Height: 18-7/8"(47.9cm) or18" (45.7cm) Inside Frame Width: 26-3/4"(67.9cm) or 23-7/8"(60.6cm) NOTE: Consult local building codes prior to installation, or a qualified carpenter. Select Wall Location The air conditioner has a slide-out chassis, so Inside that it can be installed through an outside wall Frame Height...
- Page 13 INSTALLATION INSTRUCTIONS 5. Screw or nail cabinet wooden frame using Prepare and Install Cabinet shims if frame is oversized, to eliminate distortion. See Fig.8.Remember to maintain 1. Slide chassis from cabinet. Refer back to Step proper slop as described in Step 3. one of Window Mounting.
-
Page 14: Normal Sounds
NORMAL SOUNDS High Pitched Chatter High efficiency compressors may have a high pitched chatter Vibration during the cooling cycle. Unit may vibrate and make noise because of poor wall or window construction or incorrect installation. Sound of Rushing Air At the front of the unit, you may hear the sound of rushing air being moved by the fan Pinging or Switching... - Page 15 AIR CONDITIONER FEATURES TO ADJUST FAN SPEEDS: TO SELECT THE OPERATING MODE: Press to select the Fan Speed in four steps-Auto, To choose operating mode, press Mode button.Each Low, Med or High. Each time the button is pressed, time you press the button, a mode is selected in a the fan speed mode is shifted.For some models, the sequence that goes from Auto, Cool, Dry ,heat(cooling fan speed can not be adjusted under HEAT mode.
-
Page 16: Care And Cleaning
AIR CONDITIONER FEATURES DISPLAYS: Fresh Air Vent Control Displays DISPLAYS: Shows the set temperature in C or F and the Auto-timer settings.While on Fan only mode,it shows the room temperature. Error codes: Fig. A Fig. B (VENT CLOSED) (VENT OPEN) AS-Room temperature sensor error-Unplug the unit and plug it back in.If error repeats, call for service. -
Page 17: Troubleshooting
CARE AND CLEANING Cabinet Cleaning Air Filter Cleaning Push the vent handle to the Vent Closed position Be sure to unplug the air conditioner to prevent shock or fire hazard. The cabinet and front may be dusted with an oil-free (where applicable). - Page 18 TROUBLESHOOTING TIPS Problem Solution Dirty air filter- air restricted. Clean air filter. Refer to Care and Cleaning section. Air conditioner cooling, but room Temperature is set too High, set temperature to a Lower setting. is too warm- NO Air directional louvers positioned improperly. Position louvers for better air distribution. ice forming on cooling coil behind Front of units is blocked by drapes, blinds, furniture, etc.
- Page 19 CrosleyCare servicer. For one year from your original date of purchase, Crosley will pay all costs for repairing or replacing any parts of this appliance that prove to be defective in materials or workmanship when such appliance is installed, used and maintained in accordance with the provided instructions.
- Page 20 The design and specifications are subject to change without prior notice for product improvement. Consult with the sales agency or manufacturer for details.
Need help?
Do you have a question about the CAMHE18B2 and is the answer not in the manual?
Questions and answers