Table of Contents
Advertisement
Quick Links
Advertisement
Table of Contents

Subscribe to Our Youtube Channel
Summary of Contents for LS XCODE-IU9060
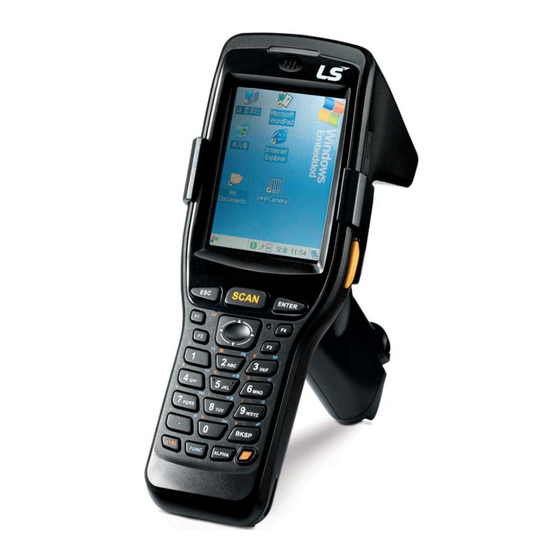
- Page 1 900MHz Handheld Reader Users Manual Handheld XCODE-IU9060 Cautions for Safety ● Please surely read cautions for safety before its use and use it accurately. ● Please store well at a place where people using this product can always see after reading the...
-
Page 2: Table Of Contents
Contents Composition of Products ..................5 Name of each Part ....................5 2.1. Explanation of Buttons ................. 6 2.2. LED Indication .................... 7 Getting Started ......................8 3.1. How to Use Battery ..................8 3.2. Charging of Battery ..................8 3.3. - Page 3 RFID ........................34 Others ........................34 Disposal ........................ 34 Purchasing Information .................... 35 Compensation Criteria of Quality Compensation Service ..........35 Guide of Compensation Criteria of Quality Compensation Service ........35 Service Tips ....................36 Warranty Information (Terms) ................36...
- Page 4 Cautions for Safety This is content for keeping safety of users and preventing property damage. Please surely read this well and use this product rightly. 1. Please notice in case of using a battery If you use an unapproved battery, the battery can explode. Please don’t drop a battery or apply heavy impact.
-
Page 5: Composition Of Products
Composition of Products • IU906x Main body one unit • One piece of standard battery • One piece of Stylus • One piece of Hand Strap • One piece of adaptor(for charging) • One unit of stand(Ethernet Cradle) • One piece of USB Cable, the USB cable should shielded with core. 2. -
Page 6: Explanation Of Buttons
2.1. Explanation of Buttons Button Function The cancellation (ESC) function is done. SCAN The scanner beam is operated. The selected program is executed. ∧ Moves one column upwardly. ∨ Moves one column downwardly. < Moves one column to the left. >... -
Page 7: Led Indication
After tapping the CTRL key (or taps simultaneously), and if you tap 1~0, .and BKSP, an allotted mark is inputted. The mode of input characters is changed. The basic value is a number input mode , and if you tap once, it is changed to a large character English input ALPHA mode , and if you tap once, it is changed to a small character English input... -
Page 8: Getting Started
3. Getting Started 3.1. How to Use Battery Locker L/R Locker Center Insertion of Battery 1. After fixing into a groove of an upper part of a battery cover, close it. 2. Push all Locker L/R to the outside, and turn a Locker Center horizontally. <!>... -
Page 9: Using Of Battery For Long
3.3. Using of Battery for long If you use a battery longer, please use as follows. When you first use a terminal, please don’t turn on a terminal until it is charged for minimum 13 hours. When you don’t use it, please turn off power of a wireless device (WiFi). Please use screen brightness/keyboard brightness as minimum brightness. -
Page 10: How To Use Writing Recognition/Keyboard
3.5. How to Use Writing Recognition/Keyboard To input characters, select Writing Recognition or Keyboard. -
Page 11: How To Use Writing Recognition
3.5.1. How to Use Writing Recognition When you write each character (English character, number) into an input panel directly, the characters inputted will be displayed on screen. <!> When you write characters, write them in right sequence. <!> If you stop before a character is completed, its input can proceed as it is. 3.6. -
Page 12: Sync With Pc And Terminal
(Recommended specification is that a thing less than XP is more than ActiveSync v. 4.5 and Windows 7 and Vista are Windows Mobile Center) and downloading it. 2. After completion of its installation, please insert a terminal into an ethernet cradle and connect PC with USB Cable. -
Page 13: Exploration Of Mobile Device
4.3 Exploration of Mobile Device After Sync, you can use through opening the Windows explorer of the terminal at PC. Opening of Explorer The respective “Explorer” and “File Management” are executed at a menu of ActiveSync or Windows Mobile Device Center. Because PC recognizes the corresponding terminal as an external device, it can be explored, and the action such as file copy and deletion, etc. -
Page 14: Performing Of Usb Sync
5.2 Performing of USB Sync 1. Place a terminal at an ethernet cradle. 2. Connect a USB Cable at the rear of an ethernet cradle. 3. The terminal and PC can be sync each other. Please refer to Active sync Manual regarding the corresponding content. 5.3 Connection of Wired Ethernet. -
Page 15: Using Of Uhf Rfid Reader
Wrong using method: If the laser beam and Bar-cord are not matched, scan failure occurs. 7 Using of UHF RFID Reader The XCODE-IU906X can use function of UHF RFID Portable Reader. The method that confirms UID of multiple/single tag and Read/Write/Lock/Kill the memory of single tag by using a program mounted basically in the product shipment state of XCODE- IU906X is explained. -
Page 16: Explanation Of Main Window
Fig.3. Shape that the tag is read. Explanation of Main Window The function on each part is explained at a main window which is a main screen of a program. Version of Driving Program Fig.4. Main Screen of Reader Program 1. - Page 17 exists, it is displayed as much as the number that only Cnt(COUNT) was read at No. 3. Namely, it isn’t seen several times. The order of UID of tags is arranged in the non- increasing order. 3. The read number of each tag to be displayed at No. 1 is indicated. 4.
-
Page 18: Reader Setting Window
Reader Setting Window The window shown below is a window capable of setting use of modes of output of a reader/G value/operating frequency/reader RF test. 5. Reader Setting Window 1. This adjusts attenuation of reader output. 0 means that there is completely no attenuation at output. -
Page 19: Reading/Writing Of Tag Memory
4. As the TEST MODE is a part necessary for various certifications, its use is prohibited except a corresponding engineer. The way of using is that you select a necessary menu and click the [Set] button. No Modulation ON/OFF: The frequency should use only FIX and the transmission of the output un-modulated with the frequency designated at 3.1 is ON/OFF. - Page 20 Fig. 7. Tag Reading Tag Writing Like the first and second processes of tag reading, select or input Bank/starting position/size. Data that you want to write are additionally inputted to a column of [Write Data] as hexadecimal number. ‘.’ of an input window is a separator and doesn’t affect in case of input.
- Page 21 Fig. 9. Window of Tag LOCK/KILL KILL If you make a tag lose its function completely, the Password necessary for it should be set with a value that is not “0” in the Reserved domain of memory Bank. It is called Access Password and Kill Password, and for its detailed explanation, please refer to EPC-related documents.
-
Page 22: Using Of Wireless Lan
8 Using of Wireless LAN The wireless LAN supports IEEE 802.11b and 802.11g. Turning-on of Wireless LAN After selecting an arrow mark of Task Bar, select “Turn Wireless LAN On” Connection with Wireless Network 1. If you try to set connection with a wireless network, double-click the WiFi Icon of Task Bar. - Page 23 4. Please press “Yes” at the scu window. <!> The method putting into Network Key becomes different according to Encryption of AP to be set. 5. If the Profile installation was complete, it is OK if you store when moving to the [Main] tab.
-
Page 24: Setting Of Auto Profile
6. If you change Active Profile from the [Main] tab to AP set just now, it is connected automatically. If the setting on wireless LAN is complete, select [Main]. 7. If you change Active Profile from the [Main] tab to AP set just now, it is connected automatically. -
Page 25: Turning-Off Of Wireless Lan
2. After selecting a Profile to be set, press OK. 3. Check [On] of Auto Profile. Turning-off of Wireless LAN After selecting an arrow mark of Task Bar, select “Turn Wireless LAN Off”. <!> If the power of wireless LAN is turned off in a condition that Network is connected and then the power is turned on again, the Profile value set previously is maintained. -
Page 26: Environment Setting
9 Environment Setting You can set using environment or perform system management at Start Set Control Panel. The control panel added basic menus, scanner setting and SysInfo provided by Windows CE.NET. Stylus Stylus .You can adjust touch sensitivity, accuracy and double-click speed. Backlight backlight Battery... -
Page 27: Date/Time
<!> If you reduce power consumption, please set turning-off of backlight shortly and set brightness darkly. External Power When you use a terminal as external power, set screen lighting. Keyboard This is a function adjusting lighting and brightness of a keyboard. Date/Time Date /Time Change or Setting of Date and Time... -
Page 28: Power Properties
2. The date and time can be changed to the date you want. 3. You can change the desired national time zone from the standard time zone list, and in case of changing a summer time-designated country, you can set automatic adjustment of time to conform to the daylight saving time system. -
Page 29: Button Setting
<!> It can be charged even when the backup charging is more than 90% due to the intensity of voltage. 3. When it is charged, “now charging” is displayed, and if it is fully charged, “AC Power (100%)” is displayed. <!>... -
Page 30: Manager Of Repository
2. Select a function after selecting application program key. Default – Basic value. Scan Key – use as Scan Key. No Function – There is no function. Application – If you set, the [OPEN] button is activated and an application program is selected. -
Page 31: Q&A
Q&A 1. Scanner Q. When I scan, the laser beam doesn’t come out. A. This is a phenomenon capable of being generated when a Scanner is not activated. 1. Is the Scanner Icon non-activated at the task bar like the below picture? Then please press the Scanner Icon and pop-up the Scanner menu like below picture. -
Page 32: Power
Q. Although I scan, the Bar-cord isn’t printed out. A. This is a phenomenon appearing when Scan failed or Result Type is enabled. 1. Isn’t it Scan failure probably? The failure phrase isn’t inputted in case of Scan failure at other Word Program except ScanDemo. -
Page 33: Wireless Lan
1. Please turn on power after taking out a battery and put it again. If it is not turned on, go to No. 2… 2. Please charge a terminal. Please press a Power button in a charged state. If the power is not turned on even with the Power button, please press a Reset Home. If the power is turned on, please buffer it. -
Page 34: Rfid
Q. Even if the wireless LAN is turned on, the wireless LAN Icon doesn’t come out. A. First, please make the Power of the wireless LAN turned off. After performing COLD Reset (HW Reset), please turn on the Power of the wireless LAN again. -
Page 35: Purchasing Information
2. When there are materials you want to reuse, please inquire to our company. Because materials generating toxic gas in case of incineration become a reason of respiratory diseases, please surely dispose it at an allowed place. 7. Purchasing Information Name of Model Purchasing Date Serial No... -
Page 36: Service Tips
performance and The case that its repair is Exchange of function due to impossible due to inferior products after intention Repair appearance which is not collection of the negligence impossible a breakdown of amount consumers performance and function corresponding to is excluded. - Page 37 The present product was made through strict quality control and inspection process of engineers of LS industrial Systems. The product warranty period is usually 12 months from its purchase, and when the purchase date was not written, 12 months are applied from the date of manufacture.
- Page 38 FCC Regulations: This device complies with part 15 of the FCC Rules. Operation is subject to the following two conditions: (1) This device may not cause harmful interference, and (2) this device must accept any interference received, including interference that may cause undesired operation. This device has been tested and found to comply with the limits for a Class B digital device, pursuant to Part 15 of the FCC Rules.
- Page 39 4RF Exposure Information (SAR) This device meets the government’s requirements for exposure to radio waves. This device is designed and manufactured not to exceed the emission limits for exposure to radio frequency (RF) energy set by the Federal Communications Commission of the U.S. Government. The exposure standard for wireless devices employs a unit of measurement known as the Specific Absorption Rate, or SAR.
Need help?
Do you have a question about the XCODE-IU9060 and is the answer not in the manual?
Questions and answers