Advertisement
Quick Links
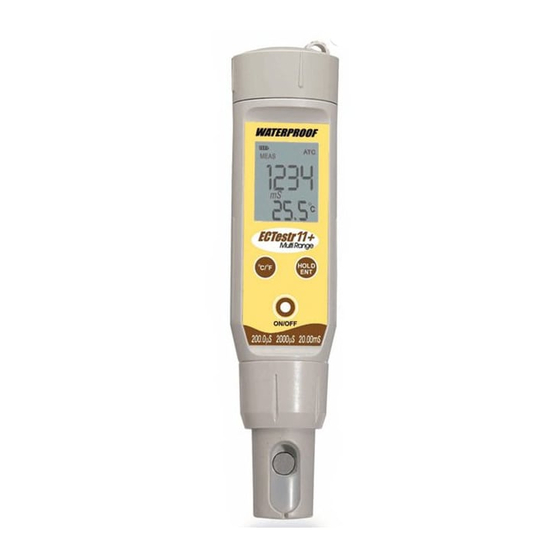
INSTRUCTION MANUAL
EC/TDS/SALT Testr
Large Screen Waterproof Multi Range
Conductivity/TDS/Salt Tester
with Temperature Display
Introduction
Thank you for selecting microprocessor-based waterproof EC / TDS / SALT tester with
large dual line display. You have one of the following models:
• ECTestr11
• ECTestr11+
• TDSTestr11
• TDSTestr11+
Non-plus models (ECTestr11, TDSTestr11 & SALTTestr11) come with user-replaceable
Non-plus models
Non-plus models
Non-plus models
Non-plus models
two-pin type sensor and have many user friendly features such as Dual-range
measurement, the Hold function, Automatic Temperature Compensation (ATC) and
Self-Diagnostic Messaging capabilities.
Plus models
Plus models (ECTestr11+ & TDSTestr11+) come with the user-replaceable cup type
Plus models
Plus models
Plus models
sensor and have additional features such as Multi-range measurement, up to 3-point
calibration and higher resolution measurement.
Before You Begin
Remove the electrode's protective cap. Soak the electrode for a few minutes in
alcohol to remove any oil stains on the electrodes which will affect the accuracy of
the tester. Rinse thoroughly with de-ionized water and shakS
Key Functions
K K K K K e e e e e y
y
y
y
y
Function
Function
Function
Function
Function
- Power on and off the tester
(The tester automatically switches of, if no button is pressed for 8.5 seconds)
- In measurement mode, temperature reading switches between Celsius &
°C/
°F
Fahrenheit
- In calibration mode, switches the tester to temperature calibration mode
- In temperature calibration mode, exits calibration mode without confirming
calibrated values
- In measurement mode, switches to hold mode freezing the display.
HOLD
- In hold mode, switches back to measurement mode
- In manual calibration and temperature calibration modes, exits calibration mode
without confirming calibrated values
- In range selection mode, selects a range
- In measurement mode, enters calibration mode
- In calibration mode, adjusts the calibration values
- In hold mode, enters TDS factor setting mode
- In TDS factor setting mode, adjusts TDS factor
Note:
Note:
Note:
Note:
Note: INC
INC
INC
INC
INC & DEC
DEC keys are located inside the
DEC
DEC
DEC
battery compartment. . . . . Refer figure 1.
Note:
Note:
Note:
Note:
Note: For ECTestr11 & ECTestr11+ models, the
caption of HOLD key is 'HOLD/ENT'
'HOLD/ENT'
'HOLD/ENT'
'HOLD/ENT'
'HOLD/ENT'
Figure 1: Battery compartment
-1-
Press ON/OFF
ON/OFF
ON/OFF
ON/OFF key to switch on the tester. The LCD shows the power-up sequence
ON/OFF
as illustrated in Figure 2.
When the tester is on, if you do not press a key for 8.5
minutes, the tester automatically switches off to conserve batteries.
CAL
ATC
MEAS
HOLD
pp m
pH%
S
R.mV
°C °F
ON/OFF
°C
°F
software revision number
Figure 2: Power Up Sequence
Range Selection
Depending on the selected model, you can set the tester to limit its reading to a
particular measuring range (PU, LO or HI) or full scale (AUTO). The default setting
is AUTO. When you select a range other than AUTO, the tester can be calibrated
• SALTTestr11
only for that particular range. If you try to measure a sample which has a higher
conductivity/TDS value than that of the selected measuring range, the LCD shows
'OR' error message. Refer Specif
Specif
Specif
Specif
Specifica ica ica ica ications
selected model.
T T T T T o select a r
o select a r
o select a r
o select a r
o select a rang
ang
ang
ange: e: e: e: e:
ang
1. Switch off the tester. Press and hold °C/°F
using ON/OFF
ON/OFF key. Release °C/°F
ON/OFF
ON/OFF
ON/OFF
2. The tester goes to range selection mode. The LCD shows the currently selected
Range (the default is AUTO) in the lower display. The upper display shows the
maximum possible reading for the selected range. Press HOLD
until you see the required range (PU, LO or HI).
Note:
Note:
Note:
Note: If no key is pressed within 5 seconds, LCD shows power-up sequence and
Note:
tester goes to measurement mode.
3. The tester automatically confirms the last selection if no key is pressed for 5
seconds. Upper display momentarily shows 'CO'. The LCD shows power-up
sequence and the tester goes to measurement mode.
2
HOLD
°C/
°F
1
ENT
2 0 .0 0
Tester
Off
ms
Au o
ON/OFF
Press & hold
°C/°F
key and switch on
the tester
+
-
Figure 3: Range selection sequence from AUTO to HI for ECTestr11+
ATC
MEAS
E c . p
2 0 .0 0
0.0
ms
uS
Au o
26 .8
°C
Model number &
Selected range &
Measurement
upper limit of the range
mode
tions
tions
tions section for available ranges of the
tions
°C/°F key and then switch on the tester
°C/°F
°C/°F
°C/°F
°C/°F
°C/°F
°C/°F
°C/°F key.
HOLD key repeatedly
HOLD
HOLD
HOLD
2
2
2
HOLD
HOLD
ENT
ENT
2 0 0 .0
20 0 0
20 . 0 0
us
us
ms
PU
LO
HI
5 seconds
3
Power-up
C O
Sequence
Auto confirmation occurs for
HI
the last selected range
if no key is pressed for 5 sec.
-2-
Measurement
1. Press the ON/OFF
ON/OFF
ON/OFF
ON/OFF
ON/OFF key to switch on the tester. The 'MEAS' indicators appears
when the tester is in measurement mode.
2. Dip the electrode into the test solution making sure that it is fully immersed.
Stir to clear any trapped air bubbles from the electrode and let the reading
stabilize. For plus models, you can opt for the cup style measurement by filling
the electrode cup with sample of test solution.
Note:
Note:
Note: The LCD indicates 'Or' (over range) if the reading is outside the selected
Note:
Note:
range. If this occurs, select an appropriate range to suit the reading.
3. The upper display shows the main reading (conductivity/TDS/Salt) of the
solution, automatically temperature compensated (ATC) to normalized temperature
of 25°C. The lower display shows the temperature of the solution.
HOLD Function
This feature lets you freeze the display for a delayed observation.
1. Press HOLD
HOLD
HOLD key to freeze the measurement. The tester goes to hold mode and
HOLD
HOLD
'HOLD' indicator is displayed in LCD. The measurements are frozen and the 'MEAS'
indicator disappears.
HOLD
HOLD
2. Press HOLD
HOLD
HOLD key again to release the measurement. The 'HOLD' indicator is no
longer displayed. The tester goes back to measurement mode.
ATC
ATC
HOLD
HOLD
HOLD
MEAS
ppm
ppm
1500
1500
°C
°C
26.8
26.8
Measurement
HOLD mode
mode
Figure 4: HOLD Function
Temperature Unit of Measurement Selection
This feature lets you set the unit of measurement of temperature to either Celsius (°C)
or Fahrenheit (°F).
°C/°F
°C/°F
When the tester is in the measurement mode, press °C/°F
°C/°F button. The temperature
°C/°F
display toggles between the Celsius and Fahrenheit reading.
ATC
°C/
°F
t
MEAS
pp
MEAS
6.00
6.00
25. 5
°C
7 8.0
Figure 5: Temperature unit of measurement selection
-3-
ATC
MEAS
ppm
1 535
°C
26.2
Measurement
mode
ATC
t
pp
°F
Advertisement

Related Manuals for Oakton WD-35662-35


Summary of Contents for Oakton WD-35662-35
- Page 1 Measurement Press ON/OFF ON/OFF ON/OFF ON/OFF ON/OFF key to switch on the tester. The LCD shows the power-up sequence 1. Press the ON/OFF ON/OFF ON/OFF ON/OFF ON/OFF key to switch on the tester. The ‘MEAS’ indicators appears as illustrated in Figure 2. When the tester is on, if you do not press a key for 8.5 when the tester is in measurement mode.
- Page 2 About Calibration Note: Note: Note: Note: Note: If you have selected a specific measuring range for the tester, the lower display After shows the corresponding calibration standard value that matches the selected HOLD HOLD To ensure higher accuracy, the tester must be calibrated on a regular basis. 1 sec.
- Page 3 5. For multi-point calibration rinse the electrode in de-ionized water and repeat Manual Calibration Temperature Calibration step the above steps with another standard solution. In manual calibration, the tester allows 1-point calibration for each measuring range. Temperature calibration need not be performed every time, unless the temperature You can use customized calibration solutions with known conductivity/TDS values to reading differs from that of an accurate thermometer.
- Page 4 Note: Note: Note: Note: Eutech Instruments/Oakton Instruments reserve the right to make improvements O-ring fully onto the new electrode module. Push the collar over the module in design, construction and appearance of products without notice. Prices are subject and thread it into place by firmly twisting clockwise.