Table of Contents
Advertisement
Quick Links
Advertisement
Table of Contents

Related Manuals for LG LDF5678ST


Summary of Contents for LG LDF5678ST
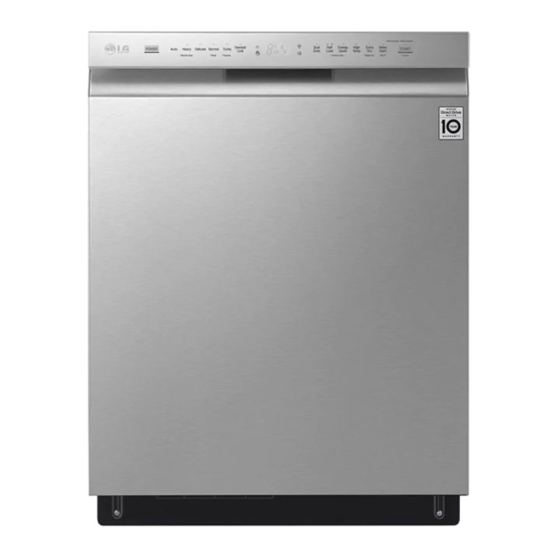
- Page 1 OWNER'S MANUAL DISHWASHER Read this owner's manual thoroughly before operating the appliance and keep it handy for reference at all times. LDF567*** LDT567*** www.lg.com MFL69261723 Copyright © 2018 LG Electronics Inc. All Rights Reserved. Rev.03_061718...
-
Page 2: Table Of Contents
TABLE OF CONTENTS PRODUCT FEATURES 36 SMART FUNCTIONS SmartThinQ Application Smart Diagnosis™ Function SAFETY INSTRUCTIONS IMPORTANT SAFETY INSTRUCTIONS 40 MAINTENANCE Cleaning the Exterior PRODUCT OVERVIEW Cleaning the Interior Exterior Parts Seasonal Maintenance and Storage Interior Parts Clogged Drain Air Gap or In-Sink Disposal Accessories Cleaning the Filters Cleaning the Spray Arms... -
Page 3: Product Features
This efficient drying system does not use a heating element during the drying process resulting in superior energy efficiency and gentle care for dishes. SmartThinQ™ Download the new LG smart phone app to set options, self-diagnose and troubleshoot problems with the appliance, and other useful features. This function uses Wi-Fi. -
Page 4: Safety Instructions
SAFETY INSTRUCTIONS SAFETY INSTRUCTIONS READ ALL INSTRUCTIONS BEFORE USE Your safety and the safety of others are very important. We have provided many important safety messages in this manual and on your appliance. Always read and follow all safety messages. This is the safety alert symbol. - Page 5 • Do not grasp the power supply line or touch the appliance controls with wet hands. • Do not modify or extend the power cable. • If the product has been submerged, contact an LG Electronics customer information center for instructions before resuming use.
- Page 6 SAFETY INSTRUCTIONS • Do not allow children to play on, in or with the appliance. Close supervision of children is necessary when the appliance is used near children. • Do not tamper with controls. • In the event of a gas leak (propane gas, LP gas, etc.) do not operate this or any other appliance. Open a window or door to ventilate the area immediately.
- Page 7 SAFETY INSTRUCTIONS MAINTENANCE • Do not repair or replace any part of the appliance. All repairs and servicing must be performed by qualified service personnel unless specifically recommended in this Owner’s Manual. Use only authorized factory parts. • Do not disassemble or repair the appliance by yourself. •...
- Page 8 SAFETY INSTRUCTIONS CAUTION To reduce the risk of minor injury to persons, malfunction, or damage to the product or property when using this product, follow basic precautions, including the following: INSTALLATION • Install the product on a firm and level floor. •...
-
Page 9: Product Overview
PRODUCT OVERVIEW PRODUCT OVERVIEW Exterior Parts Control Panel & Door Handle Control Panel Front Cover Door Handle Lower Cover Front Cover Shipping Brace Lower Cover Safety Cover Shipping Brace Base Safety Cover Leveling Feet Signal Light (some models) Base Leveling Feet NOTE •... -
Page 10: Interior Parts
10 PRODUCT OVERVIEW Interior Parts Top Wash Impeller Upper Spray Arm Lower Spray Arm Filtration System Detergent and Rinse Aid Dispenser Drying Vent Cover Cutlery Rack Upper Rack Silverware Basket Lower Rack (appearance may vary) NOTE • Press the tab to remove the cable tie by hand. •... -
Page 11: Installation
INSTALLATION INSTALLATION Installation Parts and Tools Parts not Provided Electrical cable Water supply tube Fittings for tube Coupler Teflon™ tape Air gap Wire nuts for Hose clamp ⅞" UL approved Electrical tape 16-gauge wiring strain relief Tools Needed Flat-blade Phillips Hole saw Electrical drill Gloves... -
Page 12: Installation Overview
12 INSTALLATION Installation Overview Preparing Cabinet Opening Leveling the Dishwasher Preparing Electrical Wiring Securing the Dishwasher to Countertop Preparing Water Supply Connection Connecting the Drain Hose Preparing the Dishwasher Connecting Water Supply Removing Lower Cover Connecting Power Sliding the Dishwasher into Cabinet Final Check Product Dimensions Back view... -
Page 13: Preparing Cabinet Opening
INSTALLATION Preparing Cabinet Opening This dishwasher is designed to fit a standard NOTE dishwasher opening. An opening may be needed • Do not push. on both sides to route plumbing and electrical connections. 24" (610 mm) min. WARNING • Do not remove safety cover. Removal can result 33 / "... -
Page 14: Preparing Electrical Wiring
14 INSTALLATION Preparing Electrical Wiring Preparing Water Supply Connection Operate this appliance with the correct voltage as shown in this manual and on the rating plate. Make sure the house water supply is turned off Connect it to a dedicated, properly grounded before connecting the dishwasher water lines. -
Page 15: Preparing Dishwasher
INSTALLATION Preparing Dishwasher Removable Rear Plastic Shipping NOTE • Do not push. Brace The rear shipping brace can be removed if additional clearance is needed when installing the dishwasher under a low countertop. WARNING • Do not remove safety cover. Removal can result in fire, electric shock or death. -
Page 16: Sliding Dishwasher Into Cabinet
16 INSTALLATION Sliding Dishwasher into Attaching Mounting Hardware Cabinet For countertops made of wood or other material that will not be damaged by drilling, use the metal installation brackets. Slide the dishwasher carefully into the cabinet opening. Insert the installation brackets into the slots in the upper frame. -
Page 17: Leveling The Appliance
INSTALLATION Leveling the Appliance Adjusting the Legs Adjusting the Front Legs Check that dishwasher is level. • Attach level on top front opening of tub from side to • Use a flat-blade screwdriver or a pliers to turn the front legs and adjust the front of the tub. side. -
Page 18: Securing Dishwasher To Countertop
18 INSTALLATION Securing Dishwasher to Connecting Drain Hose Countertop For countertops made of wood or other material that will not be damaged by drilling, use Method 1. For countertops made of granite, marble, or other materials that could be damaged by drilling, use 40"... - Page 19 INSTALLATION Connecting to Disposal or Waste Tee NOTE • If the knockout plug has not been removed, the with Air Gap dishwasher will not be able to drain properly. Remove the knockout plug with a hammer and screwdriver. Connecting to Disposal with No Air Connect end of the drain hose to the air gap with hose clamp provided.
-
Page 20: Connecting Water Supply
20 INSTALLATION Connecting Water Supply Connecting Power Before connecting, turn off the water supply. Slide the flexible stainless-steel water line or copper tube into the elbow. Tighten the compression nut and make sure that the line is not kinked or pinched. NOTE •... -
Page 21: Final Check
INSTALLATION Final Check Error Code Possible Cause and Solution Drain hose kinked or pinched. Turn on electrical power. Feed the drainage and supply hoses through the hole under Turn on house water supply. the sink. Then gradually slide the dishwasher into the cabinet while Make sure the door opens and closes smoothly. -
Page 22: Operation
22 OPERATION OPERATION Select the Cycle and Options Select the cycle and options that best fit the load by referring to the Cycle guide. The display Using the Appliance will show the estimated time for the cycle and options selected. Before Using the Appliance •... -
Page 23: Control Panel
OPERATION Control Panel Power • : Control Lock • Press the Power button to turn power on and - The Control Lock feature helps prevent off. settings from being changed during a cycle. • After the cycle is complete, the power Selecting this feature locks all of the buttons, except for the Power button, on the control automatically turns off for purposes of safety and... -
Page 24: Cycles
24 OPERATION Cycles Download Cycle Use a dedicated cycle downloadable via Wi-Fi or Select your desired cycle. NFC. Auto NOTE • Only the cycle code for the current Download cycle This cycle senses the soil amount and soil toughness appears on the appliance. See the smartphone app and is optimized to achieve the best cleaning. -
Page 25: Options
OPERATION Options High Temp Raises the main wash temperature to improve Select the desired cycle button and then select the cleaning. options for that cycle. Extra Dry Dual Zone Select the Extra Dry option for better drying This option automatically sets the spray intensity to performance. -
Page 26: Cycle/Option Guide
26 OPERATION Cycle/Option Guide The cycle guide below shows the available options for each cycle. Machine Cycle Auto Heavy Delicate Normal Turbo Express Rinse Clean Soil Level all levels heavy light all levels heavy light light 13.8- 9.2- 25.0L 26.9 L 19.7 L 19.5 L 27.5 L... -
Page 27: Loading The Dishwasher
OPERATION Loading the Dishwasher Loading the Lower Rack The extra tall tub allows loading of dishes, pans, or Loading 10 Place Settings other utensils up to 14" high. For effective washing performance, always follow the following instructions. • Remove large particles of food debris from plates including bones etc. - Page 28 28 OPERATION Folding Down the Lower Tines Loading Pots & Bowls Fold tines down to fit larger dishes; pull tines back up to fit smaller dishes. Case 1 Case 2 NOTE • The silverware basket ships installed at the back of the bottom rack.
-
Page 29: Loading The Silverware Basket
OPERATION Loading the Silverware Silverware Loading Tips: Basket • For best cleaning results, use the top separators in the basket when loading silverware. The separators The silverware basket has separators to avoid will prevent nesting of silverware. scratching and tarnishing of delicate silverware. •... -
Page 30: Loading The Upper Rack
30 OPERATION Loading the Upper Rack Upper Rack Loading Tips: • Place cups and glasses in the rows between the Loading 10 Place Settings rack tines. Placing them over the rack tines can lead to breakage and water spots. • To avoid chipping, do not let stemware touch other items. - Page 31 OPERATION Folding Down the Upper Tines Fold tines down to fit larger dishes; pull tines back up to fit smaller dishes. Loading Dishes & Pots...
- Page 32 32 OPERATION Height Adjustable Upper Rack WARNING The upper rack adjusts up and down. Raise the upper rack to allow items up to 14" tall in the lower • Before adjusting, ensure the rack is empty of all rack. Lower the upper rack to allow dishes up to 12" dishes.
-
Page 33: Loading The Cutlery Rack
OPERATION Loading the Cutlery Rack Removing the Cutlery Rack The entire cutlery rack can be removed if more space The cutlery rack is best suited for flatware. The is needed on the upper rack for larger items. separators on the cutlery racks help keep flatware separated to avoid damage and improve cleaning. -
Page 34: Adding Cleaning Agents
34 OPERATION Adding Cleaning Agents WARNING Adding Detergent to the Dispenser • Dishwasher detergent and rinse aid contain • Remove the label on the dispenser prior to running chemical components, like all other household the dishwasher for the first time. detergent. - Page 35 OPERATION Adding Rinse Aid to the Dispenser Rinse Aid Dispenser Adjustment The Rinse Aid indicator appears in the display when The dispenser has five adjustment levels. The more rinse aid is needed. dishwasher is programmed at the factory for a rinse aid dispenser level of 2.
-
Page 36: Smart Functions
Internet service provider or refer to your wireless communicate with the appliance using a smartphone. router manual. • LG SmartThinQ is not responsible for any network Things to check before using LG connection problems or any faults, malfunctions, or SmartThinQ errors caused by network connection. - Page 37 The application is subject to change for product NOTE improvement purposes without notice to users. • If you choose the simple login to access the LG SmartThinQ application, you must go through the appliance registration process each time you change your smartphone or reinstall the application.
- Page 38 However, there available for download. is no guarantee that interference will not occur in a LG Electronics will also provide open source code particular installation. If this equipment does cause to you on CD-ROM for a charge covering the cost...
-
Page 39: Smartthinq Application
Should you experience any problems with the appliance, it has the capability of transmitting data Use the Smart Diagnosis feature in the SmartThinQ via your telephone to the LG Customer Information application for help diagnosing issues with the Center. NFC or Wi-Fi equipped models can also... -
Page 40: Maintenance
40 MAINTENANCE MAINTENANCE Cleaning the Interior • Clean the interior of the dishwasher periodically with To maintain performance and prevent trouble, it is a soft, damp cloth or sponge to remove food and important to check the outside and inside of the dirt particles. -
Page 41: Clogged Drain Air Gap Or In-Sink Disposal
MAINTENANCE Clogged Drain Air Gap or In-Sink Disposal Check the drain air gap or in-sink disposal if the dishwasher is not draining well. Cleaning the Air Gap Turn off the dishwasher. Remove the air gap cover and the plastic cap underneath it. -
Page 42: Cleaning The Filters
42 MAINTENANCE Cleaning the Filters WARNING Remove the lower rack and position the bottom spray arm so a wider vee is open to the front. • Be cautious of sharp edges when handling the stainless steel filter. Turn the inner filter counter-clockwise and take out the assembled inner filter and stainless steel filter. -
Page 43: Cleaning The Spray Arms
MAINTENANCE Cleaning the Spray Arms Remove food particles by rinsing or shaking the spray arm. If the spray arm holes are blocked by any food residue, dishes may not be cleaned well due to improper water spray. If any food residue blocks the spray arm holes, It is recommended that the spray arms be cleaned remove it with a pin or any sharp tool. -
Page 44: Troubleshooting
LG dishwashers are designed to be used in conjunction with a rinse aid. Using a rinse aid will maximize the amount of water that has already been sheeted away from the dishes before the dry cycle begins. - Page 45 TROUBLESHOOTING What is the hybrid drying system? The dishwasher does not rely on a heating element for the drying process; instead, it relies on the heat that is retained by the dishes and the tub during the wash and rinse cycles to turn the moisture in the tub into humidity.
-
Page 46: User Support Videos
For further assistance, there are videos and tutorials available through the LG.com website. On the www.lg.com/us home page, click on the Support menu tab to bring up the menu selections. Select Video Tutorials. Select a product category and then pick a topic or search a Scan this QR code to quickly access the keyword. -
Page 47: Before Calling For Service
TROUBLESHOOTING Before Calling for Service The appliance is equipped with an automatic error-monitoring system to detect and diagnose problems at an early stage. If the appliance does not function properly or does not function at all, check the following before you call for service. - Page 48 48 TROUBLESHOOTING Problem Possible Cause Solutions • Water supply should be at least 120 °F Low water temperature. for best wash performance. Overloading. • Do not overload the dishwasher. Improper loading. • See the Operation section. • Water pressure should be between 20 Insufficient water pressure.
- Page 49 The password for the Wi-Fi that you are to your smartphone and remove it, trying to connect to is incorrect. then register your appliance on LG SmartThinQ. • Turn off the Mobile data of your Mobile data for your smartphone is smartphone and register the appliance turned on.
- Page 50 AE error is resolved. Excessive Water supplied. Heater circuit failure. • Please call an LG Electronics Customer Thermistor failure. Information Center at 1-800-243-0000 (U.S.A.) 1-888-542-2623 (Canada). Motor trouble Vario motor trouble...
-
Page 51: Limited Warranty
Should your LG Dishwasher fail due to a defect in materials or workmanship under normal home use, during the warranty period set forth below, LG will at its option repair or replace the product. This limited warranty is valid only to the original retail purchaser of the product and applies only when purchased and used within the United States, including U.S. - Page 52 • Damage or failure caused by incorrect electrical current, voltage, or plumbing codes, commercial or industrial use, or use of accessories, components, or consumable cleaning products that are not approved by LG. • Damage caused by transportation and handling, including scratches, dents, chips, and/or other damage to the finish of your product, unless such damage results from defects in materials or workmanship and is reported within one (1) week of delivery.
- Page 53 If you and LG are unable to resolve the dispute within 30 days, either party may proceed to file a claim for arbitration.
- Page 54 Opt Out. You may opt out of this dispute resolution procedure. If you opt out, neither you nor LG can require the other to participate in an arbitration proceeding.
-
Page 55: Warranty Exceptions
LIMITED WARRANTY Warranty Exceptions Poor wash results caused by • Clean the filter regularly. debris remaining in the filter. • Make certain that no dishes or Poor wash results caused utensils are in the path of the by improper loading or over spray arms. - Page 56 56 LIMITED WARRANTY Door movement or closing • Adjust the lower front leveling compromised by incorrect legs to the required height. leveling. No power due to loose • Reconnect the power supply connection of power supply line or repair the electrical line or electrical outlet outlet.
- Page 57 LG Customer Information Center For inquiries or comments, visit www.lg.com or call: 1-800-243-0000 U.S.A. 1-888-542-2623 CANADA Register your product Online! www.lg.com...
Need help?
Do you have a question about the LDF5678ST and is the answer not in the manual?
Questions and answers