Table of Contents
Advertisement
Quick Links
Safety .................................................................................................................... 3
Environment ........................................................................................................ 4
1 Getting Started ................................................................................................. 5
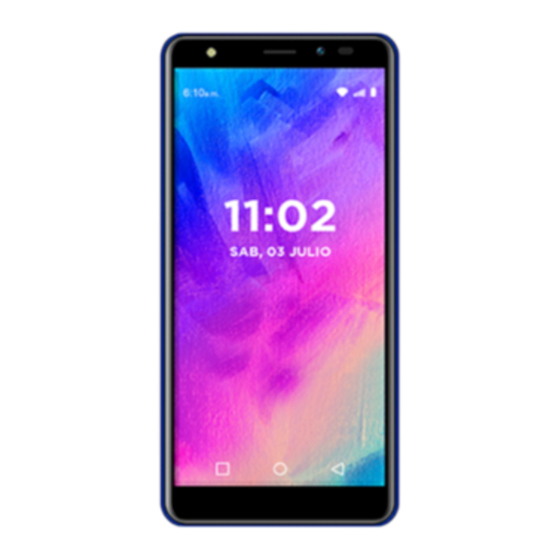
1.1 Getting to know your touch phone .................................................... 5
1.2 Installing the SIM card and storage card ........................................... 5
1.3 Charging the Battery .......................................................................... 5
1.4 Starting up the device......................................................................... 5
1.5 Status Icons ........................................................................................ 7
2 Using phone features ....................................................................................... 8
2.1 Turning the phone function on and off .............................................. 8
2.2 Making a call ..................................................................................... 8
2.3 Answering and Ending a call ............................................................. 9
2.4 In-call options .................................................................................... 9
2.5 Using call history ............................................................................. 10
3 Setting on your device .................................................................................... 10
4 ActiveSync ....................................................................................................... 13
5 Contacts .......................................................................................................... 15
6 Exchanging Messages .................................................................................... 18
7 Internet ........................................................................................................... 23
7.1 Ways of Connecting to the Internet ................................................. 23
7.2 Browser ............................................................................................ 23
8 Experiencing Multimedia .............................................................................. 24
8.1 Camera & Picture ............................................................................. 24
8.2 Music................................................................................................ 27
8.3 FM Radio ......................................................................................... 29
BL54 Mobile Phone
Bmobile
manual
Contents
1
Advertisement
Table of Contents

Related Manuals for Bmobile BL54


Summary of Contents for Bmobile BL54
-
Page 1: Table Of Contents
BL54 Mobile Phone Bmobile manual Contents Safety ........................3 Environment ......................4 1 Getting Started ....................5 1.1 Getting to know your touch phone ............ 5 1.2 Installing the SIM card and storage card ........... 5 1.3 Charging the Battery ................5 1.4 Starting up the device................. - Page 2 8.4 Voice Search ..................29 9 Other applications ..................29 9.1 Calendar ................... 29 9.2 Alarm Clock ..................31 9.3 Calculator ..................33 SAR ..................错误!未定义书签。...
-
Page 3: Safety
Safety Never attempt to disassemble your phone. You alone are responsible for how you use your phone and any consequences of its use. As a general rule, always switch off your phone wherever the use of a phone is prohibited. Use of your phone is subject to safety measures designed to protect users and their environment. -
Page 4: Environment
interfere with electronic medical equipment or implants, such as hearing aids, pacemakers, insulin pumps, etc. It is recommended that a minimum separation of 15 cm be maintained between the phone and an implant. Your doctor or the manufacturers of such equipment will be able to give you any advice you may need in this area. -
Page 5: Getting Started
1 Getting Started 1.1 Getting to know your touch phone 1.2 Installing the SIM card and storage card To install the SIM card Turn off the phone, pull out card slot. Add the SIM card according to instruction on the card slot. When you need to remove the SIM card, please shut down. - Page 6 menu opens. Select „Power off‟ and confirm. To power on again, press & hold POWER. Screen sleep After a period of inactivity, your screen will go to sleep (display will turn black). In sleep, your phone uses less battery power. You can control this behavior: Set screen timeout period 1.
-
Page 7: Status Icons
• To move an icon or other item on the Home screen, you must first touch & hold it to enter move mode. The object will magnify when it‟s ready to be moved. • Without lifting your finger (or you‟ll drop out of move mode), drag the object to the new position. -
Page 8: Using Phone Features
You can clear notifications list by selecting „Clear‟ notifications at the top of the notifications window. To open the message, reminder, or other notification, you can touch the items. To close the notifications window, slide your finger up the screen. Notes: On the home screen, touch the bar and slide your finger down the screen to open the list of notifications displayed in the sliding window, you... -
Page 9: Answering And Ending A Call
make a call. To end a call, touch „END‟ button (Red icon). 1. Call log tab: Select an entry listed in the log to call the number. 2. Contacts tab: Contacts with phone numbers are listed. Select a contact, and then select the phone number to dial the call. -
Page 10: Using Call History
2.5 Using call history 1. The missed call icon appears in the title bar when you missed a call. 2. Use „Call log‟ tab to check who the caller was, or view all your dialed numbers, and received calls. To open „Call log‟ tab, touch „Call log‟ button in the phone screen to enter the call history list. - Page 11 Bluetooth Bluetooth on/off: Use this check box to turn Bluetooth services on or off. Bluetooth settings: With Bluetooth services on, you can open the Bluetooth settings screen to: • Rename your device. • Select to be discoverable for up to 120 seconds, or not discoverable. •...
- Page 12 screen: 1. View how much space you are using on your memory card. 2. Select to use your memory card as USB mass storage when your phone is connected to your computer (selected by default) 3. Unmount /eject your memory card from your phone.
-
Page 13: Activesync
Set time, time zone, and date: Use Automatic unless you need to override the network values. Time format: Select from 12 or 24 hour formats. Reset options You can select to reset your phone to factory settings. This will erase all your data from the phone and require you to sign in and go through the setup screens to use any of the applications. - Page 14 To control synchronization Contacts, you can do the following: 1. Select Settings > User & accounts 2. First you choose add account, then add account you have .When any of the applications are synchronizing, you will see the “sync” icon .
-
Page 15: Contacts
Name your Bluetooth device 1. Make sure you have turned Bluetooth on. 2. Type the name for your device in the dialog box, and then select „Rename‟. 3. Your new device name appears on the Bluetooth settings screen. Pair & connect with Bluetooth devices Before your phone can communicate with a Bluetooth headset or hands-free car kit, the devices must “pair”, then “connect”: 1. - Page 16 Browse through your contacts by sliding your fingertip up and down on the screen. Another way to find a contact quickly is to use “SEARCH” button, input the first letter of the name you‟re looking for and touch search icon, the matching contacts are appeared on the screen.
- Page 17 From Contacts you can quickly call or text a contact‟s default number, as displayed below their name on the screen. However, to view all the information you‟ve stored for a contact, and to initiate other types of communication with that contact, open the Contact details screen. To open a contact‟s details screen, simply select their name from Contacts.
-
Page 18: Exchanging Messages
6 Exchanging Messages 6.1 SMS and MMS messaging To open the SMS & MMS Messaging application, select the Messaging icon. About text and multimedia messages SMS messages are also know as “text” messages and can each be around 160 characters. If you continue to type after the limit is reached, your message will be delivered as one, but count as more than one message. - Page 19 bottom of the screen to reply to a message. You can always add a subject or an attachment to convert it to a multimedia message. Select „Send‟ when ready. 3. Links in messages: If a message contains a link to a Web page, it will be selectable.
- Page 20 To set text and multimedia message preferences, from the message list, press and select „Settings‟. You can set the following from this screen: 1. Notification settings You can receive a notification each time you receive a new message. Select „Notifications‟ check box to receive a notification in the status bar when a new message arrives.
- Page 21 download even while roaming. 6.2 POP3 and IMAP email accounts Add an email account You can fetch messages from accounts. Follow these steps: 1. Select Email application. 2. The Set up new account screen appears. 3. Type your account email address and password. 4.
- Page 22 6. Empty Trash: Once you‟ve moved a message to the Trash, to empty messages in the Trash you must delete each message individually. Note that the message is only deleted from your phone, not from the account server. Edit account settings To open your Account settings screen, do the following: 1.
-
Page 23: Internet
7 Internet 7.1 Ways of Connecting to the Internet Your device‟s networking capabilities allow you to access the Internet or your corporate network through WLAN, 4G (if SIM card supported). You can also add and set up a VPN or proxy connection. Wi-Fi Wi-Fi provides wireless Internet access over distances of up to 100 meters (300 feet). -
Page 24: Experiencing Multimedia
Manage bookmarks You can store as many bookmarks as you want on your phone. and select „Bookmarks‟. The Bookmarks screen opens. Press 1. Bookmark any page: Select „Add to bookmark‟. 2. Send bookmarked page‟s URL: Open the bookmark you want to share, press .Select „Share page ‟. - Page 25 name and open it. 4. Copy .jpg or other image files into this folder. To organize pictures into albums that will display in the Pictures application, create a folder and copy pictures there for each album you want to display. 5.
- Page 26 disappear, touch the picture again to reveal the arrows and zoom controls. Picture options You can do the following while in Pictures. Note: In all the instructions below, you can touch & hold a picture to open the context menu to access all actions, rather than open the picture in full-screen view.
-
Page 27: Music
8. View picture details: In full-screen view, press and select Details. The picture details window opens. You can see the title, resolution, file size, and date of the picture. 8.2 Music To open your music Library, select the Music icon. Your music is organized into four categories: Artists, Albums, Songs, and Playlists. - Page 28 Play back music At any level in your Library, touch & hold a listing (a song, artist, album, or playlist) to open the context menu. Select Play to begin play and go to the Playback screen. You can do the following using the Playback screen: 1.
-
Page 29: Fm Radio
You can set any of your songs as a phone ringtone: 1. From the Library, navigate to a song you want to use as a phone ringtone. 2. Touch & hold the song in the list to open the context menu. 3. - Page 30 View event details - Select a day to view all the events in that day. This will take you to either the Agenda or Day view, depending on which you last visited. Select the event to view its details. Edit an event - First select a day to go to either the Day or Agenda view. From there, select the event to view its details.
- Page 31 they last. All-day events are displayed at the top of the day list. View event details - Highlight an event to open a small popup window in the lower part of the screen that provides more event information. This window will stay open for three seconds.
- Page 32 Two alarms are set up for you, ready to customize. All two alarms are turned off by default. Select the check box to turn on the alarm. If no day shows under the set time, the alarm will go off once when the set time is reached. Two alarms will go off at 8:30 am from Monday to Friday and at 9:00 am on Saturday and Sunday.
- Page 33 FCC RF Exposure Information and Statement The SAR limit of USA (FCC) is 1.6 W/kg averaged over one gram of tissue. Device types: BL54 (FCC ID:ZSW-30-101) has also been tested against this SAR limit. The highest SAR value reported under this...
- Page 34 properly worn on the body is 1.06 W/kg. This device was tested for typical body-worn operations with the back of the handset kept 10mm from the body. To maintain compliance with FCC RF exposure requirements, use accessories that maintain a 10mm separation distance between the user's body and the back of the handset.
Need help?
Do you have a question about the BL54 and is the answer not in the manual?
Questions and answers