
Related Manuals for Network Technologies Incorporated SPLITMUX Series

Summary of Contents for Network Technologies Incorporated SPLITMUX Series
- Page 1 ® SPLITMUX Series SPLITMUX-DVI-4 Quad Screen Video Splitter Installation and Operation Manual MAN093 Rev Date 10-5-16...
- Page 2 TRADEMARK SPLITMUX is a registered trademark of Network Technologies Inc in the U.S. and other countries. COPYRIGHT Copyright © 2007, 2016 by Network Technologies Inc. All rights reserved. No part of this publication may be reproduced, stored in a retrieval system, or transmitted, in any form or by any means, electronic, mechanical, photocopying, recording, or otherwise, without the prior written consent of Network Technologies Inc, 1275 Danner Drive, Aurora, Ohio 44202.
- Page 3 SPLITMUX-DVI-4 3.02 Release Notes Correction for display of serial number in the OSD. SPLITMUX-DVI-4 3.00 Release Notes Transparent USB 2.0 Matrix The transparent USB 2.0 Matrix allows switching of up to four USB devices to the connected hosts. New improved Video ICs The new video processor of SPLITMUX-DVI-4 provides best image quality in Quad, PiP, Dual and Fullscreen mode.
- Page 4 SPLITMUX-DVI-4 - 2.1 Release Notes SPLITMUX firmware version 2.1 contains new and improved features, including smooth transitions, manual input video mode selection, and automatic hiding of notifications like “no signal” to prevent burn-in. New Features in 2.1 Fade through black An elegant visual effect for presentations: When switching channels or display modes, the previous image fades to black, and the next image is faded in smoothly.
- Page 5 SPLITMUX-DVI-4- 1.40 Release Notes Touch Screen Support SPLITMUX version 1.40 adds touch screen support to allow the user to operate four computers with a touch screen. The initial release includes support for touch screens from the following manufacturers: • elo AccuTouch 2116 Controller Series includes monitor models 1215L, 1229L, 1515L, 1522L, 1528L Medical, 1529L, 1537L, 1715L, 1729L, 1739L, 1915L, 1928L, 1928L Medical, 1939L, 2020L •...
- Page 6 TABLE OF CONTENTS TABLE OF CONTENTS INTRODUCTION FEATURES TECHNICAL SPECIFICATIONS SAFETY GUIDELINES HARDWARE - FRONT PANEL - LED indicators - Push buttons - Additional button functions - REAR PANEL - Power / Reset / Monitor - DVI-I / RS 232 / USB INSTALLATION CONNECTING UNIT TO POWER CONNECTING CONSOLE (MONITOR, kEYBOARD, MOUSE, TOUCHSCREEN, TRACkBALL)
-
Page 7: Table Of Contents
TABLE OF CONTENTS TABLE OF CONTENTS ON SCREEN DISPLAY (continued) OSD VIDEO - INPUT STATUS - DVI/VGA - BRIGHTNESS - CONTRAST - HORIZONTAL POSITION - VERTICAL POSITION - SCREEN WIDTH - PHASE - FORMAT OSD COMPUTER - kEYBOARD - MOUSE - RESET PS/2 - CHANGE EDID/DDC OSD USB DEVICE 1-4... - Page 8 INTRODUCTION FEATURES Thank you for choosing SPLITMUX-DVI-4 from NTI. This product represents the latest state-of-the-art tech- nology in keyboard-video-mouse (kVM) switching. The SPLITMUX-DVI-4‘s key advantage over conventional kVM switches is that it allows you to simultaneously display and administer 4 computers on a single console. It combines key features of a high-end kVM switch and a digital multiviewer scaling and converting videos at both inputs and output.
- Page 9 INTRODUCTION FEATURES DVI & VGA SPLITMUX-DVI-4 supports resolutions of up to 1920 x 1200 @ 60 Hz for both DVI and VGA. Any combination of VGA and DVI at all standard resolutions is possible at inputs and output. Analog video input is converted to digital.
- Page 10 INTRODUCTION TEChNICAL SPECIFICATIONS Casing: Desktop or 19“, black (RAL 9005) Dimensions WxDxh: 43.6 x 23.4 x 4.4 cm Weight: 2.9 kg Operating controls: Front panel: Four channel selection buttons, one Quad mode button, one PiP mode button, one Fullscreen mode button Rear panel: One Power On/Off switch, one Reset button Indicators: Four active channel indicator LEDs, one Quad mode LED, one PiP mode LED,...
- Page 11 INTRODUCTION SAFETY GUIDELINES WARNING: To avoid risk of electric shock do not open the device or remove any part of the casing. Please contact our technical support if the device requires servicing. Please read this manual carefully before putting the device into operation. Observe all warnings and instructions on the device and in the operation manual.
- Page 12 INTRODUCTION hARDWARE FRONT PANEL The SPLITMUX-DVI-4 front panel has seven status indicators (LEDs) and seven buttons. Buttons 1 to 4 switch between channels, LEDs 1 to 4 indicate the status of the individual channels. Full, Quad and PiP buttons and LEDs are used to switch and indicate display modes and other functions, e.g. open the OSD menu etc.
- Page 13 INTRODUCTION hARDWARE FRONT PANEL (continued) Push buttons - Buttons 1 to 4: These buttons activate the corresponding channel (computer port). - Full button: Press to chose the Fullscreen mode. - Quad button: Press this button to switch from Fullscreen mode to Quad mode. - PiP button: Press this button to enable the PiP (picture in picture) function.
- Page 14 INTRODUCTION hARDWARE FRONT PANEL (continued) Additional button functions Setting output resolution to safe display modes To set output resolution to 640 x 480 pixel @ 60 Hz simultaneously press buttons 1 and 2 for longer than 1 second. Use of this feature is recommended when you cannot use the OSD (on screen display dark or illegible) because the output resolution setting is not supported by the monitor.
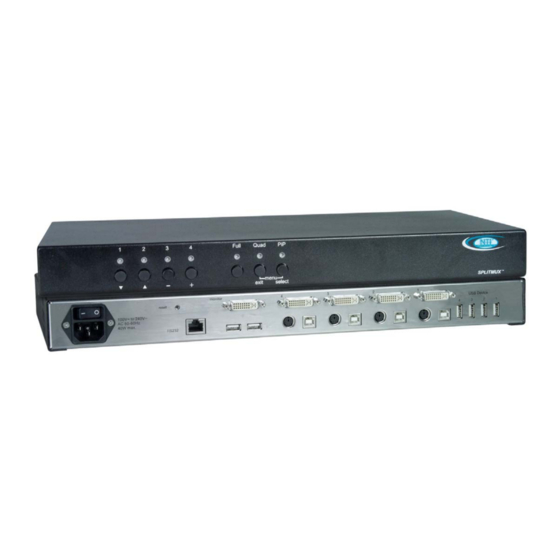
- Page 15 INTRODUCTION hARDWARE REAR PANEL The rear panel of SPLITMUX-DVI-4 features four input source/computer ports, the console port (kVM), the serial RS232 port, four transparent high-speed USB 2.0 device ports, the power connection, and a reset button. 1 - Power 2 - Reset 3 - Monitor / DVI-I output 4 - Four DVI-I inputs 5 - RS232 / RJ45 port...
- Page 16 INTRODUCTION hARDWARE REAR PANEL (continued) 4 - DVI-I inputs Connect the analog or digital video signal of your up to four sources to these four DVI-I ports. 5. - RS 232 / RJ45 port Connect external serial control devices to this RJ-45 port to operate SPLITMUX-DVI-4 remotely, e.g. connect to this port to access the OSD menu from a computer using the ConfDev device configuration tool (see page 67).
- Page 17 INSTALLATION INSTALLATION SPLITMUX-DVI-4 is best located as close as possible to the sources / computers to reduce the length of cables. By default, SPLITMUX-DVI-4 is delivered as desktop version. Using the rack mount kit supplied, it may also be mounted in a 19” rack. See deliverables page 76. keyboard, monitor, mouse (console) and USB devices are connected to SPLITMUX-DVI-4 by means of the corresponding cables (DVI, USB or PS/2).
- Page 18 INSTALLATION INSTALLATION CONNECTING SOURCES / COMPUTERS - Switch off the computer and disconnect keyboard, monitor and mouse. - Connect keyboard and mouse to the computer ports either with a single USB cable or via the PS/2 interface (use the Y cable) up to 5 meters. For greater distances use a kVM or USB extender. - To connect an analog video / computer source (VGA) to SPLITMUX-DVI-4, use a VGA-DVI cable.
- Page 19 ON SCREEN DISPLAY OSD - OVERVIEW SYSTEM HOTkEY Multiple Hotkey / Double Click Hotkey HOTMOUSE Hotmouse Recognition, Hotmouse Timeout QUAD MODE Channel Selection Timeout OSD POSITION Position of OSD window OSD LANGUAGE German / English / Spanish SECURITY Set security level TEST PATTERN Crosshairs –...
- Page 20 ON SCREEN DISPLAY OSD - MAIN MENU WINDOW There are three ways to open the OSD main menu (figure): - use keyboard command „hotkey“ + „O“ (see Annex pages 65f) - simultaneously press front panel buttons „Quad“ + „PiP“ for longer than one second - remotely open the OSD via ConfDev program on an external PC with serial connection (see Annex pages 67f) The main menu pops up in the center of the screen (on top of the video image).
- Page 21 ON SCREEN DISPLAY OSD - SYSTEM - hOTkEY hOTkEY Use the arrow keys to navigate in the SYSTEM menu to the entry HOTkEY and press the ENTER/SELECT key to open the HOTkEY window. Two different hotkey modes are available: - For multiple hotkey commands you can define one to four keys which are pressed simultaneously to enter the command mode.
- Page 22 ON SCREEN DISPLAY OSD - SYSTEM - hOTMOUSE hOTMOUSE FUNCTION Use the arrow keys to navigate in the SYSTEM menu to the entry HOTMOUSE and press ENTER/SELECT to open the HOTMOUSE window. Hotmouse is an exclusive function that comes with NTI SPLITMUX-DVI-4. It works with your standard mouse or trackball.
- Page 23 ON SCREEN DISPLAY OSD - SYSTEM - QUAD MODE QUAD MODE Use arrow keys to navigate in the SYSTEM menu to the entry QUAD MODE and press ENTER/SELECT to open the QUAD MODE window. Channel selection timeout defines the period (1 to 30 seconds) after which the selector will close automatically. Default setting is 5 seconds.
- Page 24 ON SCREEN DISPLAY OSD - SYSTEM - OSD POSITION / OSD LANGUAGE OSD POSITION Use arrow keys to navigate in the SYSTEM menu to the entry OSD POSITION and press ENTER/SELECT to open the OSD POSITION window. Use this function to move the OSD window to any position on the screen. OSD LANGUAGE Use arrow keys to navigate in the SYSTEM menu to the entry OSD LANGUAGE and press ENTER/SELECT to open the OSD LANGUAGE window.
- Page 25 ON SCREEN DISPLAY OSD - SYSTEM - SECURITY SECURITY – SECURITY LEVELS Use arrow keys to navigate in the SYSTEM menu to the entry SECURITY and press ENTER/SELECT to open the SECURITY window. The SECURITY feature allows you to reduce the functional range of SPLITMUX-DVI-4. Eight security levels are available for this purpose.
- Page 26 ON SCREEN DISPLAY OSD - SYSTEM - SECURITY Note: Before changing the security level, please set the configuration you wish to work with to the higher security level, under MODE START (see page 31). This configuration will be maintained when SPLITMUX-DVI-4 is reset, in case of power failure, or when power is turned off and on again.
- Page 27 ON SCREEN DISPLAY OSD - SYSTEM - SECURITY SECURITY LEVEL 4 As security level 5, with the following additional settings in the OSD: SYSTEM OSD POSITION MODE PIP / START CONFIGURATION RECALL VIDEO FORMAT - Modify PiP settings in Hotmouse menu - Changing both channels in Dual mode - Changing the fixed PiP channel in PiP mode single fixed SECURITY LEVEL 3...
- Page 28 ON SCREEN DISPLAY OSD - SYSTEM - TEST PATTERN TEST PATTERN Use arrow keys to navigate in the SYSTEM menu to the entry TEST PATTERN and press ENTER/SELECT to open the TEST PATTERN window. Use the Test Pattern feature to check monitor quality (pixel errors, contrast, etc) or the functionality of the SPLITMUX-DVI-4’s video output.
- Page 29 ON SCREEN DISPLAY OSD - SYSTEM - DISABLE ChANNEL DISABLE ChANNEL Use arrow keys to navigate in the SYSTEM menu to the entry DISABLE CHANNEL and press ENTER/SELECT to open the DISABLE CHANNEL window. If two or three computers or video sources are connected to SPLITMUX-DVI-4, use the DISABLE CHANNEL feature to ensure that for the unused channels: a) message "no signal input x"...
- Page 30 ON SCREEN DISPLAY OSD - SYSTEM - CONTROL CONTROL Use arrow keys to navigate in the SYSTEM menu to the entry CONTROL and press ENTER/SELECT to open the CONTROL window. NTI devices can be controlled via DCP (Device Control Protocol), an XML-based protocol. (see page 71 in Annex) There are two DCP modes: DCP control,...
- Page 31 ON SCREEN DISPLAY OSD - SYSTEM - CONTROL Example of DCP control A SPLITMUX-DVI-4 is controlled via DCP-XML by a computer connected by serial cable. For an introduction to the DEVICE CONTROL PROTOCOL please see page 71 in Annex. DCP synchronize Use this mode to keep several SPLITMUX-DVI-4 devices in the same mode.
- Page 32 ON SCREEN DISPLAY OSD - SYSTEM - CONTROL Example of DCP synchronization SPLITMUX-DVI-4 2 and 3 are synchronized with SPLITMUX-DVI-4 1. SPLITMUX-DVI-4 1 SPLITMUX-DVI-4 2 SPLITMUX-DVI-4 3 To synchronize, SPLITMUX-DVI-4 1 sends every change in settings as a DCP message via the serial Y cable to the RX input of SPLITMUX-DVI-4 2.
- Page 33 ON SCREEN DISPLAY OSD - SYSTEM - CONTROL SECURITY LEVELS The security level settings in the OSD menu described on page 18ff also apply to control via DCP messages. Queries are possible up to security level 7. The table below shows the maximum security levels for simple element settings. These settings may be changed via DCP up to the specified protection level.
- Page 34 ON SCREEN DISPLAY OSD - MODE - PIP PiP (Picture in Picture Function) Use arrow keys to navigate in the MODE menu to the entry PIP and press ENTER/SELECT to open the PIP window. In the PIP window you can configure PiP size, position, and display mode. PiP size Adjust the size of PiP images to your requirements.
- Page 35 ON SCREEN DISPLAY OSD - MODE - PIP PIP Display Modes SPLITMUX-DVI-4 offers the following PiP modes: PIP display mode triple: All other video sources are displayed (three PiP images) Triple gap: PiP images are displayed with a gap in place of the active channel.
- Page 36 ON SCREEN DISPLAY OSD - MODE - PIP PIP Display Modes (continued) PIP display mode single: One PiP image is displayed. You can choose between different display modes: Single fixed: One channel is selected to be displayed as permanent PiP image. Only the active channel (full image) can be switched.
- Page 37 ON SCREEN DISPLAY OSD - MODE - PIP PIP Display Modes (continued) Single dual: In Dual mode the left halves of the fullscreen images from two video sources are displayed side by side. You can choose the left or the right image as the active channel.
- Page 38 ON SCREEN DISPLAY OSD - MODE - START START (Set start mode) Use arrow keys to navigate in the MODE menu to the entry START and press ENTER/SELECT to open the START window. This feature allows you to define the start configuration, i.e. the display mode (Quad, Fullscreen, or PiP), active channel, and PiP settings which SPLITMUX-DVI-4 uses after a reset or when the system is powered up.
- Page 39 ON SCREEN DISPLAY OSD - CONFIGURATION - BACkUP / RECALL BACkUP Use arrow keys to navigate in the CONFIGURATION menu to the entry BACkUP and press ENTER/SELECT to open the BACkUP window. This function saves the current device settings, including the start mode set in MODE START. Note: The EDID configuration will not be saved and can not be recoverd with the RECALL function.
- Page 40 ON SCREEN DISPLAY OSD - CONFIGURATION - FACTORY RESET FACTORY RESET Use arrow keys to navigate in the CONFIGURATION menu to the Factory Reset and press ENTER/SELECT to open the DEFAULTS window. Use this function to reset the current settings of SPLITMUX-DVI-4 to the factory default configuration. All four input EDIDs are also reseted to their default values.
- Page 41 ON SCREEN DISPLAY OSD - CONSOLE - VIDEO OUTPUT VIDEO OUTPUT Use arrow keys to navigate in the CONSOLE menu to the entry VIDEO OUTPUT and press ENTER/SELECT to open the VIDEO OUTPUT window. Change with ENTER/SELECT Use the VIDEO OUTPUT menu to choose an output resolution supported by your monitor.
- Page 42 ON SCREEN DISPLAY OSD - CONSOLE - LANGUAGE / LAYOUT LANGUAGE / LAYOUT Use arrow keys to navigate in the CONSOLE menu to the entry kEYBOARD and press ENTER/SELECT to open the kEYBOARD window. Set the keyboard layout to the desired language, English, Deutsch (German), Español (Spanish), Français (French), Italiano (Italian) or Japanese.
- Page 43 ON SCREEN DISPLAY OSD - CONSOLE - TOUChSCREEN TOUChSCREEN SPLITMUX-DVI-4 enables the user to use a touchscreen to control and switch between four computers as well as change display modes. SPLITMUX-DVI-4 supports a great number of USB touch screens with commonly integrated touch controllers. For a list of supported touchscreens, please see Annex on page 72.
- Page 44 ON SCREEN DISPLAY OSD - CONSOLE - TOUChSCREEN TOUChSCREEN (continued) Touch in quad mode: Check this box to switch a quadrant from Quad mode temporarely to full screen when touching the quadrant. This activates keyboard and mouse of that quadrant and allows operating the computer in full screen. The other sources are not visible during this time.
- Page 45 ON SCREEN DISPLAY OSD - CONSOLE - TOUChSCREEN / FADE TOUChSCREEN (continued) Mouse position Absolute mouse position SPLITMUX-DVI-4 works best together with touchscreens when using absolute mouse positioning mode with the connected computers. To enable absolute mouse positioning mode, use the menu COMPUTER MOUSE in the OSD (see page 46).
- Page 46 ON SCREEN DISPLAY OSD - CONSOLE - MULTI MONITOR MULTI MONITOR Use arrow keys to navigate in the CONSOLE menu to the entry MULTI MONITOR and press ENTER/SELECT to open the MULTI MONITOR window. Multi Monitor is used if computers with multiple video output are connected to SPLITMUX-DVI-4 but only one keyboard and mouse to operate the computer.
- Page 47 ON SCREEN DISPLAY OSD - CONSOLE - EDID EDID (display of monitor data) Use arrow keys to navigate in the CONSOLE menu to the entry EDID and press ENTER/SELECT to open the EDID window. Use the EDID command to read and display monitor data (manufacturer, monitor name, serial number etc.) from the monitor’s EDID memory.
- Page 48 ON SCREEN DISPLAY OSD - VIDEO - INPUT STATUS / DVI/VGA INPUT STATUS (Display Video Formats) Use arrow keys to navigate in the VIDEO menu to the entry INPUT STATUS and press ENTER/SELECT to open the INPUT STATUS window. S Signal a = analog d = digital g = sync on green...
- Page 49 ON SCREEN DISPLAY OSD - VIDEO - BRIGhTNESS / CONTRAST / h + V POSITION BRIGhTNESS – CONTRAST (with analog input only) Use arrow keys to navigate in the VIDEO menu to the entry BRIGHTNESS or CONTRAST and press ENTER/ SELECT to open the BRIGHTNESS or CONTRAST window.
- Page 50 ON SCREEN DISPLAY OSD - VIDEO - SCREEN WIDTh / PhASE SCREEN WIDTh (with analog input only) Use arrow keys to navigate in the VIDEO menu to the entry SCREEN WIDTH and press ENTER/SELECT to open the SCREEN WIDTH window. Normally, screen width (number of horizontal pixels) is defined by the VESA standard.
-
Page 51: Osd Video
ON SCREEN DISPLAY OSD - VIDEO - FORMAT FORMAT Use arrow keys to navigate in the VIDEO menu to the entry FORMAT and press ENTER/SELECT to open the FORMAT window. When using a wide-screen monitor (aspect ratio 16:10) in Quad mode, a video input with a different aspect ratio is normally displayed with black borders to the left and right. - Page 52 ON SCREEN DISPLAY OSD - VIDEO - FORMAT FORMAT (continued) PiP mode for wide-screen monitors If you use a wide-screen monitor (for example with an aspect ratio of 16:10) and the active channel does not have a wide-screen aspect ratio (e.g. 4:3), PiPs are placed aside the full image of the active channel in the black bar on the right side.
- Page 53 ON SCREEN DISPLAY OSD - COMPUTER - kEYBOARD / MOUSE kEYBOARD Use arrow keys to navigate in the COMPUTER menu to the entry kEYBOARD and press ENTER/SELECT to open the kEYBOARD window. Use this display feature to identify which keyboard type (USB, PC1, PC2 or PC3) has been recognized at which computer port.
-
Page 54: Osd Computer
ON SCREEN DISPLAY OSD - COMPUTER - RESET PS/2 / EDID/DDC RESET PS/2 Use arrow keys to navigate in the COMPUTER menu to the entry RESET PS/2 and press ENTER/SELECT to open the RESET PS/2 window. Use arrow keys or “+” and “-” keys to select the channel (1 to 4) you wish to reset and confirm by pressing ENTER/SELECT. - Page 55 ON SCREEN DISPLAY OSD - COMPUTER - EDID/DDC EDID/DDC (continued) In this window two freely selectable video modes can be programmed in the input EDID visible to the connected computer at the input port. It is recommended to program the preferred video modes for the connected signal source. SPLITMUX-DVI-4 also uses these entries to distinguish between confusable analog input video signals.
- Page 56 ON SCREEN DISPLAY OSD - COMPUTER - EDID/DDC EDID/DDC (continued) This window gives an overview of the contents of the display EDID. It has the following write options: WRITE TO INPUT 1 write the monitor EDID to input 1 WRITE TO INPUT 2 write the monitor EDID to input 2 WRITE TO INPUT 3 write the monitor EDID to input 3...
-
Page 57: Osd Usb Device
ON SCREEN DISPLAY OSD - USB DEVICE 1-4 USB Device 1-4 SPLITMUX-DVI-4 supports and switches transparent USB 2.0 devices such as printer, camera, 3D mouse, finger printer, and external memory. Connect a single finger printer to log in on all four computers connected to SPLITMUX-DVI-4;... - Page 58 ON SCREEN DISPLAY OSD - USB DEVICE 1-4 - SWITChING MODE USB Device 1-4 (continued) Switching mode: By default, switching mode is "manual switching with warning”. To change the switching mode use the arrow keys to navigate to "CHANGE SWITCHING MODE” and press ENTER/SELECT.
- Page 59 ON SCREEN DISPLAY OSD - USB DEVICE 1-4 - ChANGE NAME USB Device 1-4 (continued) Change device name: In the „USB DEVICE. / USB DEVICE” menu chose „Change device name” and press ENTER/SELECT to change the name of the connected USB device. Use the keyboard to rename the USB device or use the front panel buttons (as described in the OSD).
-
Page 60: Osd Help
ON SCREEN DISPLAY OSD - hELP - hOTkEY / ABOUT / CONTACT Use arrow keys to navigate in the HELP menu to the desired line and press ENTER/SELECT to open the corresponding window. The HELP / COMMAND LIST window lists keyboard commands and their functions. The HELP / ABOUT windows show the current revision levels of SPLITMUX-DVI-4 hardware and firmware. -
Page 61: Activating Hotmouse Cursor
hOTMOUSE hOTMOUSE - ACTIVATING hOTMOUSE CURSOR hOTMOUSE Hotmouse is an exclusive function offered by NTI SPLITMUX-DVI-4. It works with your standard mouse or trackball. Similar to using hotkeys on your keyboard, Hotmouse is a quick and comfortable way to operate SPLITMUX-DVI-4 simply with your standard mouse, trackball, or touch screen. -
Page 62: Hotmouse Cursor In Fullscreen Mode / Quad Mode
hOTMOUSE hOTMOUSE CURSOR IN FULLSCREEN MODE / QUAD MODE hOTMOUSE CURSOR IN FULLSCREEN MODE When you activate the Hotmouse Cursor in Fullscreen mode, PiP images of the other channels are temporarily displayed to allow you to switch to another channel. Switching to another fullscreen channel Activate Hotmouse Cursor. -
Page 63: Hotmouse Cursor In Pip Mode
hOTMOUSE hOTMOUSE CURSOR IN PIP MODE hOTMOUSE CURSOR IN PIP MODE Change active channel Enable Hotmouse Cursor. Move the Hotmouse Cursor to the PiP-image of the channel you wish to activate and press the left mouse button. Note: When the Hotmouse Cursor moves over a PiP-image, its appearance changes (arrows, channel number). - Page 64 hOTMOUSE hOTMOUSE CURSOR IN PIP MODE hOTMOUSE CURSOR IN PIP MODE (continued) Modify size of PiP images Activate Hotmouse Cursor and move to the left edge of the PiP image area until horizontal arrows appear in the Hotmouse Cursor. Hold down the left mouse button and drag the Hotmouse Cursor to the left to increase PiP image size, or to the right to reduce PiP image size.
-
Page 65: Hotmouse Menu
hOTMOUSE hOTMOUSE MENU - ACTIVATING / OPERATING hOTMOUSE MENU - ACTIVATING Activate Hotmouse Cursor and press the right mouse button to open the Hotmouse Menu. The Hotmouse Menu can also be opened via touch screen: tap the screen twice, and leave your finger pressed on the touchscreen after the second tap (tap –... - Page 66 hOTMOUSE hOTMOUSE MENU - MODES hOTMOUSE MENU - MODES The individual modes can be set as follows: hOTMOUSE MENU - QUAD MODE Use the mouse to navigate to a channel in the Hotmouse Menu and click the left mouse button to activate it. You can also switch to a different mode with the left mouse button.
- Page 67 hOTMOUSE hOTMOUSE MENU - MODES hOTMOUSE MENU – MODES (continued) hOTMOUSE MENU – PIP MODE Use the mouse to navigate to a channel in the Hotmouse Menu and click the left mouse button to activate it. Change position and size of PiP images, and PiP zoom. Change PiP mode (triple / triple gap / single fixed / single direct / single scan) and scan time.
- Page 68 hOTMOUSE hOTMOUSE MENU - MODES hOTMOUSE MENU – PIP MODE (continued) Single fixed: One selected PiP image is permanently displayed. Single direct: Press the front panel buttons 1, 2, 3, or 4 to directly select the PiP channel you want. Single dual: The left half of the first channel is displayed at full size next to the left half of the second channel.
-
Page 69: Service
SERVICE SERVICE INFORMATION MAINTENANCE AND REPAIR SPLITMUX-DVI-4 does not contain any user-serviceable parts. Please report any malfunction or deviation from the functionality described in this manual during operation to NTI’s Technical Support Department. If we cannot solve your problem by phone and find that the fault is due to the unit, we will repair your unit free of charge during our warranty period. -
Page 70: Annex
ANNEX FCC DECLARATION FEDERAL COMMUNICATIONS COMMISSION INDUSTRY CANADA RADIO FREQUENCY INTERFERENCE STATEMENTS This equipment generates, uses, and can radiate radio-frequency energy, and if not installed and used properly, that is, in strict accordance with the manufacturer’s instructions, may cause interference to radio communica- tion. -
Page 71: Keyboard Commands
ANNEX kEYBOARD COMMANDS SPLITMUX-DVI-4 supports two types of hotkey: „multiple keys” and „double click”. By default, SPLITMUX-DVI-4 is set to „multiple keys”. Use the OSD menu to choose the hotkey type and keys (see page 14). Multiple keys: Press multiple keys plus command key. Command key COMMAND = Hotkey... - Page 72 ANNEX kEYBOARD COMMANDS Selecting display mode Quad mode Fullscreen mode PiP mode Selecting active channel in Fullscreen / Quad / PiP mode Computer 1 Computer 2 Computer 3 Computer 4 You can also use hotkey and the arrow keys to switch the active channel. In Dual mode, you can select the channel on the right using the 1, 2, 3, or 4 keys on the numeric keypad.
-
Page 73: Device Configuration Program
ANNEX DEVICE CONFIGURATION PROGRAM Installation of Device Configuration Program (CONFDEV) The Device Configuration Program allows you to remotely operate the OSD of SPLITMUX-DVI-4 on an external Windows computer via serial connection. To install the device configuration software CONFDEV, you need •... - Page 74 ANNEX DEVICE CONFIGURATION PROGRAM Settings Click the „device configuration” button to open the SETTINGS window. It allows you to set the font size for the OSD window, log parameters, and the COM port SPLITMUX-DVI-4 is connected to. Remote OSD operation Click the green arrow to open the On Screen Display (OSD) of SPLITMUX-DVI-4 remotely on your external Windows computer.
-
Page 75: Firmware Update
ANNEX FIRMWARE UPDATE Update firmware of SPLITMUX-DVI-4 To execute a firmware update, you need: • a computer with serial port • the enclosed „serial cable” (RJ45-DB9 adaptor + RJ45 CAT5 cable) • the current executable firmware file Use the serial cable to connect the COM port of your computer to the RS232 port on SPLITMUX-DVI-4. Start the executable firmware file. -
Page 76: Serial Cable
ANNEX SERIAL CABLE For serial remote control, SPLITMUX-DVI-4 requires a special adaptor to connect a CAT5 cable to the serial RJ45 port at the rear panel of SPLITMUX-DVI-4. This adaptor is connected to your external serial control device (e.g. computer). To the adaptor any CAT5 patch cable (wired straight-through) can be connected. -
Page 77: Dcp-Xml Remote Control
ANNEX DCP-XML REMOTE CONTROL DCP-XML permits remote control of SPLITMUX-DVI-4 by a computer or other devices using the RS-232 serial port of SPLITMUX-DVI-4. To connect to this port, use the "serial cable” (NTI RJ45-DB9 adaptor + standard RJ45 CAT5 cable). DCP is an XML-based protocol. -
Page 78: Supported Touch Screen Controller
ANNEX SUPPORTED TOUCh SCREEN CONTROLLER SPLITMUX-DVI-4 supports USB touch screens having built in one of the following controllers: Tyco ELO Touch System: - AccuTouch Five-Wire Resistive Touch Technology includes models 1215L, 1229L, 1515L, 1522L, 1528L Medical, 1529L, 1537L, 1715L, 1729L, 1739L, 1915L, 1928L, 1928L Medical, 1939L, 2020L - IntelliTouch Surface Wave Touch Technology elo 2701 Controller Series (IntelliTouch, SecureTouch) - Page 79 ANNEX SUPPORTED VIDEO INPUT VIDEO INPUT (Display Video Formats) Mode Resolution Sync Refresh rate Set in VESA / CEA polarity analog digital* EDID Standard 640x350 640x400 720x400 720x400 640x480 22 - 60 640x480 640x480 640x480 SVGA 800x600 22 - 56 SVGA 800x600 SVGA...
- Page 80 ANNEX SUPPORTED VIDEO OUTPUT VIDEO OUTPUT (Display Video Formats) The table lists all video formats supported by SPLITMUX-DVI-4 at the output port. Mode horizontal Vertical SVGA SVGA SVGA 1024 1024 1024 1024 1024 SXGA 1280 1024 SXGA 1280 1024 SXGA 1280 1024 SXGA+...
- Page 81 ANNEX CASCADING CASCADING multiple SPLITMUX-DVI-4 units - more than 4 sources on a single display SPLITMUX-DVI-4 can be cascaded in order to display more than 4 sources simultaneously on a single display. In this master-slave-system, any SPLITMUX-DVI-4 can be used as master or slave. It is the same hardware. One SPLITMUX-DVI-4 is used as master unit.
- Page 82 ANNEX DELIVERABLES Please use the list below to verify that all parts have been delivered. The following components are included: SPLITMUX-DVI-4 - Installation and Operation Manual...